


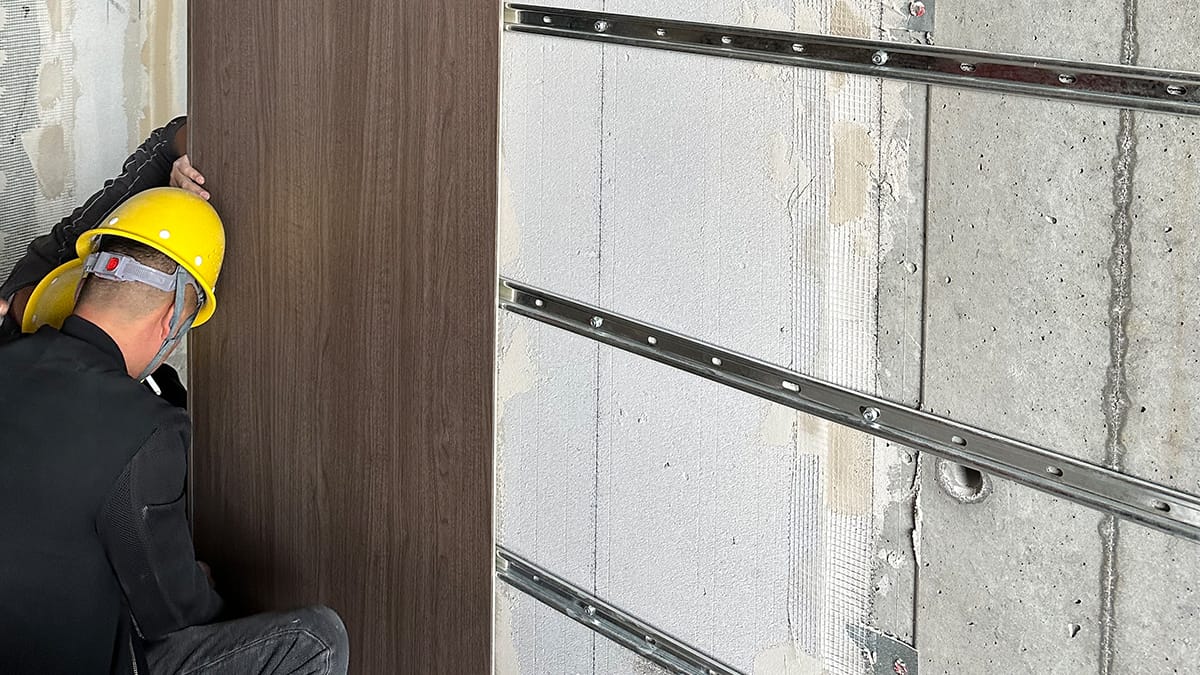
09 Apr Installing Prefinished MgO Decorative Wall Panels: Planning, Joints and Finishing
Installing decorative wall panels starts well before the first panel is fixed. A project team needs to confirm the supplied panel configuration, the supporting wall, the layout and the approved fixing method. Those decisions are especially important for a factory-prefinished panel because the decorative face, edges and joints remain visible after installation.
Sulfycor decorative panels use a magnesium oxysulfate MgO substrate with a melamine-paper or HPL face for interior lining applications. The substrate, decorative face, fixings, trims and complete wall build-up are separate parts of the specification. This guide explains the planning sequence for a prefinished panel. It does not replace the installation instructions or shop drawings approved for a particular order and project.
Core rule: confirm the complete panel configuration before choosing cutting, fixing, jointing or cleaning methods. A method used for bare MgO board may not be suitable for a supplied decorative face.
1. Start With the Supplied Panel Configuration
The product name alone is not enough to plan installation. Record the MgO substrate thickness and panel dimensions, then identify whether the face is melamine paper or HPL. Add the approved finish reference, edge condition, panel orientation and intended wall build-up. If a woodgrain, stone-look or metallic-effect appearance is being considered, approve it from the relevant sample rather than from a screen image.
- Panel size and MgO substrate thickness
- Melamine-paper or HPL face
- Approved finish and sample reference
- Edge condition and finish direction
- Support or substrate behind the panel
- Proposed fixing route, joints and trims
- Project requirements that need documented verification
The MgO decorative wall panel range provides the product context. If the project instead requires an unfinished board for field-applied treatment, review the bare magnesium oxide wallboard route separately. Do not combine the two finishing sequences in one installation method.
2. Inspect, Store and Condition Panels Under Approved Instructions
Check the delivery before work begins. Confirm quantities, labels, dimensions, finish references and the condition of faces and edges. Separate any panel that is damaged or does not match the approved reference. Record the issue before cutting or fixing so that the project team can decide whether the panel should be replaced.
Storage position, environmental conditions and any conditioning period must follow the guidance issued for the selected configuration. A generic number of days should not be copied from an unrelated MgO board guide. Keep decorative faces protected from abrasion, dirt, moisture exposure and site traffic, and preserve any protective film according to the approved sequence.
3. Confirm Support, Flatness and the Fixing Route
Before installing decorative wall panels, the responsible parties should accept the support and fixing proposal. Identify the wall type, support locations, required flatness, perimeter conditions and transitions to adjacent materials. Confirm who approves the substrate and who signs off the first installed panel.
Pre-start decisions
- Support: Is the approved support continuous or framed, and where are its fixing zones?
- Flatness: Which project tolerance applies, and how will it be checked?
- Fixing: Is the approved route mechanical, adhesive-assisted or another documented method?
- Compatibility: Have all adhesives, fasteners and trims been checked for the selected panel and site conditions?
- Perimeter: How do panels terminate at floors, ceilings, openings and other materials?
This planning guide intentionally gives no universal screw spacing, joint width, adhesive brand or unsupported span. Those values depend on the selected panel, support, fixing system and project requirements. If adhesive is proposed, obtain written compatibility confirmation for the actual surfaces and conditions before installation.
4. Plan the Layout, Cuts and Openings
Create a panel schedule or shop drawing before material is cut. Establish datum lines, panel orientation and finish direction. Coordinate balanced cuts, visible joints, outlets, switches, service openings and access panels. Where appearance varies by reference or batch, agree how panels will be distributed across the wall and approve the first area before continuing.
Cutting requirements vary with panel thickness and decorative face. Confirm the approved method, then trial it on a sample or offcut. Support the panel during the operation, protect the face and check both the visible edge and the back before production cutting. Do not sand a prefinished face or assume that a tool recommended for bare board will leave the decorative surface acceptable.
5. Coordinate Joints, Edges and Corners
Joints are part of the finished design, not a last-minute repair. The project may use a visible reveal, a trim or a concealed treatment, but each route needs an approved detail. Review vertical and horizontal joints together with panel dimensions and wall openings so that small, awkward cuts do not appear at prominent locations.
Internal and external corners
Confirm whether corners use a formed trim, a separate profile or another project detail. Check how the finish direction meets at the corner and how exposed edges will be protected. Do the same at doors, windows, service penetrations and transitions to ceilings or floors.
Performance-related joints
A joint compound, tape or sealant does not by itself prove that a decorative panel or complete wall has a particular fire or moisture performance. Where the project has a performance requirement, use the detail and evidence for the applicable product or tested assembly. Keep that verification separate from the visual joint decision.
6. Use Quality Hold Points During Installation
A useful installation sequence is based on approvals rather than generic dimensions:
- Confirm the current approved documents, samples and panel schedule.
- Accept the support, datum lines, openings and perimeter conditions.
- Dry-plan the first area and verify finish direction, cuts, joints and trims.
- Install the first panel or sample area with the approved fixing method.
- Check alignment, face protection, edge quality and joint consistency at the agreed hold point.
- Continue in the approved sequence, recording any change that needs a revised detail.
The installer should stop when site conditions differ from the approved drawing or when the face, edge or fixing response is unexpected. Changing the gap, fixing pattern, adhesive or cutting method on site can affect appearance and may affect other project requirements. Obtain a documented decision before continuing.
7. Protect, Clean and Plan for Replacement
Keep finished faces protected through the remaining work and agree when temporary protection will be removed. Use the cleaning guidance for the selected face and test any proposed cleaner on a sample or inconspicuous area first. Avoid abrasive treatment, uncontrolled sanding, repainting or clear coating unless it is specifically approved for that finish.
Inspect damage at faces, edges, joints and corners before deciding on a repair. A field touch-up suitable for bare board may leave a visible or incompatible result on melamine paper or HPL. Record the finish and batch reference, and consider access for panel replacement during layout planning. The broader interior wall application context can help the project team discuss how the lining relates to the rest of the wall.
Information to Send Before Requesting Installation Guidance
- Application and complete wall build-up
- Panel dimensions and MgO substrate thickness
- Melamine-paper or HPL face and finish reference
- Panel layout or shop drawing, including openings
- Joint, edge and corner preference
- Proposed fixing route and support information
- Quantity, destination and project schedule
- Project requirements that need supporting documents
Request the installation guidance for your selected panel configuration. With these inputs, the supplier and project team can review the relevant details without relying on a generic procedure.
Frequently Asked Questions
Can bare MgO board instructions be used for a prefinished panel?
Not automatically. Bare-board instructions may include sanding, joint filling, priming or painting that does not apply to a supplied melamine-paper or HPL face. Confirm the instructions for the complete decorative panel configuration.
Which adhesive or fastener should be used?
The choice depends on the selected panel, support, wall build-up and project conditions. Use the approved fixing specification and obtain compatibility confirmation before substituting a product or method.
Should a prefinished MgO panel be painted after installation?
A factory-prefinished panel is normally installed with its supplied decorative face. Do not sand, prime or paint that face unless the finish supplier has approved the process. Treat field-finished bare MgO board as a separate specification route.
Does the installation detail make the wall fire rated?
No performance conclusion should be drawn from the substrate name, decorative face or joint product alone. Check the documents that apply to the exact product or tested wall assembly required by the project.