


16 Jan How to Install Magnesium Sulfate Sheathing Step by Step
Table of Contents
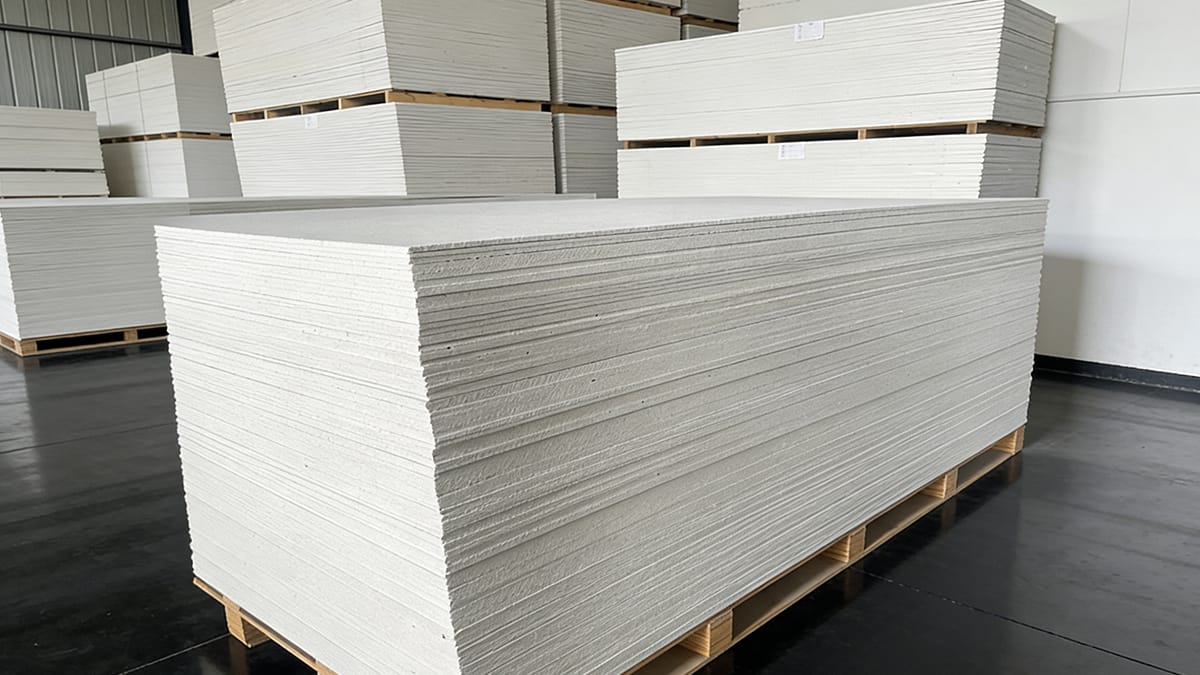
You will learn how to install magnesium sulfate sheathing step by step. Good preparation helps you get the best results. You need the right tools and materials for a strong and safe job. Magnesium sulfate sheathing is good for the environment. It has low carbon emissions and can be recycled. These boards take in CO2 while they cure and use natural materials. Always wear safety gear and follow safety rules to keep yourself safe during each step.
Benefit | Description |
|---|---|
Eco-friendly | Made from natural materials, so it lowers pollution |
Recyclability | Can be recycled, which helps the planet |
Lower carbon emissions | Makes 18% less CO2 than regular building materials |
CO2 absorption | Takes in CO2 while it cures |
Key Takeaways
Get all the tools and materials you need first. This helps you work faster and stops delays.
Pick magnesium sulfate boards that are good quality. Make sure they meet fire and moisture rules. This makes the boards strong and safe.
Clean the surface before you start installing. Make sure it is flat and smooth. A clean base helps the boards stick well and last longer.
Leave space between the boards when you put them in. This stops cracks and lets the boards move when it gets hot or cold.
Always wear personal protective equipment (PPE). Use safety goggles, gloves, and dust masks. These keep you safe from dust and injuries.
Tools and Materials Required for Magnesium Sulfate Sheathing
Essential Tools Checklist
You need certain tools and materials to install magnesium sulfate sheathing. Gather everything you need before you start. Use this checklist to help you get ready:
Measuring tape
Utility knife or saw for cutting boards
Screw gun or drill
Rust-proof screws
Carpenter’s square
Level
Safety goggles, gloves, and dust mask (PPE)
Chalk line for marking
Straight edge
Tip: Check your tools before you begin. Sharp blades and working drills help you work faster and safer.
Choosing the Right Materials
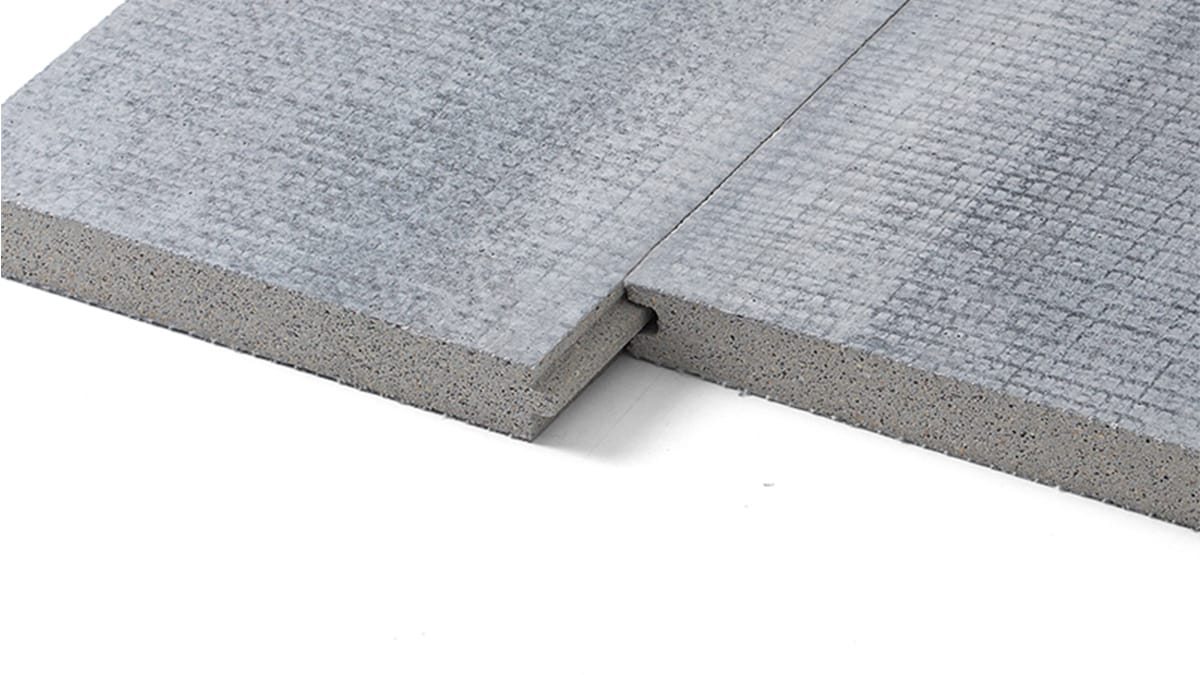
Pick good magnesium sulfate sheathing for a strong wall. Find boards that meet rules for fire resistance, moisture control, and durability. Magnesium oxide boards are A1 non-combustible under EN 13501-1. These boards can handle fire up to 1200°C. A1 means the material does not catch fire and does not get much hotter or lose much mass.
Here is a table to help you pick the best sheathing:
Criteria | Description |
|---|---|
Fire Resistance | A1 non-combustible, handles high heat for 60 to 90 minutes. |
Moisture and Mold Resistance | Breathable and water-resistant, stops delamination and keeps its shape. |
Eco-Friendliness | Made from natural materials, no harmful chemicals, helps indoor air quality. |
Durability and Strength | Lasts a long time, resists moisture damage, so you replace it less often. |
You might think about the price. Magnesium sulfate boards cost more than gypsum board. They last longer and need fewer repairs.
Board Type | Cost per Square Foot | Long-term Value |
|---|---|---|
MgO Board | $1.50 – $2.50 | Strong, fireproof, and water-resistant, saves money later. |
Gypsum Board | $0.50 – $1.00 | Cheaper at first but may need more repairs later. |
Pick boards that work for your project. Always check for certifications and ratings. The right tools and materials help you finish the job safely and well.
Surface Preparation for MGO Board Installation
 Cleaning and Drying the Substrate
 Cleaning and Drying the Substrate
You need to start with a clean and dry surface before installing your mgo board. Dust, dirt, and sticky grime can weaken the bond and cause problems later. You should check the surface for cracks, holes, or uneven spots. Fix any damage so the boards sit flat. Use a broom or vacuum to remove dust and loose debris. If you see sticky grime, wipe it away with a damp cloth or a mild cleaner. Strong chemicals can interfere with adhesives or screws, so avoid them. Make sure the surface dries completely before you move to the next step.
Tip: A clean substrate helps the boards stick better and last longer. Take your time with this step for the best results.
Inspecting and Smoothing Edges
After cleaning, you need to inspect the edges and make sure the surface is level. Uneven surfaces can cause gaps or weak spots in your wall. Use a level and carpenter’s square to check for bumps or dips. Smooth out rough edges with sandpaper or a rasp. You want the boards to fit tightly together without gaps.
Industry standards help you know what is acceptable for leveling and edge smoothness. Here is a table that shows the specifications:
Measurement Type | Specification |
|---|---|
No greater than 1/4 inch | |
Maximum difference over 1 foot | No more than 1/16 inch |
Tool measurement precision | At least 1/16 inch for distance and 0.1 degree for slope |
Maximum slope for ramps or walks | Not more than 5% (1:20) |
You should follow these standards to make sure your surface preparation meets professional requirements. A level substrate and smooth edges help you install the boards easily and keep your wall strong.
Magnesium Sulfate Sheathing Installation Instructions
Measuring and Cutting Boards
You need to measure and cut each mgo board carefully for a good fit. Follow these steps to make sure your boards fit the wall or ceiling:
Measure the area where you want to install the board. Use a tape measure for accuracy.
Mark the cut line on the mgo board with a pencil. Double-check your measurements before you cut.
Place the board on a stable surface. Support large boards so they do not bend or break.
Choose your cutting tool. Use a utility knife for thin boards. Use a circular saw for thicker boards.
Cut along the marked line. Keep your hand steady and apply even pressure.
Smooth the edges with sandpaper or a file. This helps the boards fit tightly together.
Clean up dust and debris. Wear a dust mask to protect yourself from fine particles.
Tip: Accurate measuring and smooth edges help you avoid gaps and make the installation look professional.
Fastening and Staggering Panels
You must fasten the magnesium sulfate sheathing securely to the framing. Start at one corner and work across the wall or ceiling. Use rust-proof screws for the best results. Stagger the joints of each mgo board so the seams do not line up. This makes the wall stronger and helps prevent cracks.
Use the following screw spacing for a solid installation:
Application | Screw Spacing (on center) |
|---|---|
Panel edges | 4 inches |
Intermediate framing members | 12 inches |
Drive each screw so the head sits just below the surface of the board. Do not overtighten, or you may damage the mgo board. Check that each panel sits flat against the framing. If you see any gaps, adjust the board or add more screws.
Note: Staggering the panels increases the strength of your wall and helps prevent future problems.
Expansion Gaps for Steel and Wood Framing
You need to leave small gaps between each mgo board during installation. These gaps let the boards expand and contract as the temperature changes. If you skip this step, the boards may crack or buckle.
For steel framing, leave a 1/16 inch gap between each board.
For wood framing, leave a 1/8 inch gap between each board.
Use a spacer or a piece of scrap material to keep the gaps even. Check the gaps as you install each board. Consistent gaps help your magnesium sulfate sheathing last longer and stay strong.
Safety and PPE Guidelines
Safety matters during every step of installation. Always wear personal protective equipment (PPE) when you handle mgo board. This includes safety goggles, gloves, and a dust mask. The dust from cutting or sanding can irritate your eyes, skin, and lungs.
Wear safety goggles to protect your eyes from dust and debris.
Use gloves to prevent cuts and scrapes.
Put on a dust mask to avoid breathing in fine particles.
Keep your work area clean and free of tripping hazards.
Remember: Good safety habits protect you and help you finish the job without injury.
You can follow these installation instructions to get a strong, safe, and long-lasting result with magnesium sulfate sheathing. Careful measuring, proper fastening, correct expansion gaps, and good safety practices all play a part in a successful installation.
Finishing Magnesium Oxide Board Joints
Sealing Seams and Screw Holes
 Sealing Seams and Screw Holes
You need to seal the seams and screw holes in your mgo board for a smooth and strong finish. Start by using a special waterproof compound made for sealed drywall systems. This compound keeps water out and helps your wall last longer. Apply the compound along each seam and over every screw hole. Use a putty knife to spread the compound evenly. Make sure you cover all gaps and fill each hole completely. This step is important for joint treatment and stops moisture from getting inside your wall.
Use waterproof compounds for seams and screw holes.
Spread the compound with a putty knife.
Cover all gaps and holes for a tight seal.
Check the drying time before you move to the next step. Here is a table to help you plan:
Drying Condition | Drying Time |
|---|---|
General maximum drying time | Up to 24 hours |
Drying time for seams | As little as 12 hours |
Drying time for filled-in screw holes | 1 to 2 hours |
Skim coats | 15 to 20 minutes |
Sanding and Priming Surfaces
After the compound dries, you need to sand the surface. Sanding makes the mgo board smooth and ready for paint or tile. Use fine-grit sandpaper and move your hand in gentle circles. Wipe away dust with a clean cloth. Next, apply a primer that works with magnesium oxide board. Primers for concrete or masonry work best. These primers help paint stick and protect the wall from water.
Tip: Always let the primer dry before you start painting or tiling. This step helps your finish last longer.
Painting or Tiling Options
You can paint or tile your mgo board after priming. Choose paint brands that work with cement surfaces. These paints create a strong, UV-resistant finish. If you want a textured look, use acrylic stucco topcoats or polymer modified cement base coats. You can also add tiles for a clean and modern style.
Use concrete or masonry primers.
Pick UV-resistant paint for durability.
Try acrylic stucco or polymer cement coats for texture.
Add tiles for a sleek finish.
You now have a wall that looks great and stands up to moisture and wear.
MGO Board Sealing and Best Practices
Exterior Weatherproofing
You need to keep MGO boards safe from bad weather. MGO boards should not be the outside layer. Always cover them with siding or stucco. Sun, rain, and wind can make the boards weak. Use membranes and coatings to block water. Put waterproof sealant on all edges. Use joint tape before you add coatings. This helps stop leaks. Silicone sealants, acrylic coatings, and water-resistant paints work well.
Best Practice | Description |
|---|---|
Always cover MGO boards with protective materials. | |
Avoid Direct Exposure | Keep boards away from sunlight, rain, and wind. |
Protect Against Moisture | Use membranes, coatings, and flashings to stop water from soaking the board. |
Tip: Keep MGO boards flat and off the ground before you install them. This keeps them dry and stops damage.
Fastener Treatment for Durability
You need strong fasteners to hold your wall together. Pick 316-stainless steel or ceramic-coated screws. These screws do not rust or corrode. Magnesium chloride in the boards can ruin regular screws. Always use screws that resist corrosion.
Recommended Fastener Type | Description |
|---|---|
316-stainless steel | Prevents corrosion and lasts a long time. |
Ceramic coated fastener | Designed for cement boards, also resists rust. |
Corrosion-resistant screws | Essential for strong, lasting joints. |
Leave small gaps between boards. This lets boards move when it gets hot or cold. It helps stop cracks.
Moisture Control and Maintenance
MGO boards can soak up water if not protected. Wet boards can peel, grow mold, or get weak joints. You can stop these problems by using boards with less chloride. Put waterproof sealant on the boards. Make sure air can move around the boards. Never let water touch the boards.
Install MGO boards soon after you get them.
Check boards for damage or bending before you use them.
Make sure joints are tight and surfaces are clean.
Follow all building rules for safety.
Check your boards often and seal them well to help your MGO wall last for years. 🛡️
You can put up magnesium sulfate sheathing if you follow each step. First, clean and make the surface flat. Use the right screws and leave small gaps for movement. Try not to make these mistakes:
Not cleaning or leveling the surface
Using the wrong screws
Putting screws too close to the corners
Tightening screws too much
Forgetting to leave expansion gaps
Cutting boards without wearing safety gear
Magnesium oxide boards last longer than plywood or drywall.
Property / Material | MgO Board | Plywood | Drywall |
|---|---|---|---|
Flexural Strength Retention | Nearly 100% | Loses 9% | Loses 36-52% |
Moisture Absorption | 0.34% | Higher | Higher |
Mold Growth | None | Mold prone | Mold prone |
Dimensional Stability | No warping | Warping | Swelling |

Throw away waste the right way:
Material | Disposal Method |
|---|---|
Magnesium sulfate | Sewer or ordinary trash (if allowed) |
Always wear safety gear and follow the maker’s rules to build a strong and safe wall.
FAQ
How do you cut magnesium sulfate sheathing safely?
Use a utility knife for thin boards. Use a circular saw for thick boards. Always wear safety goggles and a dust mask. Hold the board so it does not break. Clean up dust after you finish cutting.
Can you install magnesium sulfate sheathing outside?
You can use magnesium sulfate sheathing under siding or stucco. Never leave it open to rain or sunlight. Always cover it to keep it safe. Use waterproof membranes and sealants for extra protection.
What screws work best with magnesium sulfate boards?
Use 316-stainless steel or ceramic-coated screws. These screws do not rust and last longer. Regular screws can rust from the board’s chemicals. Always check what the manufacturer suggests.
How do you prevent mold on magnesium sulfate sheathing?
Magnesium sulfate boards do not grow mold easily. Keep the boards dry and seal all joints. Use waterproof coatings for more protection. Check the boards often for moisture.
Can you paint or tile over magnesium sulfate sheathing?
You can paint or tile over magnesium sulfate sheathing. Use a primer made for cement or masonry. Pick UV-resistant paint or polymer tile adhesive for best results.