

18 May How to Insulate a Subfloor for Maximum Energy Efficiency
Table of Contents
Did you know your floors could be the culprit behind those high energy bills? Subfloor insulation is a game-changer when it comes to keeping your home cozy and efficient. Without subfloor insulation, heat escapes through the floor, making your heating and cooling systems work overtime. Insulating a timber floor with subfloor insulation not only reduces drafts but also helps you save big on energy costs. For example, using closed-cell spray foam insulation can cut heat loss by up to 24%! Plus, some homes see annual savings of up to £665. When you insulate with subfloor insulation, you’re not just improving comfort—you’re making a smart investment in your home’s future.
Key Takeaways
Subfloor insulation helps lower energy costs by keeping heat inside in winter and cool air inside in summer.
Good insulation makes your home more comfortable by stopping drafts and keeping the temperature steady.
A vapor barrier stops water damage, protects floors, and makes insulation last longer.
Picking the right insulation, like fiberglass or spray foam, is important for saving energy and staying comfortable.
Checking and fixing your insulation often keeps it working well, saves money, and keeps your home warm.
Benefits of Subfloor Insulation
Energy savings and reduced heating/cooling costs
Do your energy bills rise in hot or cold weather? Adding insulation under your floors can fix this problem. It keeps heat inside during winter and cool air in during summer. This means your heater and air conditioner won’t need to work as hard. As a result, you’ll spend less on energy bills. Many homes with good insulation save a lot of money. Think about using that saved money for something fun instead of paying utilities!
Improved indoor comfort and reduced drafts
Do your floors feel cold in the winter? That’s a sign you need better insulation. Subfloor insulation blocks cold air from coming through the floor. This makes your home warmer and more comfortable. You’ll feel the change right away—no more cold feet or uneven room temperatures. Insulated floors also help keep your home’s temperature steady all year long.
Protection against moisture and structural damage
Water can damage your home, but insulation helps stop it. Good underfloor insulation keeps water from soaking into your floors and walls. Using XPS insulation slows water movement, and a vapor barrier stops moisture buildup. A capillary break adds even more protection. These steps keep your home dry and protect your floors from damage. Insulating your subfloor is like giving your home a strong shield against water problems.
Increased home value and long-term efficiency
Did you know insulation can raise your home’s value? It’s true! Adding subfloor insulation makes your home more comfortable and attractive. Buyers love energy-efficient homes that save on utility bills. A well-insulated subfloor shows you care about efficiency and the environment.
Think of it like a car with great gas mileage. It saves money and feels like a smart choice. If you sell your home, buyers will like the lower energy costs and extra comfort. This can make your home stand out in the market.
Subfloor insulation also helps your home work better for years. It keeps your house warm in winter and cool in summer. This reduces strain on your HVAC system, meaning fewer repairs and longer-lasting equipment. It also keeps indoor temperatures steady, preventing problems like warped floors or damage from changing conditions.
In short, subfloor insulation is a smart move. You’ll enjoy a cozy, efficient home now and get your money back if you sell later. Don’t wait—start insulating today and enjoy the benefits for years!
Getting Ready to Insulate a Subfloor
Knowing Your Subfloor and Crawl Space
Before starting, figure out what type of subfloor you have. Is it wood, concrete, or something else? Does your house have a crawl space? If yes, check how easy it is to access. These details help you pick the right insulation and know how to install it.
Local rules may require you to check these things first. For example:
Some areas need specific insulation thickness based on the weather.
Exposed insulation might need to resist fire for safety.
Insulation must be installed without gaps or squishing for it to work well.
Start by cleaning the subfloor and fixing any damage. Make sure it’s dry. If you see mold or rotting wood, call an expert. For uneven floors, use leveling tools to make them smooth. These steps help your project begin the right way.
Checking for Water, Leaks, and Airflow
Water can ruin insulation. Before insulating, look for leaks or wet spots. Plumbing problems might hide under floors or behind walls. Use a moisture meter to find hidden issues. If you see standing water, remove it and find the source.
Good airflow is also important. Without it, moisture can build up and ruin insulation. Airflow also stops problems like ice buildup in winter. During your check, look for water stains or white powdery spots. If everything looks good, you’re ready to start.
Check Item | Status |
|---|---|
Water Leaks | None |
Stains | None |
White Powder | Not Found |
Moisture Levels | Normal Range |
Dealing with Wires and Pipes
Wires and pipes can make insulation tricky, but you can handle it. Find these obstacles before starting. Fit insulation tightly around pipes and wires, but don’t press it down too hard. Keep insulation away from hot lights or surfaces for safety.
Here’s how to manage these challenges:
Cut insulation to fit around wires and lights.
Place insulation snugly around pipes without leaving spaces.
Follow safety rules to keep insulation away from heat sources.
Planning ahead helps you avoid mistakes and ensures your insulation works well.
Getting tools and materials ready for the job
Before starting, gather all the tools and materials you need. Being prepared saves time and makes the work easier. Here’s what to have:
Important Tools
Tape Measure: Measure spaces to make insulation fit well.
Utility Knife: Cut insulation to the right size easily.
Staple Gun: Attach insulation securely, especially fiberglass batts.
Safety Gear: Wear gloves, goggles, and a mask for protection. Insulation can bother your skin and lungs.
Caulking Gun: Seal cracks and gaps to stop air leaks.
Materials You’ll Need
Insulation: Pick the best type for your subfloor—fiberglass batts, spray foam, rigid boards, or mineral wool.
Vapor Barrier: Stop moisture from getting into the insulation.
Adhesive or Fasteners: Hold insulation in place firmly.
Sealant: Close gaps around pipes, wires, and edges tightly.
Tip: Check the insulation’s R-value. Higher R-values mean better heat and cold resistance, keeping your home comfy.
Extra Items
Work Light: Light up dark spaces for better visibility.
Moisture Meter: Find hidden damp spots before starting.
Leveling Tools: Fix uneven areas for smooth installation.
Tool/Material | Use |
|---|---|
Tape Measure | Measuring spaces |
Utility Knife | Cutting insulation |
Safety Gear | Staying safe |
Vapor Barrier | Blocking moisture |
Sealant | Closing air gaps |
Having everything ready helps you avoid delays. Double-check your list before starting to ensure you’re fully prepared.
Step-by-Step Guide to Insulating a Floor
Cleaning and Preparing the Workspace
Before insulating, clean the area well. A tidy workspace makes the job easier and helps insulation last longer. Remove old insulation, dust, and debris from the subfloor or crawl space. This step ensures the insulation sticks properly and works better.
Always think about safety first. Wear gloves, goggles, and a mask to protect yourself. If you’re in a crawl space, make sure there’s good airflow. Use a work light to see clearly in dark spots.
Follow these safety tips:
Training: Learn how to handle insulation safely.
Protective Gear: Use gloves, masks, and goggles to stay safe.
Check for Hazards: Look for sharp objects or wet areas.
Sealants: Apply sealants carefully to avoid accidents.
Safety Tips | Details |
|---|---|
Training | Learn safe ways to install insulation. |
Protective Gear | Gloves, goggles, and masks keep you safe. |
Check for Hazards | Spot problems like moisture or sharp items early. |
Sealants | Use carefully to ensure safety and good insulation. |
By preparing your workspace and following safety rules, you’ll be ready for a smooth insulation project.
Choosing the Right Insulation Material
Picking the best insulation is very important. It helps keep your home warm in winter and cool in summer. The right material also saves energy and makes your home more comfortable.
Think about these things when choosing insulation:
Thermal Conductivity: Pick materials that keep heat from escaping.
Durability: Choose strong materials like rigid foam or mineral wool.
Moisture Resistance: Use insulation that can handle water and weather.
Feature | What It Does |
|---|---|
Thermal Conductivity | Stops heat from escaping, saving energy. |
Durability | Makes sure the insulation lasts a long time. |
Moisture Resistance | Protects against water damage and weathering. |
For DIY projects, fiberglass batts are easy to use. Spray foam is great for tight spaces under floors. Rigid foam boards work well in damp areas and provide strong thermal resistance.
Tip: Check the R-value of the insulation. Higher R-values mean better performance and comfort.
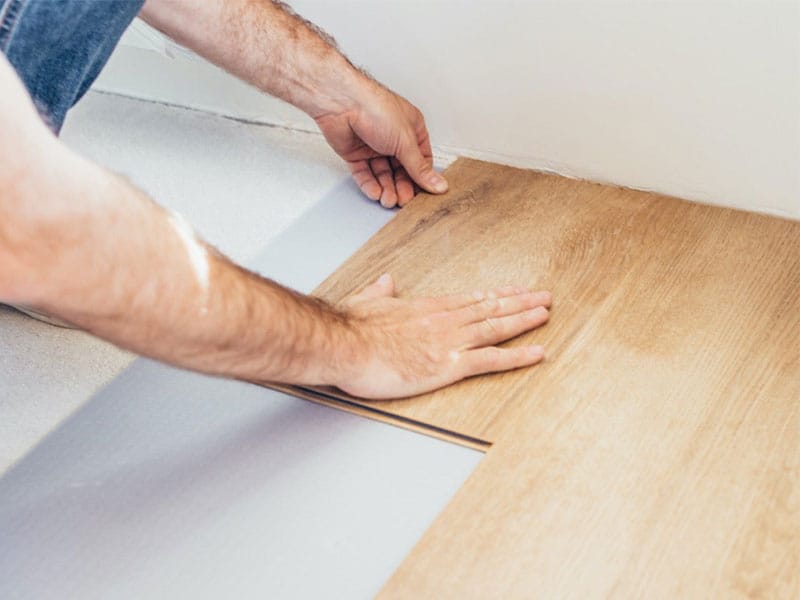
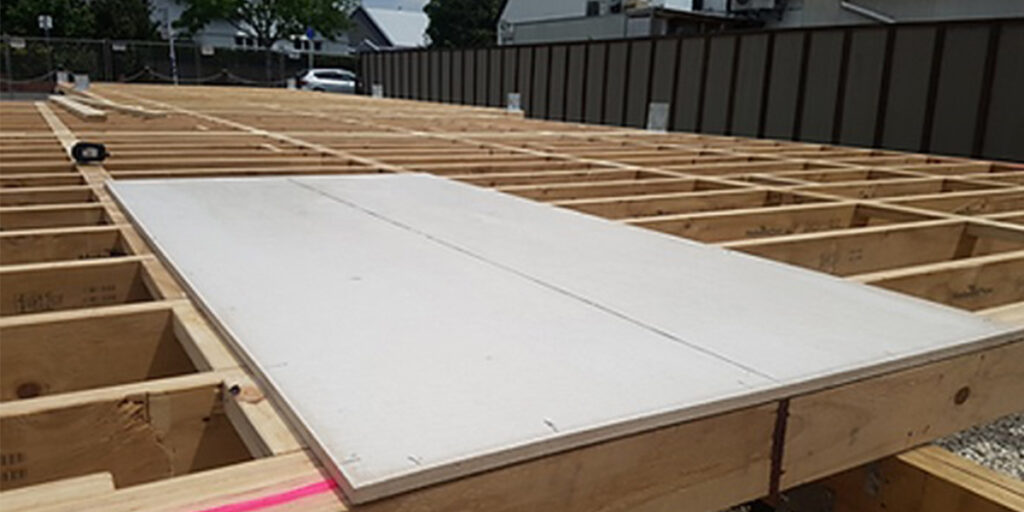
Installing Insulation Between Joists or Under the Subfloor
Now it’s time to install the insulation! If your floor has joists, place the insulation between them. For floors without joists, attach the insulation under the subfloor.
Follow these steps:
Measure the Area: Use a tape measure to find the size you need.
Cut the Insulation: Trim it to fit with a utility knife.
Place the Insulation: Press it gently into place without leaving gaps.
Secure It: Use staples or adhesive to hold it firmly.
Seal Gaps: Apply sealant to block air leaks.
Real-life examples show how effective this is. For instance, ROCKWOOL FLEXI® insulation improved soundproofing and saved energy in an office building. The Petronas Twin Towers used ROCKWOOL to lower cooling costs and improve fire safety.
Pro Tip: Add a vapor barrier in crawl spaces to protect insulation from water. This keeps your home dry and extends the insulation’s life.
By following these steps, you’ll install insulation correctly, making your home more energy-efficient and comfortable.
Sealing gaps and ensuring proper coverage
Sealing gaps is just as important as adding insulation. If air leaks are not fixed, even good insulation won’t work well. Gaps around pipes, wires, and edges let warm air out in winter. In summer, hot air can sneak in. This makes your insulation less effective and raises energy bills.
Look closely for cracks or gaps in the area. Use a caulking gun to seal small gaps. For bigger gaps, apply expanding foam. Focus on spots where the subfloor meets walls or foundations. These areas often have air leaks.
Why is sealing so important? Studies show unsealed joints can cause nearly 50% of air leaks in a home. Sealing these gaps improves insulation performance a lot. Tests using ASTM E283 found sealing can cut air leaks by over 80% at 50 pascals of pressure. That’s a big improvement!
Here’s a checklist to help you:
Seal gaps around pipes, wires, and vents.
Check edges where the subfloor meets walls or foundations.
Add a vapor barrier to block moisture and stop air movement.
Double-check your work to ensure no gaps are left open.
Pro Tip: Use a flashlight to find hidden gaps. Shine it on one side of the subfloor and look for light leaks on the other side. This trick helps you spot missed areas.
By sealing gaps and covering everything properly, your home will be more airtight and energy-efficient.
Inspecting the installation for completeness
After installing insulation and sealing gaps, inspect your work. This step ensures everything is done right and your insulation works well.
First, check the thickness of the insulation. It should match the R-value needed for your project. If unsure, measure the depth with a tape measure. Next, make sure the insulation fills all spaces without gaps or being squished. Squished insulation doesn’t work as well, so fluff it up if needed.
Follow this guide to inspect your work:
Check the thickness of the insulation everywhere.
Make sure all spaces are filled without gaps or voids.
Ensure wall stud cavities are sealed for an airtight fit.
Confirm insulation labels or data sheets are available.
Look for exposed edges or areas where insulation might move later.
Did you know professionals like HERS raters do similar checks? They confirm thickness, check seals, and ensure materials meet the R-value. Installers also sign certificates to prove the work follows building codes.
Note: If you’re doing a DIY project, take photos of your finished work. These can help with future repairs or inspections.
By inspecting your installation, you’ll make sure your insulation works its best. This step saves money and keeps your home comfy for years.
Comparing Subfloor Insulation Materials
Picking the right insulation can seem tricky with many choices. Each type has good and bad points. Knowing these helps you pick the best for your home. Let’s look at three popular options for timber floors: fiberglass batts, spray foam, and rigid foam boards.
Fiberglass Batts: Pros and Cons
Fiberglass batts are very common and easy to use. They’re made of tiny glass fibers and come in ready-to-use panels. If you want a cheap option, fiberglass batts are a good pick.
Pros:
Affordable: They are budget-friendly and save money.
Fire-resistant: They help keep your home safer from fire.
Easy to install: You can cut and fit them easily.
Low maintenance: Once installed, they need little care.
Cons:
Moisture issues: They don’t handle water well and can grow mold.
Health risks: Tiny fibers can irritate skin and lungs. Wear safety gear.
Installation gaps: Poor installation can leave gaps, reducing effectiveness.
Fiberglass batts are great for dry areas and DIY projects. But if your home is damp or leaks often, consider other options.
Spray Foam: Benefits and Applications
Spray foam is a modern and flexible choice. It starts as a liquid and expands into foam, filling every small space. This makes it perfect for hard-to-reach spots under floors.
Benefits:
Air sealing: It blocks drafts and boosts energy efficiency.
Thermal control: Keeps your home warm in winter and cool in summer.
Moisture management: Stops water and mold, great for damp areas.
Energy savings: Can cut energy use by 30%-50%, saving money.
Spray foam works well in all climates and for homes with odd spaces or high energy bills. It costs more upfront but saves money over time.
Tip: Hire a pro to install spray foam for the best results.
Rigid Foam Boards: Features and Uses
Rigid foam boards are strong and long-lasting. Made from materials like polystyrene, they come in solid panels. These are great for areas needing strong insulation and water protection.
Features:
High R-value: Provides great insulation with thin panels.
Moisture resistance: Doesn’t soak up water, ideal for damp spaces.
Thermal bridging reduction: Covers framing to stop heat loss.
Uses:
Rigid foam boards have been used since the 1970s for energy-saving projects. For example, a Victorian house saved 70% on energy by using these boards with cellulose insulation. They’re also popular in eco-friendly building projects.
If you want a durable and effective option, rigid foam boards are a great pick. They work well in humid or extreme weather conditions.
Fun Fact: Rigid foam boards are often used in green buildings for their energy-saving benefits.
By learning about these materials, you can pick the best insulation for your subfloor. Whether you care about cost, performance, or durability, there’s a choice for you.
Mineral Wool: Benefits and When to Use It
Looking for strong, eco-friendly insulation? Mineral wool could be the answer. It’s a great material that keeps your home comfy and has unique benefits. Let’s explore why mineral wool is special and when to use it.
Why Pick Mineral Wool?
Mineral wool isn’t just regular insulation—it has features that make it stand out:
Fire Resistance: Mineral wool doesn’t burn and handles heat over 2,000℉. It slows fires and protects homes, especially in tall buildings.
Energy Efficiency: With an R-value of 4.3 per inch, it saves energy. Even when wet, it keeps your home warm or cool.
Moisture Resistance: Mineral wool repels water and drains it well. This makes it great for rainy or damp places.
Soundproofing: Want a quieter home? Mineral wool blocks noise and absorbs sound.
Eco-Friendly: Made from recycled materials, it’s a green choice that helps the planet.
Tip: If you live in a noisy or fire-risk area, mineral wool is a smart pick.
When to Use Mineral Wool
Mineral wool works best in certain situations. Here’s when to use it:
Fire Safety: Use it in wood walls for extra fire protection. It handles high heat, giving more time to escape during a fire.
Tricky Wall Shapes: Its flexible design fits odd spaces without leaving gaps.
Wet Areas: Perfect for basements or walls exposed to rain, as it resists water and mold.
Noise Reduction: Tired of loud sounds? Mineral wool reduces noise between rooms or from outside.
Real-Life Uses
Mineral wool proves its value in real projects:
Assembly #7 uses mineral wool outside walls for fire safety and tricky designs.
In wood walls, it fits snugly, improving fire safety and making installation easier.
Feature | What It Does |
|---|---|
Fire Resistance | Handles heat over 2,000℉, slowing fire spread. |
Energy Efficiency | Keeps R-value of 4.3 per inch, even when wet. |
Moisture Resistance | Blocks water and prevents mold. |
Soundproofing | Absorbs noise, making homes quieter. |
Sustainability | Made from recycled materials, helping the environment. |
Fun Fact: Mineral wool’s fire and water resistance make it popular for eco-friendly buildings.
Is Mineral Wool Right for You?
Need durable, safe, and green insulation? Mineral wool is a great choice. It’s perfect for fire safety, moisture control, or soundproofing. Whether for a new build or upgrade, mineral wool offers lasting benefits.
Ready to choose insulation that works hard? Mineral wool might be just right for your project.
Tips for Maximizing Insulation Efficiency
Sealing air leaks and rim joists
Air leaks can ruin your insulation efforts. They let warm air out in winter and hot air in during summer. To stop this, seal gaps around rim joists and other openings. These spots often cause air leaks. Use caulk or foam to close cracks and holes.
Not sure how to find leaks? Try blower-door testing. It checks how much air escapes from your home. Thermal imaging is another option. It shows missing insulation or hidden air leaks. Pay close attention to attic hatches and kneewall attics, as they often have problems.
Tip: Sealing rim joists improves comfort and lowers energy costs.
Using vapor barriers to prevent moisture
Moisture can damage insulation. It causes mold, rot, and reduces insulation’s effectiveness. A vapor barrier helps keep insulation dry. It blocks water vapor from getting inside.
Place the vapor barrier on the warm side of the insulation. In crawl spaces, put it on the ground to stop rising moisture. Make sure there are no gaps or tears. Overlap edges and seal them with tape for better protection.
Pro Tip: Vapor barriers protect insulation and make it last longer.
Ensuring insulation is evenly distributed
Uneven insulation creates cold spots in your home. To fix this, install insulation carefully. It should fit tightly between joists without being squished. Squished insulation doesn’t trap air well, making it less effective.
Measure and cut insulation to fit properly. Check for gaps near pipes, wires, and edges. Fill these spaces with small insulation pieces or spray foam. Inspect your work to ensure the subfloor is fully covered.
Fun Fact: Even insulation can boost energy efficiency by 20%!
Regular maintenance and inspection
Once you’ve insulated your subfloor, the job isn’t completely done. Regular maintenance and inspections are key to keeping your insulation effective and your home energy-efficient. Don’t worry—it’s not as hard as it sounds. A little effort now can save you from costly repairs later.
Start by checking your insulation at least once a year. Look for signs of wear, like sagging, gaps, or damage caused by pests. If you notice any issues, fix them right away. Damaged insulation can’t do its job properly, and it might even let moisture or drafts sneak in.
Keep an eye out for moisture problems. Even the best insulation can struggle if water gets into your subfloor. Use a flashlight to inspect for leaks or damp spots. If you find any, address the source of the moisture before it causes bigger problems. Adding a vapor barrier can help protect your insulation from future water damage.
Don’t forget to clean the area around your insulation. Dust and debris can build up over time, especially in crawl spaces. A clean environment helps your insulation last longer and perform better. While you’re at it, check for any new gaps or cracks that might have formed. Seal them up with caulk or foam to keep your home airtight.
Pro Tip: Schedule your inspection during seasonal changes. This way, you can prepare your home for extreme weather and catch any issues early.
By staying on top of maintenance, you’ll ensure your insulation continues to work efficiently. It’s a small effort that pays off with lower energy bills and a more comfortable home.
Subfloor insulation is a smart way to make your home more energy-efficient and comfortable. It helps you save on energy bills, keeps drafts out, and protects your floors from moisture. By preparing properly, choosing the right materials, and installing it correctly, you’ll enjoy these benefits for years. Why wait? Take the first step today and start insulating your subfloor. Your future self—and your wallet—will thank you!
FAQ
What is the best insulation material for subfloors?
The best material depends on what you need. Fiberglass batts are cheap, spray foam fills gaps, and rigid foam boards block water. Mineral wool is great for fire safety and stopping noise.
Tip: Think about your weather and budget before picking insulation.
Can I install subfloor insulation myself?
Yes, you can! Some materials, like fiberglass batts, are easy for DIY. But for spray foam or tricky areas, hiring a pro is better.
Pro Tip: Always use gloves, goggles, and a mask when working with insulation.
How much does subfloor insulation cost?
The price depends on the material and size of the job. Fiberglass batts are cheaper, while spray foam and rigid boards cost more. Expect to pay $1.50–$5 per square foot.
How long does subfloor insulation last?
Most insulation lasts 20–50 years if done right. Checking for gaps and fixing moisture problems can make it last longer.
Does subfloor insulation reduce noise?
Yes! Insulation like mineral wool soaks up sound, making your home quieter. It’s great for cutting noise between floors or from outside.
Fun Fact: Mineral wool is often used in music studios to block sound!