


01 Aug Step by Step Instructions for Installing Wall Sheathing Boards
Table of Contents
You can achieve a strong and durable wall with the right approach to wall sheathing. Many people find this project manageable when they prepare well and use the correct tools. You will build confidence as you learn new skills and see your progress. Remember to focus on safety and accuracy at each step for a professional result.
Key Takeaways
Clean your work area and remove any trash. Check if the wall framing is straight and square before you begin.
Use the correct tools and materials for the job. Wear safety gear. Pick good sheathing panels. Use the right nails and space them well to make strong walls.
Measure and mark the panels with care. Cut them with a circular saw. Follow safety rules to make sure the panels fit right.
Start putting up panels at the corners. Make sure they are straight. Leave small gaps so the panels can expand. Nail them in the right way to keep the walls strong.
Seal all the joints with good tape and flashing. This keeps water out. Check your work carefully before you put on siding.
Tools & Materials
Essential Tools
You must have the right tools to put up wall sheathing. These tools help you work safely and get the job done well. Builders suggest these tools for an easy project:
Saw (circular saw or handsaw) to cut panels
Tape measure to check sizes
Chalk line to draw straight marks on framing
Hammer to pound in nails
Utility knife to trim and score
Drill to make holes or drive screws
Level to see if walls are straight
Pneumatic nailer for quick nailing (optional)
Safety gear: gloves, goggles, dust mask, hard hat, and safety vest
Tip: Always wear the right personal protective equipment (PPE). OSHA says gloves, hard hats, and harnesses are important. Use scaffolds or guardrails when working high up to stop falls.
Wall Sheathing Materials
There are different wall sheathing materials you can use. Each one has its own good and bad points. The table below shows the most common types:
Material | |
|---|---|
Strong and dense. Holds fasteners well. Can swell or get moldy if wet. May change size with temperature. | |
Very tough and useful. Handles a little water better than OSB. Usually costs more. | |
Fiberboard | Stable and eco-friendly. Lets in more water and is not as tough as OSB or plywood. Some protection from pests and mold. |
You also need the right fasteners. Nails are usually used for wall sheathing because they are strong. Ring-shank nails stay in place and work well in wind or earthquakes. Screws hold tight but can break if pushed too hard. Always pick fasteners that do not rust and match your sheathing.
Note: Building codes often say to use nails or staples for wood panels. Nails go in faster and cost less than screws.
Preparation
Workspace Setup
Start by clearing your work area. Remove all debris, tools, and materials that might get in your way. A clean space helps you move safely and keeps your project organized. Lay out your panels and tools so you can reach them easily. Make sure you have enough room to handle large boards without bumping into anything.
Check that your wall framing is ready for sheathing. The framing must be plumb (straight up and down) and square (corners at 90 degrees). Use a level to check the studs and plates. Place temporary bracing on the walls to keep them from shifting. Diagonal or T-bracing works well for this step. Secure the bottom plate to the slab or subfloor using nails or fasteners. Sill seal foam strips under the bottom plate help stop air and moisture from getting in.
Tip: Use a string line along the top plate to check if the wall is straight. Adjust the bracing until the wall lines up with the string.
Wall Framing Check
You need to make sure your wall is square before you start sheathing. Begin by tacking the bottom plate to the deck at several points. This holds it in place but lets you adjust if needed. Pull a tape measure diagonally from one corner of the bottom plate to the opposite corner of the top plate. Repeat for the other diagonal. If both measurements match, your wall is square.
Use the longest, straightest boards for your plates. Start your layout from an outside corner, usually on the longest wall. Tack the top plate in one spot to hold the wall steady. Stretch a string line between blocks at each end of the wall to check for straightness. Plumb the corners first using a plate level. Adjust the braces as needed to remove any gaps between the string and the wall.
Common framing mistakes can cause problems later. Watch out for these issues:
Panels placed too close together can buckle. Leave a 1/8 inch gap at ends and edges.
Nails should be 3/8 inch from panel edges, spaced every 6 inches along edges and 12 inches on supports.
Framing that is not level or square leads to uneven surfaces.
Missing temporary bracing can let walls shift before sheathing.
Take your time with these steps. Once you install the sheathing, it becomes hard to fix framing errors.
Measuring & Cutting
 Marking Boards
You need to measure and mark your boards with care before you start cutting. Accurate marking helps you avoid mistakes and waste. Start by using a tape measure to find the length and width you need for each panel. Place a speed square against the edge to draw straight lines. Mark stud locations with a pencil, making an ‘X’ on the right side of each line. This tells you where to fasten the panels later.
Many builders use chalk lines to mark long, straight cuts. You can snap a chalk line across the board for a clear guide. For even faster marking, some professionals use layout sticks. These tools, like the Big Foot Tools Collapsible Metal Folding Layout Stick, let you quickly mark standard stud spacing, such as 16 or 24 inches on center. The stick adjusts easily and folds up for storage. If you want to keep your marks clear, use different symbols for different stud types.
Industry standards, such as the U.S. Voluntary Product Standard PS 2-18, require you to check panel labels for grade, span rating, thickness, and mill number. These markings help you pick the right panel and measure it correctly.
Tip: Always double-check your measurements before cutting. Mistakes can cost time and materials.
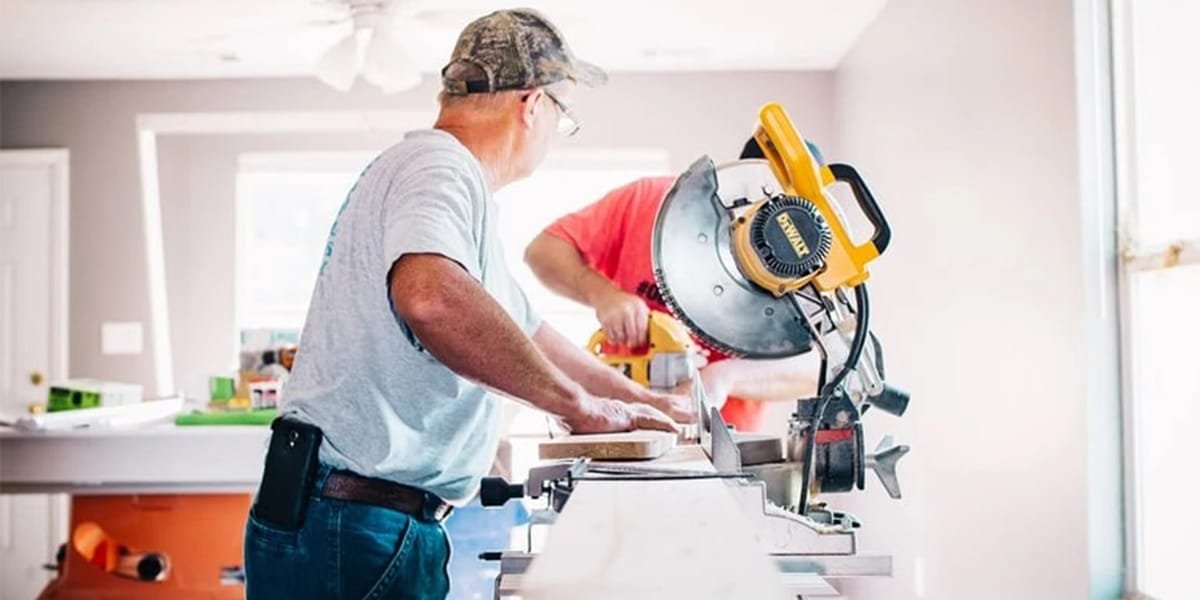
Cutting Techniques
Once you finish marking, you can start cutting. Most people use a circular saw for this job. Set the blade just a bit deeper than the panel thickness. Cut along the outside of your chalk line to keep your measurements true. Start with the bottom edge, then cut the sides, and finish with the top. This order helps prevent the panel from binding or falling.
If you need to make openings for windows or doors, try plunge cutting with a circular saw. Set the blade depth, pull back the guard, and lower the blade into the panel away from the edge. Push the saw forward along your line for a clean cut. For the smoothest edges, use a router with a flush-cutting bit, especially on thicker plywood. After cutting, sand the edges with a belt sander to remove splinters.
Saw Type | Advantages | Disadvantages |
|---|---|---|
Circular Saw | Portable, flexible, good for job sites, accurate with a guide or track | Needs skill for straight cuts, less precise than table saws |
Table Saw | Very accurate, best for repeat cuts, easy to use in a shop | Not portable, needs more setup, not ideal for large panels on site |
Note: Always wear safety gear and keep your hands clear of the blade when cutting.
Wall Sheathing Installation
Positioning Panels
You need to start by placing the first panel at a corner of the wall. Make sure the panel sits flush with the bottom plate and lines up with the edge of the framing. Use a level to check that the panel is straight. If you install panels vertically, run them from the bottom plate to the top plate. This method helps tie the wall together and gives the best wind and earthquake resistance. If you use horizontal placement, stagger the seams so the joints do not line up from one row to the next. Staggering seams helps reduce wall movement and makes the structure stronger.
Here is a table to help you choose the best panel orientation for your project:
Panel Orientation | Key Features | Strength Considerations | Installation Notes |
|---|---|---|---|
Vertical Sheathing | Panels run from bottom to top plate; overlaps plates and rim joists | Maximizes racking strength and wind resistance | Nail 4″ on-center at edges, 6″ on-center along studs; overlap foundation |
Horizontal Sheathing | Panels run side-to-side; seams staggered for strength | Provides stiffness; staggering joints reduces wall deformation | Use chalk lines for placement; stagger end seams; housewrap before raising wall |
Material Considerations | OSB and plywood have different strength directions; check panel labels | Longer OSB sheets can cover more area and tie wall to floor framing | Always follow local building codes and engineering specs |
Tip: Always check that your wall is square before you start fastening panels. Measure diagonally from corner to corner. If the numbers match, your wall is square.
Fastening Panels
Proper fastening is key to a strong wall sheathing job. Use 8d common nails (2-1/2″ long, 0.131″ diameter) for most wood panels. Place nails 6 inches apart along the panel edges and 12 inches apart along the studs in the middle of the panel. Keep each nail 3/8 inch away from the panel edge. Leave a 1/8 inch gap between panels to allow for expansion when the wood gets wet.
Aspect | Recommendation |
|---|---|
Nail Type | 8d common nails (0.131″ diameter, 2-1/2″ length) |
Nail Spacing | 6 inches on center at panel ends and edges; 12 inches on center along studs |
Nail Placement | 3/8 inch from panel edges |
Panel Spacing | 1/8 inch gap at ends and sides |
Improper nail spacing can cause the panels to buckle or the wall to lose strength. If you place nails too far apart, the wall sheathing may not hold up in strong winds or earthquakes. If you place nails too close together, you might split the wood. Always follow the nailing schedule from the panel manufacturer or your local building code.
Note: Do not use screws for fastening wall sheathing unless your building code allows it. Nails provide better holding power and flexibility.
Overlapping & Flashing
You must protect your wall from water. Start by overlapping the bottom edge of the wall sheathing over the foundation or mudsill. This overlap helps keep water out of the wall. Next, install base flashing along the bottom of the wall. Overlap each piece of flashing by at least 8 inches. Add a drip edge to direct water away from the wall base.
After you install the flashing, cover the wall with a weather-resistive barrier (WRB) like housewrap. Start at the bottom and work your way up, overlapping each layer by 6 inches horizontally and 8-12 inches vertically. This shingle-style layering lets water drain down and away from the wall. For extra protection, keep at least 8 inches of clearance between the siding and the ground.
Follow these steps for best results:
Install base flashing first, overlapping pieces by at least 8 inches.
Apply WRB over the flashing, working from the bottom up.
Overlap WRB layers to create a continuous drainage plane.
Maintain proper clearance between siding and grade.
Use drainable wraps or create an air gap behind cladding for better drying.
Tip: When you install flashing around windows, doors, or pipes, always start at the bottom and work up. Overlap each piece so water flows out, not in.
By following these steps, you help prevent moisture from getting inside your wall sheathing. This keeps your wall strong and dry for years to come.
Sealing & Inspection
 Sealing Joints
You need to seal all the joints and seams in your wall sheathing to keep out water and air. Start by taping every seam with a high-quality tape. ForceField® Premium Tape and ForceField® Seam Tape work well for most projects. These tapes stick tightly, even in cold weather, and bend around corners and curves. For tricky spots, like window corners or odd shapes, use ForceField® Flex Tape or Corner Seal accessories.
If you use the ZIP System, follow these steps:
Press the tape down with a roller to make a strong, weatherproof bond.
Cut tape into arm-length pieces for better control and fewer wrinkles.
Precrease tape for inside corners and use a plastic spatula or speed square to press it in tight.
Choose the right tape width for each seam or opening.
Peel-and-stick membranes, such as Delta-Vent SA or Aluma Flash, also create airtight seals. For the best protection, you can use fluid-applied membranes like Tremco ExoAir 230 or Sto Gold Coat®. These products roll, spray, or trowel on and cover every gap, even on complex wall shapes. Always make sure your barrier is continuous so water and air cannot get through.
Tip: Overlap all tapes and membranes at least 2 inches. Press them down firmly for a lasting seal.
Final Checks
Before you finish, inspect your wall sheathing carefully. Use this checklist to help you:
Check that you installed the correct grade and thickness of sheathing.
Make sure all nails match the schedule in your plans and are spaced correctly.
Confirm that every seam and edge sits over a framing member or is blocked.
Look at the plates and confirm they meet the size and fastening rules in your plans.
Inspect double or triple plates for proper nailing and attachment.
Review the weather-resistive barrier for full coverage and correct overlaps.
Common problems include missing gaps between panels, swelling from moisture, and poor flashing at wall joints or around pipes. You may also find framing errors or loose nails. Fix these issues now to avoid water leaks, rot, or costly repairs later.
Note: Always complete your inspection before you add siding or house wrap. Careful checks now help your wall last for many years.
You can build a strong, weather-resistant wall by following each step with care. Careful measuring, proper fastening, and sealing every seam help your wall last for decades. When you use the right materials and pay attention to details, you protect your home from moisture, wind, and damage. Remember, your effort now means fewer repairs later. Take pride in your work and enjoy the lasting results of a job well done.
FAQ
What is the best type of wall sheathing for my home?
You can choose OSB, plywood, or fiberboard. OSB works well for most homes and costs less. Plywood resists water better. Fiberboard is eco-friendly but less strong. Always check your local building codes before you decide.
How do I know if my wall framing is square?
Measure diagonally from one corner to the opposite corner. Repeat for the other diagonal. If both measurements match, your wall is square. This step helps you avoid problems when you install the sheathing.
Can I install wall sheathing by myself?
You can install wall sheathing alone, but large panels are heavy. Ask a friend for help if possible. Use panel lifters or temporary supports to hold panels in place while you fasten them.
Do I need to leave gaps between sheathing panels?
Yes, you should leave a 1/8 inch gap between panels. This gap lets the wood expand and contract with changes in temperature and moisture. Gaps help prevent buckling and damage.
What safety gear should I wear during installation?
Wear gloves to protect your hands.
Use safety goggles for your eyes.
Put on a hard hat and dust mask.
Wear sturdy shoes or boots.
Safety gear keeps you safe from cuts, dust, and falling objects.