

30 Dec MgO Board Sheathing Installation Guide: A Tutorial in 5 Steps
Table of Contents
Have you been planning to improve the interior of your home? Well, MgO board sheathing is the perfect choice to get started, but installation will be another burden on your pocket.
Fortunately, installing MgO board sheathing is not as hard as it sounds. If you have boards and are willing to spend half a day, you’re all ready. All you need are essential tools and MgO boards.
Stick with us as we’re going to learn how to install the MgO board sheathing. Roll up your sleeves because it’s going to be a fun but little hard ride.
What is a MgO Board?
Let’s stop with the installation processes and look at the MgO board in depth. In construction, magnesium oxide boards are manufactured from the hard and fire-resistant mineral magnesium oxide.
This material is commonly used in construction work thanks to the following advantages:
Fire Resistance: MgO boards are fireproof, making them suitable even in areas with a high fire risk.
Mold and Moisture Resistant: They do not encourage moisture and mold, making them ideal for use indoors and outdoors.
Environmentally friendly: This is so because the MgO Boards are natural products with no harmful chemicals.
Outstanding Insulation: MgO boards contribute to achieving thermal and sound insulation, retaining heat in the building, and minimizing energy bills.
Irritant-free and without VOCs: A few traditional substances can be said to carry volatile organic components or noxious materials. However, Magnesium oxide boards are not one of them, thus helping to enhance indoor air quality.
Frost and Freeze-Thaw Resistance: MgO boards can also be used in regions with extreme temperature variations. They easily withstand cold temperatures and do not crack or wear out even when subjected to the most adverse conditions.
All-Weather Resilience: MgO boards can endure different environmental factors such as heavy showers, and high moisture content, without deterioration. This characteristic renders them fit for both internal and external uses.
Absence of Gases and Odors: MgO boards do not release or produce any gases, odors, or emissions at any length of time even when in use for a long time.
Reduced Embodied Energy: A MgO board can be developed with less carbon emissions and lower embodied energy than cement or brick materials. This makes it a sustainable option over the lifespan of the building.
Dimensional Stability: The MgO boards tend to retain their shape even when there are changes in temperature or humidity. As a result, there are no gaps in the material application, even over a long period of time.
Now that the key properties of MgO boards have been discussed enough, let’s learn the step-by-step guide to installing MgO board sheathing.
Necessary Equipment and Materials for MgO Board Installation
To start with, you need the necessary material because the process of installation is quite simple if the appropriate tools and materials are available. Here’s a list to help you get started:
- MgO boards (sized to your project)
- Measuring tape
- Utility knife or circular saw with a diamond blade
- Drill with screwdriver bit
- Corrosion-resistant screws or nails
- Protective gloves and eyewear
- Level
- Sealing tape or weather-resistant adhesive
Get In Touch
Contact Sulfycor to Get Mgo Board Latest Quotation List

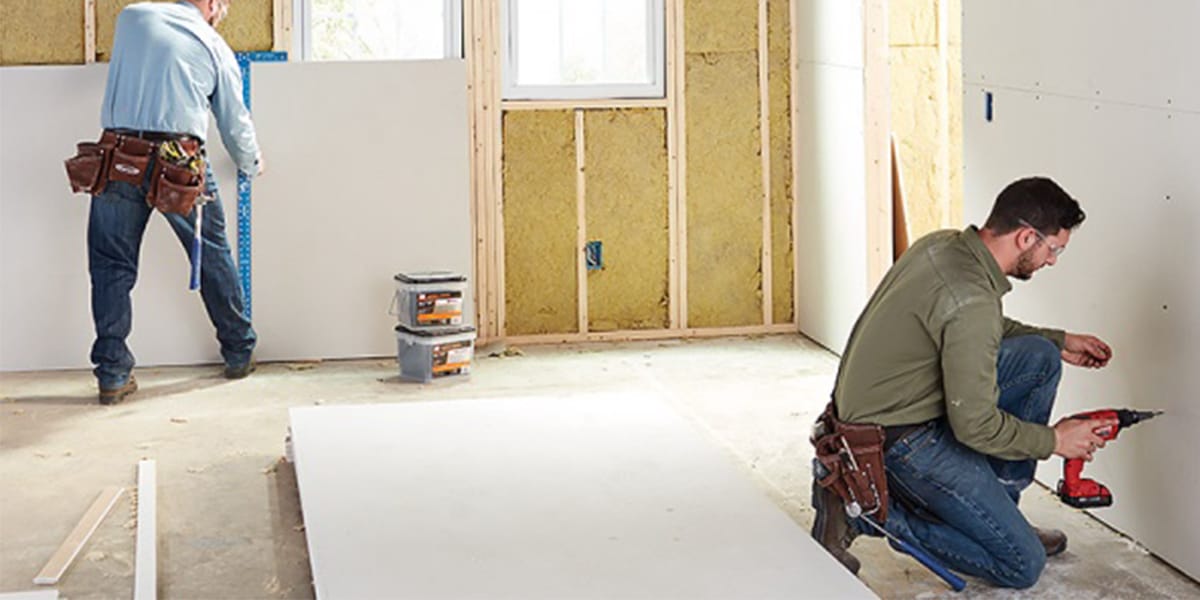
Step-By-Step Tutorial: Installing MgO Board Sheathing
Now, let us get into the installation process. Adhere to the directions below for a professional, clean, and neat finish on your Exterior MgO Board.
Step 1: Measure the Area
Mark the Board: First and foremost, grab a measuring tape and measure the area of sheathing.
Based on the measurements taken, make marks on the MgO board.
Cut the Board: For a cleaner and silicate-free edge, apply a utility knife or circular saw fitted with a diamond blade in proper installation. MgO boards tend to be slightly heavier than gypsum, so the use of a diamond blade makes cuts easier.
Pro Tip: Use gloves and eyewear to prevent cuts and dust particles from irritating you when cutting.
Step 2: Preparation of the Surface
Now, the next step is to clean the surface to ensure good finishing.
- Clean the Surface: Make sure the wall surface where you’ll attach the MgO board is clean and free of debris.
- Check the Framing: Ensure the wall framing is even. Any uneven spots can cause gaps or create weak points once the board is installed.
Step 3: Install MgO Board
- Position the Board: Starting from the bottom, attach the MgO board to the framing. This makes it easier to install, as one can work upwards. Meanwhile, gravity helps keep the board in place.
- Screw or Nail the Board: Attach the board using screws or nails that resist corrosion. Put the screws approximately 6 inches apart from each other at the sides and about 12 inches from each other in the center for added support.
- Check for Level: Place a level tool on the board to check its straightness. Make corrections if needed.
Step 4: Seal the Seams
Sealing the seams between boards is essential for moisture prevention within the boards.
- Apply Sealing Tape: Use weather-resistant sealing tape and stick it in a place where two boards meet.
- Use Adhesive (Optional): Weather-resistant adhesive can provide additional sealing.
- Double-Check Seals: Make sure every joint is sealed, especially if you are operating in humid or wet conditions.
Step 5: Inspect and Finish
- Examine for any Loose Screws or Spaces: Carry out a final observation, ensuring that no hollow spaces exist and all screws are intact and tight.
- Create Neat Edges: Employ sanding blocks to fine the rough edges of the board.
- Paint or Finish (Optional): MgO boards can also be painted for protective reasons and to enhance their aesthetic appeal. However, when painting, ensure the paint is suitable for MgO.
Learn the complete guide to finishing MgO boards.
Why Sulfycor Recommends MGO Boards
Sulfycor believes in providing effective, environmentally friendly solutions. MgO boards are the best solution for individuals looking to build long-lasting structures that are also eco-friendly.
These are the reasons why we recommend the use of MgO boards rather than the use of old-fashioned gypsum boards. Some of these are:
- Chloride-free MgO boards
- 24/7 Support
- ISO certified to meet quality and safety standards.
- Convenient doorstep delivery
- Competitive Pricing
- Expert Guidance
- Sustainability Commitment
Wrap Up
Here, the discussion about how to install MgO board sheathing ends. It’s not as challenging if you have the right equipment and high-quality boards. Because, in the end, it’s all that matters. You are probably building a shed, constructing a house, or finishing off a commercial property; the MgO board will reassure you and give you that fine finish.
You can count on Sulfycor to make the perfect decision for your project. Follow this guide, and in a jiffy, you will have a well-constructed, practical, and attractive structure ready for occupancy.