


08 Aug Backer Board vs Cement Board Which Is Better for Tile Projects
Table of Contents
When you want the best results for tile jobs, cement board is often picked because it is strong and resists water. Experts say cement board is the best for wet places like bathrooms and kitchens, where water is often present. Recent numbers show cement-based backer board is used the most, making up about 70% of what people buy worldwide. You might see that backer board works well on both floors and walls, especially in busy or damp places. What your project needs, like where it is and how much water it will get, will help you choose the right board.
Key Takeaways
Cement board is strong and does not let water in. It works well in wet places like bathrooms and kitchens. But it is heavy and needs careful work to put in right.
Backer boards, like fiber cement types, are lighter and easier to cut. They stop mold and have smooth surfaces. This helps tiles stick better.
It is very important to install the boards the right way. Use the correct screws and tape the seams. Stagger the joints and use waterproofing in wet spots. This stops tile damage and mold.
Pick your board based on where you put the tile. Think about how wet the area is, how heavy the tile is, and how easy it is to handle. This helps your tile last long and stay strong.
Cement board costs more at first, but it saves money later. It keeps out water and mold, so you do not need many repairs. Your tiles will look good for a long time.
Durability
Cement Board
You can count on cement board for strength and long-lasting support under tile. Builders trust it because it stands up well to heavy use and resists mold. Laboratory tests, such as water absorption testing per ASTM C473, show that cement board absorbs very little water—less than 0.5% on the surface and less than 5% by weight. This low absorption helps prevent mold and keeps the board strong over time. However, cement board is not waterproof. If you do not seal the edges or use a waterproofing membrane in wet areas, water can get in. This can cause grout to crumble, tiles to loosen, or even mold to grow behind the tile.
Tip: Always use fiberglass mesh tape and thinset mortar over seams. This creates a strong, even surface and helps prevent cracks.
Cement board can be brittle. If you place screws too close to the edge, the board may crack or break. You should use the right fasteners, such as cement board screws, and avoid driving them too deep. Staggering the seams and preparing the subfloor properly also help prevent weak spots.
Backer Board
Backer board comes in several types, including fiberglass mat gypsum and fiber cement. Like cement board, it is inorganic and resists mold. It also performs well in durability tests, with similar moisture resistance scores. If you install it correctly, backer board can last for many years under tile. The most common problems happen when you use the wrong fasteners, skip mesh tape, or do not stagger the seams. These mistakes can create weak points where the tile may fail.
You should always follow the manufacturer’s instructions for both cement board and backer board. Proper installation is the key to making sure your tile project lasts.
Moisture Resistance
Wet Areas
You need good moisture resistance in showers, bathrooms, and kitchens. Both cement board and backer board help protect against water. But they do not always work the same way. Some brands, like Hardie® Backer Board with HydroDefense® Technology, use MoldBlock® Technology. This helps stop mold and mildew from growing. The board is 100% waterproof all the way through. Water cannot get inside. You get a waterproof board that works well in wet places.
PermaBASE® Cement Board also does a great job in wet areas. It gets top scores on mold resistance tests, like ASTM D3273 and ASTM G21. The board takes in very little water. This keeps it from swelling or getting damaged. It is not called 100% waterproof. But it will not rot, fall apart, or swell if it gets wet.
Here is a simple comparison:
Attribute | Hardie® Backer Board with HydroDefense® | PermaBASE® Cement Board |
|---|---|---|
Mold Resistance | MoldBlock® Technology | Highest score on ASTM D3273 & G21 |
Water Absorption | 100% waterproof | Industry’s lowest rating |
Waterproof | Fully waterproof | Highly moisture resistant |
Durability in Moisture | Superior strength | Will not rot, disintegrate, or swell |
Note: Even if you use waterproof boards, always seal the seams and edges. Add a waterproofing membrane for extra safety in showers.
Dry Areas
In dry rooms, like living rooms or hallways, you do not need as much moisture protection. Both cement board and backer board give a strong base for tile. Mold and water damage are not big problems here. You can pick either one based on price or how easy it is to install. You still need to tape seams and fasten the boards the right way.
Installation
 Cutting and Handling
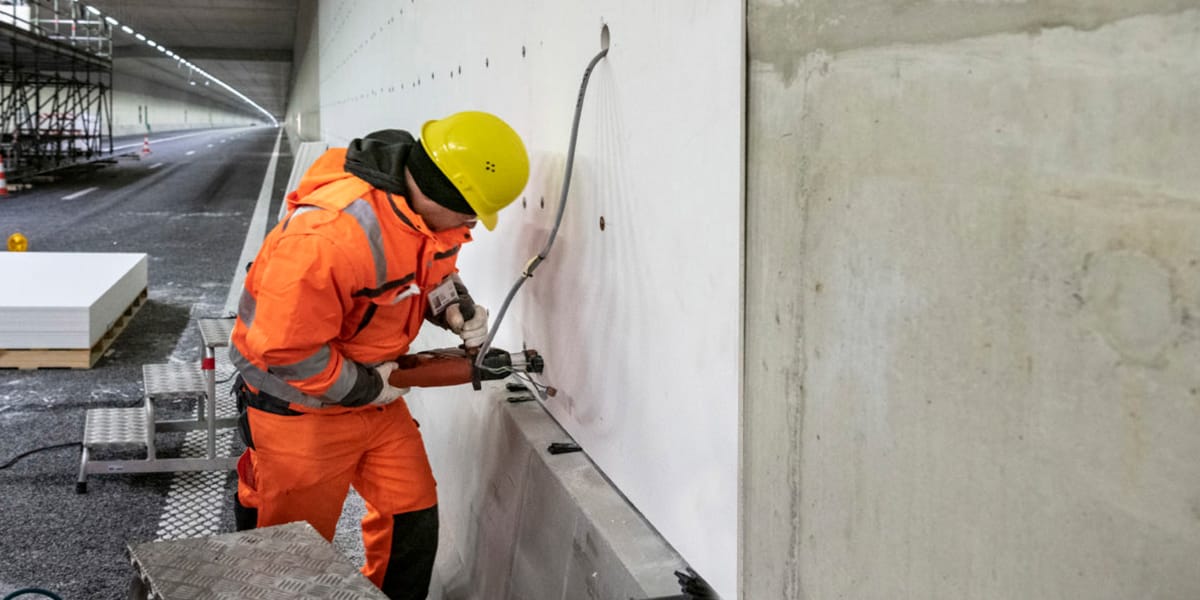 Cutting and Handling
You need to cut cement board and other tile underlayments to fit your space. Use a carbide-tipped scoring knife for straight cuts. For curves or holes, use a jigsaw with a carbide blade or a circular saw with a dust mask. Always wear gloves and eye protection because cement dust can irritate your skin and lungs.
When you handle cement board, lift it carefully. The board can snap if you bend it too much. Carry it flat and support the edges. If you need to cut several pieces, measure each one before you start. Double-check your measurements to avoid waste.
Tip: Score the board deeply on one side, then snap it along the line for a clean break. Sand rough edges with a rasp or sanding block.
Fastening and Support
Proper fastening keeps your tile job strong and long-lasting. Start by preparing a clean, dry surface. Make sure the subfloor or wall studs are stable and level. Place a layer of thin-set mortar on the substrate before you lay the cement board. This step fills gaps and gives even support.
Set the board onto the mortar, leaving a 1/8-inch gap between sheets. Use corrosion-resistant screws made for cement board. Space the screws every 6 to 8 inches and keep them flush with the surface. Do not overdrive the screws, or you may weaken the board.
Stagger the seams so they do not line up with the joints below. This reduces the risk of cracks. Seal all joints with alkali-resistant fiberglass mesh tape and cover them with thin-set mortar. This step prevents water from getting through and stops tiles from cracking.
Common mistakes include using the wrong screws, skipping the mortar bed, or failing to tape the joints. These errors can cause tiles to pop off, grout to crack, or water to seep behind the wall. Always follow manufacturer instructions and industry standards like ANSI A108.11. If you work in wet areas, add a waterproofing membrane over the board for extra protection.
Note: Studs should be spaced no more than 16 inches apart. If you see gaps or flex, add blocking behind seams for extra support.
Surface and Tile Adhesion
Smoothness
You need a flat, smooth surface before tiling. Cement board gives a smooth finish. This helps tile adhesives stick better. It also makes your tile job look neat. Cleaning and filling cracks makes the surface even smoother. Skim coating can help make the base perfect. If the surface is even, tiles will sit flat and look nice.
Backer board is stable and resists moisture. The texture of backer board changes how glue spreads. If the board feels rough or bumpy, tiles may not sit flat. You might see bumps or spaces under the tiles. Always check for dust or dirt before starting. Clean boards help glue stick well and stop tile problems later.
Tip: Do not use pre-primed boards with acrylic or silicone coatings. These coatings can make the tile stick less and weaken your project.
Adhesion
Good adhesion keeps tiles in place for a long time. The board you pick and the glue you use both matter. Cement boards work well with strong adhesives. For example, SikaTile®-350 Flex Set adhesive works great:
Substrate and Tile Type | Test Method | Typical Shear Bond Strength |
|---|---|---|
Porcelain Tile on Cementitious Surface | ANSI A118.15 Section 7.2.5 | |
Quarry Tile on Plywood | ANSI A118.11 Section 4.1.2 | 150 – 250 psi (4 weeks) |
You can see cement board gives higher bond strength than plywood. This means tiles stay in place, even in busy spots.
Backer boards also work well with the right thin-set adhesive. The board’s surface and texture affect how glue sticks. Always spread glue evenly and press tiles down firmly. This helps your tiles stay put for a long time.
A smooth, clean, and steady board surface gives the best results for tile sticking and finish.
Load Capacity
Heavy Tile
When you install heavy tile, you need a strong and stable base. Cement board and backer board both provide a solid surface for large or thick tiles. You can trust these boards to hold up under the weight of stone, porcelain, or oversized ceramic tiles. The boards do not bend or sag when you place heavy tiles on them. This helps prevent cracks in your grout or tile.
If you plan to use heavy tile, always check the manufacturer’s weight limits. Most cement boards support standard and heavy tiles with ease. You should also make sure your floor or wall framing is strong enough. The board itself does not make the floor stiffer. The strength comes from the framing below. If the floor moves too much, even the best board cannot stop tiles from cracking.
Tip: Use the right screws and follow the spacing guidelines. Fasten from the center outward to spread the load evenly and avoid stress points.
Underlayment Support
You need proper support under your tile project. Cement board and backer board act as a stable layer between the tile and the subfloor or wall studs. When you walk or place furniture on the tile, the load spreads across the board and tile system. This helps prevent weak spots and keeps your tiles secure.
The thinset mortar under the board fills gaps and removes air pockets. You do not need full coverage, but you must have enough contact to avoid voids. This step stops the board from flexing or making hollow sounds. Always use screws made for cement board, not drywall screws. Place them as the manufacturer suggests, usually every 6 to 8 inches.
A well-installed backer board does not add stiffness to the floor, but it does create a flat, even surface. This support keeps your tile job looking good and lasting longer. If you skip steps or use the wrong fasteners, you risk loose tiles or cracked grout. Always follow best practices for a strong, reliable tile base.
Backer Board Types
Cement-Based
 Cement-Based
Most tile projects use cement-based backer boards. These boards are made from cement, water, silica, and limestone. They are strong and last a long time. They also resist water, mold, and rot. You can put them on floors or walls. They work well in wet places like showers or kitchens. Many pros pick cement-based boards because they hold up heavy tiles and last for years.
Here is a simple chart to compare backer board types:
Type | Composition | Key Properties | Best Use Cases |
|---|---|---|---|
Cement Backer Board | Cement, aggregates | Strong, durable, water/mold resistant, heavy | Floors, walls, wet areas |
Fiber Cement Board | Cement + cellulose fibers | Lighter, flexible, easy to cut, moisture resistant | Wet areas, easier installation |
Foam Backer Board | Foam core + coated facers | Lightweight, easy to handle, dust-free | Bathrooms, kitchens, walls |
Mat Gypsum Board | Gypsum core + fiberglass mats | Water-resistant, easy to install, cost-effective | Low moisture areas, backsplashes |
Cement-based boards do have some downsides. They are heavy and not easy to cut. You must add extra waterproofing in wet spots. If you skip this, water can get in and cause trouble later.
Tip: Always seal seams and edges with waterproof tape and mortar for best results.
MgO Board
Magnesium oxide (MgO) boards are now used in some tile jobs. These boards are tough, flexible, and resist water. You can use them in wet places. They are also easy to carry and cut. But there are some risks you should know.
MgO boards can get damaged by water and may corrode. Some countries do not recommend them anymore because of these problems. Studies show MgO boards can break down if they stay wet for a long time. This can mean expensive repairs.
MgO boards fight water and mold but may not last as long as cement-based boards.
They are easier to cut and install, but building codes do not always allow them.
Fiber cement boards are now a safer pick for most tile jobs.
⚠️ Note: Always check local building codes and warranty rules before using MgO boards for your project.
Typical Uses
Floors
You often see cement board and backer board used as underlayment for tile floors. These boards give you a strong, stable base that resists moisture and prevents tile cracks. For most floor projects, you should use a 1/2-inch thick cement board. This thickness supports heavy foot traffic and large tiles. Always apply a layer of thinset mortar under the board, then screw it down every 8 inches. Stagger the joints to avoid weak spots. In wet areas, such as bathrooms or laundry rooms, you should add a vapor barrier behind the board for extra moisture protection. Grip-Rite MORE™ Backer Board works well for both homes and commercial spaces because it resists mold and water, and meets building codes.
Walls
You can use cement board or backer board on walls in showers, kitchens, or any area where you want to install tile. For walls, a 1/4-inch thick board is usually enough. Attach the board directly to the wall studs. You do not need thinset under the board for walls, but you should always tape and mud the seams. Cement board stands up to water and does not warp or rot, making it a better choice than drywall in wet spaces. In commercial buildings, you often see cement board used behind tile in public restrooms and kitchens because it meets fire and sound requirements.
Countertops
For tile countertops, you need a flat, moisture-resistant surface. A 1/4-inch fiber cement board or cement board gives you this support. Install the board over a plywood base to add strength. Secure it with screws and make sure all seams are taped and covered with thinset. In kitchens and bathrooms, a vapor barrier under the board helps protect against water damage. Cement board works well for countertops because it does not swell or break down when exposed to water. You get a long-lasting, easy-to-clean surface that supports heavy use.
Tip: Always check the recommended board thickness and installation method for your specific project. Using the right board in the right place helps your tile last longer and look better.
Application | Installation Notes | Moisture Protection | |
|---|---|---|---|
Floors | 1/2 inch | Thinset under board; stagger joints; screw every 8 inches | Vapor barrier in wet areas |
Walls | 1/4 inch | Attach to studs; tape seams | Vapor barrier in wet areas |
Countertops | 1/4 inch | Over plywood; tape seams | Vapor barrier in wet areas |
Cost
Price
You want to know how much you will pay for cement board or backer board. The price includes both the board and the work to put it in. Homewyse says that in July 2025, you will spend $8.10 to $9.02 for each square foot of cement backer board with installation. This price covers most brands and types of cement-based backer boards. If your project is tricky or needs extra waterproofing, the cost can go up. You should also plan for some waste if you need to cut many pieces to fit.
If you look at other underlayment choices, cement board and backer board cost more at first. Drywall or plywood might look cheaper when you start. But these do not give you the same moisture protection or strength. When you pick a good backer board, you get what you pay for.
Tip: Always ask your installer for a full quote. This helps you avoid surprises and lets you plan your budget better.
Value
You should think about more than just the first price when picking a backer board. The value over time is just as important as the starting cost. Cement board and tile backer boards last longer and need less fixing than cheaper things like drywall. They fight water, mold, and damage from bumps. This means you will not have to fix tiles or repair water damage as much.
Criteria | Cement Board | Drywall |
|---|---|---|
Upfront Cost | Higher material and installation costs | Lower initial cost |
Durability | Highly durable, impact and moisture resistant | Less durable, prone to moisture damage |
Moisture Resistance | Waterproof and mold resistant | Water-resistant but not waterproof |
Maintenance Costs | Lower over time due to resistance to damage | Higher due to susceptibility to moisture |
Installation Ease | Difficult, requires skilled labor | Easier, DIY-friendly |
Long-term Value | Better lifecycle cost due to durability | Potentially higher replacement costs |
You pay more at the start, but you save money later. Cement board and backer board keep your tile safe from water and mold. You do not have to pay for repairs as often, and your tile stays nice for years. This makes them a smart pick for bathrooms, kitchens, and any place where water is a problem.
Pros and Cons
Cement Board
Cement board gives a strong base for tile. Many pros use it because it holds up to heavy use and water. You can put it on floors or walls in homes and businesses. Here are the main good and bad points:
Pros:
It is tough and does not bend under heavy tiles.
It resists water and does not fall apart when wet.
You can find it in most stores and it is not too pricey.
It works for both floors and walls.
It is very strong, so it is great for showers.
Cons:
It is heavy and hard to move, especially big pieces.
It is hard to cut and makes rough, dusty messes.
The edges can break if you put screws too close.
You need to add a waterproof layer in wet places.
Many people like cement board because it lasts and costs less, but it can be hard to carry and messy to cut.
Board Type | Pros | Cons |
|---|---|---|
Cement Board | Strong, resists water, good for floors and walls, not expensive | Heavy, hard to cut, makes dust, needs waterproofing in wet spots |
Backer Board
Backer board is easier to use, especially fiber cement or glass mat types. Many people like fiber cement backer boards such as HardieBacker. They are easier to cut and have a smoother surface. You can carry and install them with less mess. Here are the main good and bad points:
Pros:
Easier to cut and move than cement board.
Stops mold, especially with new technology.
Smooth surface helps tiles stick better.
Lighter, so it is easier to put in place.
Good for both home projects and pros.
Cons:
Not as stiff as cement board, so it can bend if hit hard.
Some, like foam boards, are not as strong.
Costs a bit more than cement board.
Some types need extra waterproofing in wet spots.
Many people like fiber cement backer boards because they are easy to handle and cut, even if they cost a little more.
Board Type | Pros | Cons |
|---|---|---|
Fiber Cement Backer Board | Easy to cut, stops mold, smooth surface | Heavier than foam, edges can break, costs more |
Glass Mat Backer Board | Light, easy to put in, stops mold | Not as stiff, not best for wet or busy areas |
Choosing the Right Board
Project Needs
 Project Needs
You need to match the right board to your tile project. Start by looking at where you plan to install the tile. Wet areas, such as showers or bathrooms, need boards that resist water and mold. Dry areas, like living rooms, do not need as much moisture protection. Heavy tiles or large-format tiles require a strong and stable surface. If you work in a cold climate, you might want a board that adds insulation.
You also need to think about the subfloor or wall structure. A stable and flat base helps prevent tile cracks and uneven surfaces. If your project involves an older home or a renovation, check if the framing can support the weight of cement board. Some boards are heavy and hard to move, while others are lighter and easier to cut.
Here are the main factors you should consider:
Moisture Stability: Choose a board that resists swelling and buckling in wet places.
Load Capacity: Pick a board that supports heavy or large tiles.
Adhesion: Make sure the board bonds well with modern tile adhesives.
Flex and Lippage: Select a board that reduces flexing and keeps tiles even.
Surface Evenness: Use a board that gives a smooth, flat surface.
Cutting and Fitting: Consider how easy it is to cut and fit the board on-site.
Ease of Installation: Think about the weight and handling, especially if you plan to do the work yourself.
Compatibility: Check that the board works with your chosen tile and adhesive.
Environmental Impact: Look for boards with safety certifications if you care about eco-friendly options.
Environmental conditions also play a big role. The table below shows how humidity, temperature, and subfloor type affect your choice:
Environmental Condition | What You Need to Know | Cement Board | Alternatives |
|---|---|---|---|
Humidity (Wet Areas) | Needs high moisture resistance | Water-resistant but heavy; seal joints | Foam, glass mat gypsum, fiber cement; use waterproof membrane |
Temperature | Can cause expansion or cracking | May crack if not installed right | Foam and fiber cement handle changes better |
Subfloor Type | Must be stable and dry | Good for heavy-duty use | Fiber cement for moist/exterior; plywood only in dry areas |
Installation & Handling | Weight and ease matter | Heavy, needs special tools | Foam and Kerdiboard are lighter, easier |
Tip: No single board fits every job. You may need to use different types for different parts of your project.
Checklist
Use this checklist to help you pick the right board for your tile project:
Is your project in a wet or dry area?
Do you need extra moisture resistance?
Will you use heavy or large-format tiles?
Is your subfloor or wall framing stable and flat?
Can you handle the weight and size of the board?
Does the board work with your chosen tile adhesive?
Do you need insulation or eco-friendly features?
Have you checked local building codes and manufacturer warranties?
Will you follow the right installation method for your board type?
Do you have the right fasteners and tools?
Always follow manufacturer instructions and industry guidelines, such as ANSI A108.01 and the TCNA Handbook. This ensures your tile project lasts and looks great.
If you answer these questions, you will find the best board for your needs. You will avoid common problems like cracked tiles, mold, or water damage. Your tile project will stay strong and beautiful for years.
Pick your tile board based on what your project needs. Cement board is best for wet places because it keeps out water and holds heavy tiles. But it is heavy and you must install it carefully. Foam and fiber cement boards are lighter and easier to use. They also have waterproofing built in. This makes them good for small or tricky jobs. Always read and follow the manufacturer’s instructions. Think about the total cost, how long the board will last, and how hard it is to install. Check your list to make sure your tile job looks good and lasts a long time.
FAQ
What is the main difference between cement board and backer board?
Cement board uses cement and fibers for strength and moisture resistance. Backer board includes several types, such as fiber cement or foam. You should choose based on your project’s moisture needs and installation preferences.
Can you install tile directly on drywall?
You should not install tile directly on drywall in wet areas. Drywall absorbs water and can grow mold. Always use a proper backer board or cement board for showers, bathrooms, and kitchens.
Do you need to waterproof cement board before tiling?
You must waterproof cement board in wet areas. Cement board resists water but does not stop it completely. Use a waterproofing membrane or sealant on seams and surfaces for best results.
Which board is easier to cut and install?
Fiber cement and foam backer boards are lighter and easier to cut.
Cement board is heavier and creates more dust when cut.
You will find backer boards easier for DIY projects.
How thick should the board be for floors and walls?
Use 1/2-inch thick board for floors to support heavy loads. For walls, 1/4-inch thick board works well. Always follow manufacturer guidelines for your specific tile project.