

09 Apr Step-by-Step Guide to Installing MgO Wall Decorative Panels at Home
Table of Contents
You may wonder if you can really upgrade your home with a mgo wall decorative panel. Yes, you can! Many people choose these panels because they are fire resistant and eco-friendly. They also look nice in any room. These panels work well in living rooms and other spaces. You can paint them or add tiles to make them special. The best thing is you do not need to be an expert. With some easy tools and a little patience, you will have a wall that is safe and stylish.
Feature | Description | Applications |
|---|---|---|
Fire Resistant | Handles heat up to 1200°C, does not burn, helps keep you safe and meets building rules. | Firewalls, commercial buildings, escape routes |
Eco-Friendly | Has no asbestos, no formaldehyde, and low VOC, so it keeps indoor air healthier. | Green buildings, healthcare, schools |
Versatile | Works inside or outside and can be put up in many ways. | Homes, businesses, factories |
Decorative | You can paint, cover with veneers, tiles, or laminates to make it look how you want. | Living rooms, stores, special walls |
Key Takeaways
MgO wall decorative panels do not catch fire easily and are good for the environment. They are a safe and nice-looking choice for any room.
Get all the tools and materials you need before you start. This helps your project go smoothly.
Measure carefully and plan where each panel will go. This is important for a good result and a neat look.
Always seal the joints and edges. This stops water from getting in and helps your MgO wall panels last longer.
Clean and check your MgO wall often. This will help it look nice for many years.
Tools and Materials for MgO Wall Decorative Panel
Before you start your project, you need to gather all the tools and materials for installation. Having everything ready will make your work smoother and safer. You want to feel confident when you begin installing mgo wall decorative panels. Let’s break down what you need.
Essential Tools
You will use several tools and materials for installation. Here’s a handy list to help you get started:
Carbide tipped scoring knife: This tool helps you cut mgo boards cleanly.
Dust reducing circular saw: You can use this for bigger cuts and less mess.
Fiber cement shears: These give you precise cuts on your panels.
Measuring tape: You want your panels to fit perfectly, so measure twice.
Level: This keeps your panels straight.
Corrosion-resistant screws: These hold your mgo panels tight to the wall.
Adhesive: You need this to stick the panels to the surface.
Polyurea or modified epoxy seam filler: This fills in the joints for a smooth look.
Pencil or marker: Mark your measurements before you cut.
Tip: When selecting the right fireproof panels, always check the manufacturer’s instructions for the best tools and materials for installation.
Materials Checklist
You want to use the right materials for a strong and long-lasting wall. Here’s a quick table to guide you:
Material Type | Recommendation |
|---|---|
Adhesives | Use alkaline-resistant bonding agents; standard mastic may degrade due to high pH. |
Fasteners | Stainless steel or coated screws to prevent corrosion. |
Joint Treatment | Fiberglass mesh tape and alkali-resistant joint compound for durable seams. |
Choosing the right tools and materials for installation helps you avoid problems later. It also makes selecting the right fireproof panels easier.
Safety Gear
Safety comes first when you work with mgo panels. You should always protect yourself. Here’s what you need:
Safety Gear | Purpose |
|---|---|
To keep dust and debris out of your eyes. | |
Dust mask/respirator | To avoid breathing in small particles. |
Strong gloves | To protect your hands from cuts. |
Steel-toed boots | To keep your feet safe. |
Don’t skip safety gear. Even simple jobs can cause accidents. When you have the right tools and materials, you can focus on making your wall look great.
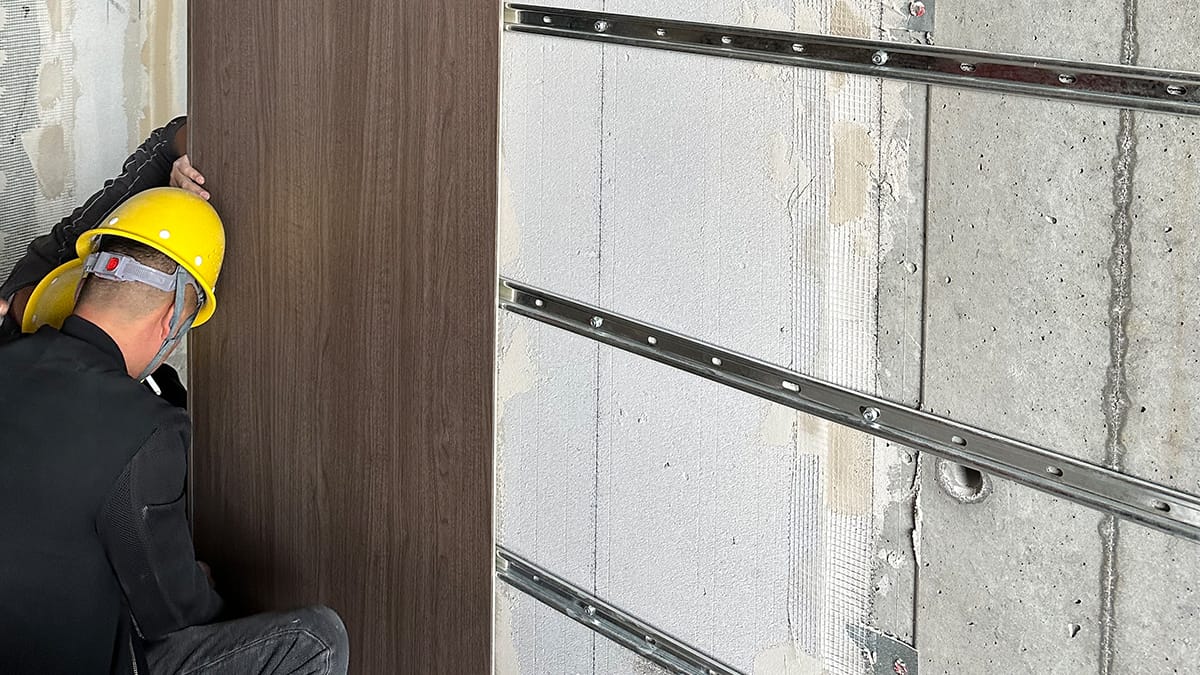
Preparation and Wall Readiness
 Wall Preparation
 Wall Preparation
You want your new wall to last and look great. Start by getting the surface ready. Remove any old paint, wallpaper, or loose debris. Make sure the wall feels dry and smooth. If you see any holes or cracks, patch them up before you move on. Getting the surface ready means you will not have problems later.
Next, acclimate your MgO boards. Bring them into the room and let them sit for three to five days. Keep your heating or cooling system running. This step helps prevent cracks after installation. Gather all your tools and materials so you do not have to stop in the middle of your project. Getting the surface ready and having everything close by makes preparation for installing much easier.
Tip: Handle corners and joints with care. Use fine-grit sandpaper if you need to smooth the MgO surface, but do not over-sand.
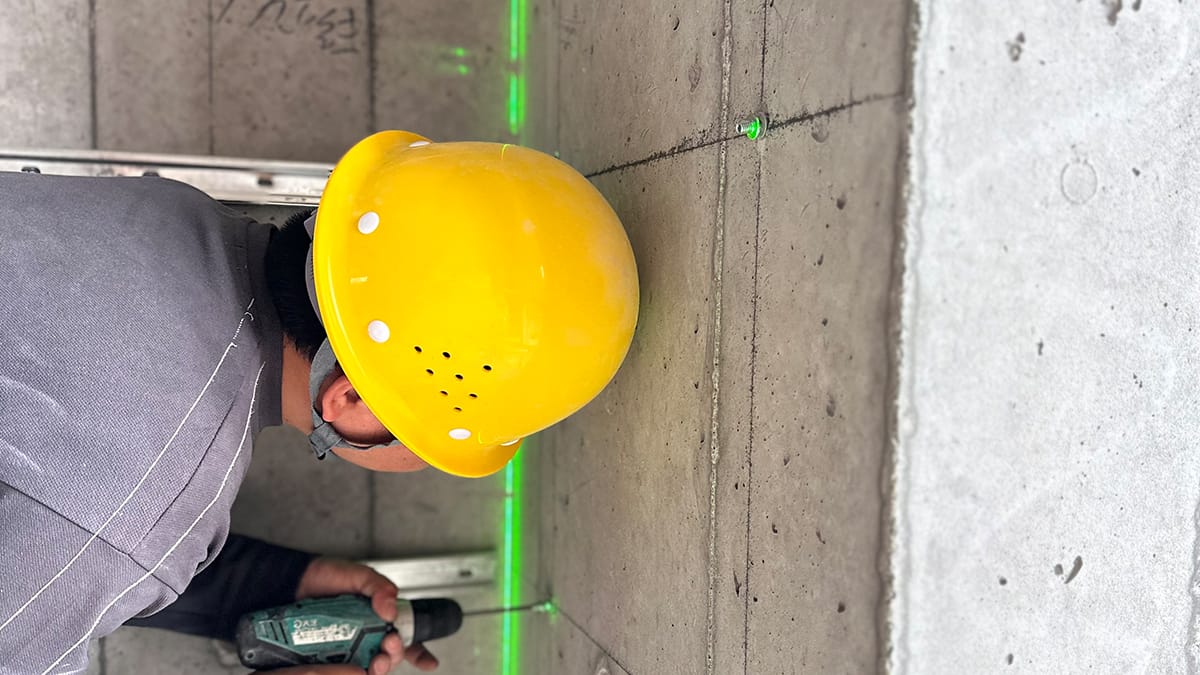
Measuring and Marking
Accurate measuring and marking help you avoid mistakes. Start by marking the layout on your wall. Use a pencil or chalk to outline where each panel will go. This step is key for planning modular wall installation. Grab your tape measure and a square ruler. Measure and mark cutting lines on your MgO boards. For small adjustments, use a scale that measures to 0.01g for extra precision. Careful measuring and marking make the rest of the job go smoothly.
Planning Panel Layout
Take time for planning before you start attaching panels. Think about how you want your wall to look. Planning modular wall installation lets you choose finishes, colors, or even custom designs. You can match your style or create a unique look. Good planning keeps the wall looking consistent for years. When you focus on planning, you make sure the final result fits your vision. Preparation for installing MgO panels always works best when you plan ahead.
Step-by-Step Installation Process
Ready to get started? This step-by-step installation process will help you install your mgo wall decorative panel like a pro. You will learn how to handle modular wall panels, from cutting mgo boards to sealing joints. Let’s break down each part so you can follow the steps to install modular walls with confidence.
Cutting MgO Boards
Cutting mgo boards is the first step in installing fireproof wall panels. You want clean edges and as little dust as possible. Here’s a quick guide to the best tools and techniques:
Tool/Technique | Description | Effectiveness for Clean Edges and Dust Minimization |
|---|---|---|
Circular Saw | Use a thin carbide blade for clean, precise cuts. | High – minimizes chipping and dust. |
Plunge Saw | Use a diamond blade for straight, controlled cuts. | High – ensures clean edges. |
Score and Snap Method | Score and snap thinner boards (up to 8 mm). | Moderate – only for thin boards. |
Professional installers often use handheld circular saws for small jobs and benchtop table saws for medium boards. If you have thick or reinforced modular wall panels, a band saw works best. Always use diamond-tipped or carbide blades for mgo. These blades last longer and give you a smoother finish.
Tip: Always cut mgo boards in a well-ventilated area. Wear a dust mask and safety glasses to protect yourself from fireproof dust.
When cutting mgo wall decorative panel, measure twice and mark your lines clearly. This helps you avoid mistakes and keeps your modular wall panels looking sharp. Cutting mgo boards with the right tools makes the rest of the installation much easier.
Laying the MgO Boards
Now you can start laying the mgo boards. This step is all about positioning the boards and making sure your modular wall panels line up perfectly. Follow these steps to install modular walls and keep your fireproof wall panels stable:
Lay the mgo boards on your prepared surface. Follow your layout plan and markings.
Place the first board in one corner. Align it with the wall or floor edges.
Use a level to check that the board is straight. Adjust if needed.
Continue laying the mgo boards row by row. Keep seams tight, but leave a small gap for expansion.
For wall installations, start at the bottom and work your way up. This helps with alignment and stability.
When laying the mgo boards, always keep a 1/8-inch gap between panels if you use wood frames. For steel frames, a 1/16-inch gap works best. This small space lets your modular wall panels expand and contract without cracking. Fill the gap with a high-quality fireproof sealant to keep your installation safe.
Note: Positioning the boards correctly is key. Take your time and double-check each panel before moving on.
Laying the mgo boards with care will make your modular wall panels look even and professional. This is one of the most important steps to install modular walls.
Fastening and Securing
Fastening the boards securely is the next step in installing fireproof wall panels. You want your modular wall panels to stay in place for years. Here’s a table to help you get the fastening right:
Details | |
|---|---|
Fastening Material | Use corrosion-resistant screws for secure attachment. |
Framing Compatibility | Works with timber studs, steel studs, and concrete/masonry walls. |
Screw Spacing | Space screws every 6–8 inches along studs. |
Expansion Gap | Leave a 2–3mm gap between panels to prevent cracking. |
When fastening, start at the center of each mgo wall decorative panel and work outward. This helps prevent warping. Make sure you do not overtighten the screws, as this can damage the fireproof panels. If you are attaching panels with connectors, follow the manufacturer’s instructions for your modular wall panels.
Tip: Fastening the boards securely means your modular wall panels will not shift or move over time.
If you are installing fireproof wall panels on a large wall, check your screw pattern often. This keeps your modular wall panels even and prevents gaps. Attaching fireproof wall panels with the right technique gives you a strong, safe installation.
Sealing Joints
Sealing joints is the final step in the step-by-step installation process. Treating joints and seams keeps your modular wall panels fireproof and stops moisture from getting behind the panels. Here’s how to do it right:
Clean the surface and make sure it is flat and dry before sealing.
Leave a 1/8-inch gap between each mgo board for expansion.
Fill the gap with a fire-rated sealant or high-quality joint compound. Use a putty knife to press the compound into every seam and smooth it out.
Apply fire-rated joint tape and compound at each seam. This boosts fire resistance and strengthens your modular wall panels.
Let the sealant dry before moving on to painting or finishing.
Note: Sealing joints and treating joints and seams is not just about looks. It keeps your fireproof wall panels safe and long-lasting.
After sealing, you can prime and paint your mgo wall decorative panel. Use a primer that bonds well with mgo, like acrylic-based or masonry primers. This step protects your modular wall panels and gives them a clean finish.
By following this step-by-step installation process, you can install modular wall panels that look great and last for years. Each step, from cutting mgo boards to sealing joints, helps you create a safe, fireproof, and stylish space. Modular wall panels make installing fireproof wall panels easy, even if you are new to DIY projects. Just remember to check your work at every stage and enjoy your new mgo wall decorative panel!
Finishing and Final Touches
Painting or Decorative Finish
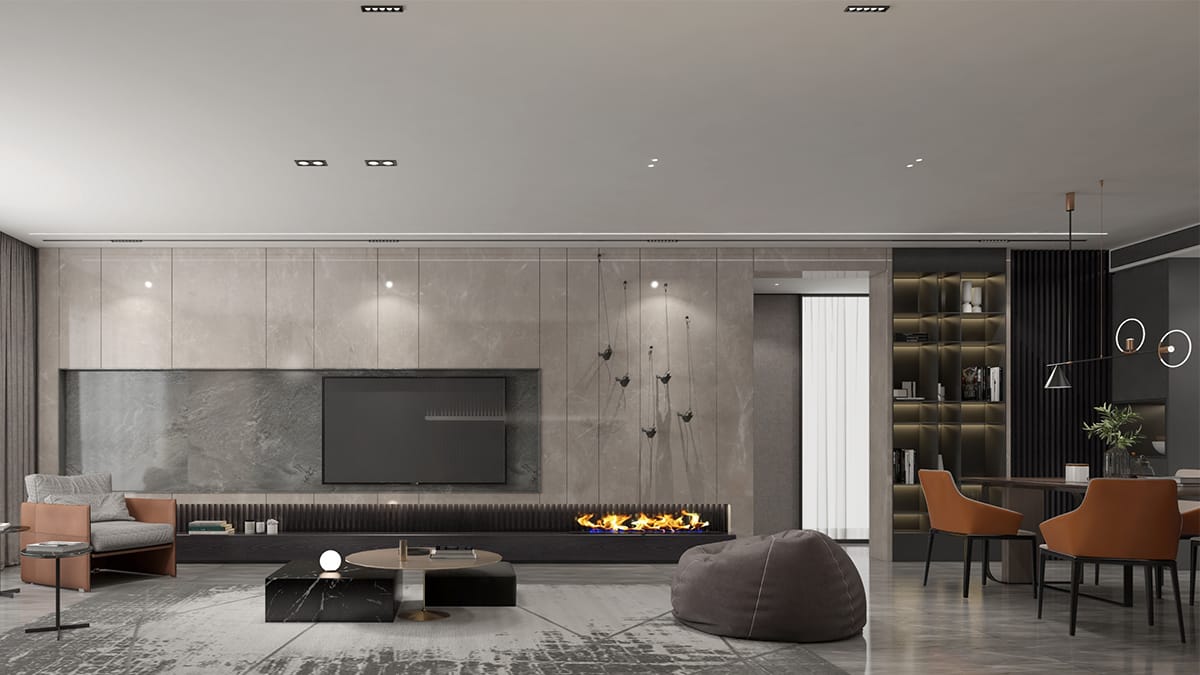 Painting or Decorative Finish
You have finished the main installation, and now it is time to make your mgo wall look amazing. You can choose from many finishes for your mgo panels. Here are some popular options:
Stucco or synthetic stucco
Wallpaper
Plaster
Stone, tile, or brick
EIFS and SIPS systems
Before you start, always use a primer made for concrete or masonry. Mgo panels have an alkaline surface, so a good primer helps the paint or finish stick better. This step also makes the color look even and last longer. Some specialty paints can bond with mgo and give you a strong, UV-resistant finish. If you want the best results, ask your paint supplier for advice.
Here is a simple way to finish your mgo wall:
Pick a high-quality paint or finish that works with mgo.
Apply primer evenly with a roller or brush.
Let the primer dry fully.
Paint or add your chosen finish. Use smooth strokes for a neat look.
If you want texture, use a trowel or special tool.
Seal the surface with a clear sealant to protect against stains and moisture.
Tip: Always let each layer dry before adding the next. This helps your mgo wall stay beautiful for years.
Cleaning Up
After installation and finishing, you want your space to look clean and fresh. Start by picking up all tools and leftover materials. Wipe down your mgo panels with a soft cloth and mild soap. This removes dust and keeps the surface looking new.
Take a close look at your finished wall. Check for any missed spots, uneven paint, or small gaps. If you see any issues, touch them up right away. Regular care keeps your mgo wall in top shape. Here is a handy table for long-term maintenance:
Maintenance Task | How Often | Tools Needed | Why It Matters |
|---|---|---|---|
Visual Inspection | Twice a year | Flashlight, checklist | Find problems early |
Surface Cleaning | Every month | Mild soap, soft cloth | Keeps mgo panels clean and bright |
Joint and Seam Check | Once a year | Putty knife, joint compound | Stops air or water from getting in |
Touch-up Painting | As needed | Latex paint, primer | Keeps color even and protects mgo |
Structural Check | Every 2–3 years | Moisture meter, level | Makes sure your wall stays strong |
Note: Good cleaning and regular checks help your mgo wall last longer and look its best.
By following these steps, you finish your mgo wall decorative panel installation with confidence. Your wall will look professional and stay strong for years.
Tips and Troubleshooting for Installing Modular Wall Panels
Common Mistakes to Avoid
When you start installing modular wall panels, you want everything to go smoothly. Many people ask, “Can I install modular wall panels by myself?” Yes, you can! But you should watch out for some common mistakes. Here are things you should avoid:
Using general-purpose adhesives for heavy or high-impact mgo panels. Always pick a strong construction adhesive that the manufacturer recommends.
Failing to secure mgo panels properly. Combine adhesive with screws or other fasteners for extra strength.
Skipping a layout plan. If you do not sketch your layout, you might end up with uneven mgo panels or awkward cuts.
Overlooking expansion gaps. Leave a small gap around the edges of your mgo panels so they can move a little without cracking.
Using the wrong tools. High-quality tools help you make clean cuts and line up your mgo panels perfectly.
Neglecting safety. Always wear gloves, goggles, and a dust mask when working with mgo.
Skipping final touches. Seal the seams and clean your mgo panels for a polished look.
Underestimating maintenance. Clean and check your mgo panels often to keep them looking new.
Tip: Planning and using the right tools make installing modular wall panels much easier and help you get a professional finish.
Quick Fixes
Sometimes, even with careful installation, you might see gaps or uneven spots between your mgo panels. You may wonder, “How long does it take to install modular wall panels?” The answer depends on your prep and how well you handle these quick fixes. Here are some easy solutions:
Method | Description |
|---|---|
Filling joints | Use the right mud to fill any gaps. Smooth it out for a neat finish. |
Caulk | Apply non-shrinking, paintable caulk in the gap. Tool it off, then prime. |
Bevel or rabbet the edges of your mgo panels to help prevent future gaps. |
If you notice uneven mgo panels, gently sand the high spots and fill the low ones. Always check your work as you go. If you ask, “Can I install modular wall panels by myself?”—yes, you can, especially if you follow these tips. With good planning, the right tools, and a little patience, you will find that installing modular wall panels is a project you can handle. Most people finish the installation in a weekend, so when you ask, “How long does it take to install modular wall panels?”—the answer is, not long at all!
You can install mgo wall decorative panels at home if you follow each step and pay attention to detail. Start by cleaning your space and gathering all your tools. Plan your layout, measure, and cut the mgo boards with care. Fasten the boards, treat the seams, and use the right primer for a smooth finish. Always seal edges and joints to keep your mgo wall strong. If you run into big problems, ask a pro for help. Most people find that with patience, their mgo wall looks great.
FAQ
How long does it take to install MgO wall panels?
Most people finish in one weekend. If you plan well and have your tools ready, you can work faster. Take your time for the best results.
Can I cut MgO panels with regular tools?
You can use a circular saw with a carbide blade or a scoring knife. Always wear safety gear. Regular wood saws may not work well.
Do I need to seal the joints between panels?
Yes, you should seal all joints. This keeps out moisture and helps your wall last longer. Use a fire-rated sealant or joint compound.
Can I paint MgO panels right away?
You need to use a primer first. Pick one made for masonry or concrete. After the primer dries, you can paint or add your favorite finish.