

21 Jul Standard Subfloor Thickness Tips For Perfect Tile Floors
Table of Contents
You want your flooring to last, right? The secret often lies in choosing the right standard subfloor thickness. If you skip the right subfloor or go too thin, you risk cracks, squeaks, and poor stability. For tile, you typically need at least 1 1/4″ of subfloor, while hardwood flooring calls for a sturdy sub-floor, too. The thickness you pick impacts both durability and stability, so always check your joist spacing and sub-floor material before installation. High quality starts with the right subfloor and standard subfloor thickness. Never forget to check local codes or manufacturer specs for your next flooring project.
Key Takeaways
Pick the right subfloor thickness to keep floors strong. Use at least 1 1/4 inches for tile. Use 3/4 inch plywood for hardwood.
Look at your joist spacing before you choose subfloor thickness. If joists are far apart, use thicker subfloors. This helps stop cracks and squeaks.
Use good materials like plywood for more strength. Plywood also helps keep out moisture. This is important under tile and hardwood floors.
If your subfloor is thin, add more plywood layers. This stops the floor from moving, cracking, or making noise.
Always follow local building codes and manufacturer instructions. This helps make your floor safe and last a long time.
Why Subfloor Thickness Matters
Risks of Thin Subfloors
If you use a subfloor that is too thin, you set yourself up for a lot of problems. Thin subflooring cannot give your flooring the support it needs. Here are some common issues you might face:
The floor feels bouncy or unstable when you walk on it.
Tiles can crack or even lift because the subfloor moves too much.
Hardwood floors may squeak, creak, or even warp over time.
Thin subfloor thickness leads to poor structural integrity, which means your floor can sag or become uneven.
Moisture can get in, causing the sub-floor to swell, grow mold, or rot.
You might notice more noise between floors because thin subfloors do not block sound well.
Tip: Using cement backer board or underlayment alone will not fix a weak subfloor. You need the right subfloor thickness for real stability.
Benefits of Proper Thickness
When you choose the right subfloor thickness, you give your flooring the best chance for long-term success. Here’s what you gain by following the standards:
You get a sturdy, stable base that supports your tile or hardwood flooring.
Proper sub-floor thickness helps prevent creaking, squeaking, and cracking.
The right thickness improves structural integrity, so your floor stays level and strong.
Thicker subfloors help block noise and keep your home quieter.
You protect your floor from moisture problems, like warping or mold.
Your flooring lasts longer, saving you money on repairs or replacements.
A good subfloor means better durability and stability for your whole floor. You want your floor to feel solid and look great for years. Always follow the recommended subfloor thickness and check your local building codes. This way, you make sure your sub-floor supports your flooring and keeps your home safe and comfortable.
Standard Subfloor Thickness
 Tile Subfloor Thickness
 Tile Subfloor Thickness
When you plan for tile installations, you need to pay close attention to the standard subfloor thickness. Tiles are heavy and do not bend, so your subfloor must be strong and stable. If you use a subfloor that is too thin, your tiles can crack or come loose. The standard thickness of sub-floor for tile is usually at least 1 1/4 inches. This total comes from layering plywood or OSB with a cement backer board.
Here’s a simple table to help you see the most common recommendations for tile floors:
Aspect | Details |
|---|---|
Minimum Subfloor Thickness | 3/4 inch plywood (preferred) or OSB; 1-1/4 inch total for mortar bed installations |
Layering | 3/4″ subfloor + 1/2″ plywood + 1/4″ cement backer board set in thinset |
Cement Backer Board | 1/4 inch thick, installed over subfloor with thinset and screws |
Deflection Standard | L/360 deflection limit to prevent tile cracking |
Installation Notes | Backer board set in mortar, not just glued; multiple layers improve stability |
You might wonder if cement backer board adds strength to your floor. It does not. Cement backer board helps with moisture and gives tiles a good surface, but it does not make your floor stiffer. If your subfloor feels bouncy before you add the backer board, it will still feel bouncy after. You need to make sure your subfloor thickness is right before you start any tile installations.
Tip: Always use thinset under your cement backer board. This fills gaps and makes a flat surface, but it does not add strength. The real support comes from the subfloor itself.
If you want to use ceramic tile, you can sometimes get by with a minimum of 1 inch total thickness. Still, most pros recommend at least 1 1/4 inches for the best results and to meet the standard subfloor thickness for tile.
Hardwood Subfloor Thickness
Hardwood floors need a solid base, too. The standard subfloor thickness for hardwood is usually 3/4 inch plywood. This gives you a strong, stable surface for nailing down your flooring. If you use thinner plywood, like 1/2 inch, your nails might go all the way through, and your floor could squeak or move.
For engineered wood flooring, you have a bit more flexibility. You can use a subfloor as thin as 1/2 inch if you are floating or gluing the boards. Still, thicker is better for stability and long-lasting floors.
Here are some quick facts to help you choose the right subfloor thickness for hardwood:
Use 3/4 inch plywood (A/C rated, tongue and groove is best) for solid hardwood.
For engineered wood flooring, 1/2 inch plywood works for floating or glue-down methods.
If your joists are spaced more than 16 inches apart, you should use even thicker subfloor, like 7/8 inch plywood or 1 inch OSB.
Tongue and groove plywood helps lock the panels together and keeps your floor flat.
Note: Always check your joist spacing before you pick your subfloor. Wider spacing means you need a thicker subfloor for proper support.
If you follow these guidelines, you will have a floor that feels solid and lasts for years. The right subfloor thickness is the key to a quiet, stable, and beautiful floor—no matter if you choose tile or hardwood.
Factors Affecting Subfloor Choice
Joist Spacing
Joist spacing plays a big role when you pick your subfloor. If your joists are 16 inches apart, you can use thinner subfloor materials. When the spacing jumps to 24 inches, you need thicker subflooring to keep your floor strong and steady. If you skip this step, your tiles or hardwood might crack or sag. Take a look at this chart to see how thickness changes with spacing:

A table can help you compare:
Joist Spacing (on center) | Plywood Subfloor Thickness | OSB Subfloor Thickness |
|---|---|---|
16 inches or less | Minimum 15/32 inch | Minimum 23/32 inch |
24 inches | Minimum 3/4 inch | Minimum 1 inch |
Wider spacing means you need a thicker subfloor for better support.
Subfloor Material
You have a few types of subfloor to choose from. Plywood and OSB are the most common subfloor materials. Plywood is stiffer and holds nails better, which helps with tiles and hardwood. OSB costs less and is more eco-friendly, but it can swell at the edges if it gets wet. Here’s a quick look:
Feature | Plywood | OSB |
|---|---|---|
Stiffness | Less stiff | |
Moisture Behavior | Swells less, dries better | Swells more, edges stay swollen |
Fastening | Holds nails and screws better | Not as strong for fasteners |
Cost | More expensive | More affordable |
Suitability | Best for tile and hardwood | Good for engineered wood, carpet |
Choosing the right sub-floor means thinking about your budget, the room, and the flooring you want.
Floor Type
Different flooring materials need different types of subfloor. Tiles need a thick, stiff base to stop cracks. Solid hardwood likes plywood for strength. Engineered hardwood can go over thinner subflooring, even OSB, but you still want a flat, dry surface. If you use the wrong subfloor, you risk moisture damage or squeaky floors. Always match your subfloor to your flooring materials for the best results.
Building Codes
Don’t forget about building codes and manufacturer rules. Codes tell you the minimum thickness and types of subflooring materials you can use. For example, codes often require at least 3/4 inch plywood for hardwood and 1 1/4 inches total for tiles. You also need to check for moisture issues and make sure your subfloor is flat and clean. Following these rules keeps your floor safe and helps you avoid costly repairs.
Tip: Always check local codes and manufacturer instructions before you start. This step protects your home and your new floor.
Upgrading Subfloors
Reinforcing Thin Subfloors
Sometimes you find that your subfloor is too thin for new tile or hardwood flooring. Don’t worry—you can fix this before you start your installation. The best way to add strength is by putting down another layer of plywood. Use at least 1/2-inch plywood and glue and screw it to your existing subfloor. Make sure you stagger the joints so they do not line up with the first layer. This helps spread out the weight and keeps your flooring from cracking or squeaking.
Here’s a quick table to guide you:
Method | Description | Special Tips |
|---|---|---|
Additional Plywood Layer | Add at least 1/2″ plywood, glued and screwed to the subfloor | Stagger joints, leave 1/8″ gap between panels, fill with silicone, fasten only to subfloor |
Install 1/2″ cement board with glue and nails for tile flooring | Avoid moisture barriers under cement board, stagger joints, clean subfloor before gluing | |
Uncoupling Membrane | Use over minimum 5/8″ OSB subfloor for tile installation | Good for moisture-prone areas, helps prevent cracks |
You want to make sure your subfloor is clean before you glue anything down. Always use the right fasteners and follow the spacing rules—nail or screw every 6 inches along the edges and every 8 inches in the middle. If you skip these steps, your flooring might not get the support it needs.
Tip: Never fasten the second layer of plywood directly to the joists. Fasten it only to the first layer for better support and less movement.
Adding Underlayment
Underlayment gives your flooring extra support and protection. You should use underlayment if your subfloor has small bumps or if you want to block moisture and sound. There are different types to choose from:
Foam underlayment: Easy to install, adds basic sound absorption and a little cushion.
Felt underlayment: Dense and durable, great for sound and moisture protection, supports hardwood well.
Rubber underlayment: Best for moisture and noise, very strong, perfect for premium flooring.
Underlayment helps in many ways. It smooths out small imperfections in your subfloor, absorbs noise, and adds a soft feel under your feet. It also keeps moisture away from your hardwood or tile, which helps prevent warping or cracking. If you install floating floors, underlayment is a must for stability and comfort.
Here’s what underlayment can do for your flooring:
Levels out minor subfloor bumps.
Helps keep floors warm.
When you pick underlayment, always match it to your flooring type and check the manufacturer’s instructions. The right underlayment makes your installation smoother and your floors last longer.
Common Mistakes
When you install tile or hardwood, it’s easy to make mistakes with your subfloor. These errors can ruin your new floor and cost you time and money. Let’s look at the most common problems and how you can avoid them.
Overlooking Joist Spacing
Many people forget to check the spacing between joists before installing a subfloor. If the joists are too far apart, your floor can bend or bounce. This movement leads to cracked tiles, squeaky hardwood, and even broken grout. Always measure the distance between joists. If you see wide gaps, use a thicker subfloor or add another layer for extra support.
Tip: Tile floors need a stiff, non-bending base. Never skip this step!
Wrong Subfloor Material
Picking the wrong subfloor material causes big headaches. If you use something too soft or weak, your floor can warp, crack, or even come loose. Particle board, for example, does not have enough strength or moisture resistance for hardwood or tile. Moisture in the subfloor can also make wood expand or rot. Always choose materials made for your flooring type and check for level, dry, and clean surfaces.
Ignoring Codes
Some people skip checking local building codes or manufacturer rules. This mistake can lead to failed inspections or unsafe floors. Codes exist to keep your home safe and your floor strong. Always read the rules before you start. If you’re not sure, ask a pro or your flooring supplier.
Skipping Reinforcement
If your subfloor is too thin, you need to reinforce it. Skipping this step lets the floor flex under your feet. That flexing can crack tiles, break grout, or make hardwood move. Thin subfloors also can’t handle heavy tile layers. Add another layer of plywood or cement board if needed. This keeps your floor solid and long-lasting.
Here’s a quick table to help you avoid these mistakes:
Mistake | What Can Happen | How to Avoid |
|---|---|---|
Wrong joist spacing | Cracks, squeaks, floor failure | Measure and reinforce if needed |
Bad subfloor material | Warping, cracking, damage | Use strong, moisture-safe materials |
Ignoring codes | Unsafe, failed inspections | Always check rules and guidelines |
Cracks, movement, failure | Add layers for proper thickness |
Remember: Careful subfloor prep means a high-quality, long-lasting floor.
You want your tile or hardwood floor to last, so always start with the right subfloor thickness. For tile, aim for at least 1 1/4 inches. Hardwood floors need 3/4 inch plywood. Good subfloor prep makes a huge difference. Check out this table to see why:
Subfloor Preparation Aspect | How It Helps Your Floor Last |
|---|---|
Structurally Sound Subfloor | Stops cracks and squeaks |
Clean Subfloor | Helps floors stick and stay flat |
Level Subfloor | Keeps floors even |
Before you install, always check local codes and manufacturer rules. Groups like the IRC and NWFA set the best subfloor standards.
FAQ
What happens if my subfloor is too thin for tile?
If your subfloor is too thin, your tile can crack or pop loose. You might also hear squeaks or feel the floor bounce. Always check thickness before you start. A strong subfloor keeps your tile safe and looking great.
Can I use OSB instead of plywood for my subfloor?
Yes, you can use OSB for your subfloor. Just make sure it meets the minimum thickness for your floor type. Plywood is stiffer and handles moisture better, but OSB works well if you keep it dry and use the right thickness.
Do I need underlayment for hardwood floors?
Most hardwood floors need underlayment. It helps block moisture, reduces noise, and smooths out small bumps. Some engineered hardwood floors come with attached underlayment. Always check your flooring instructions to see what works best for your project.
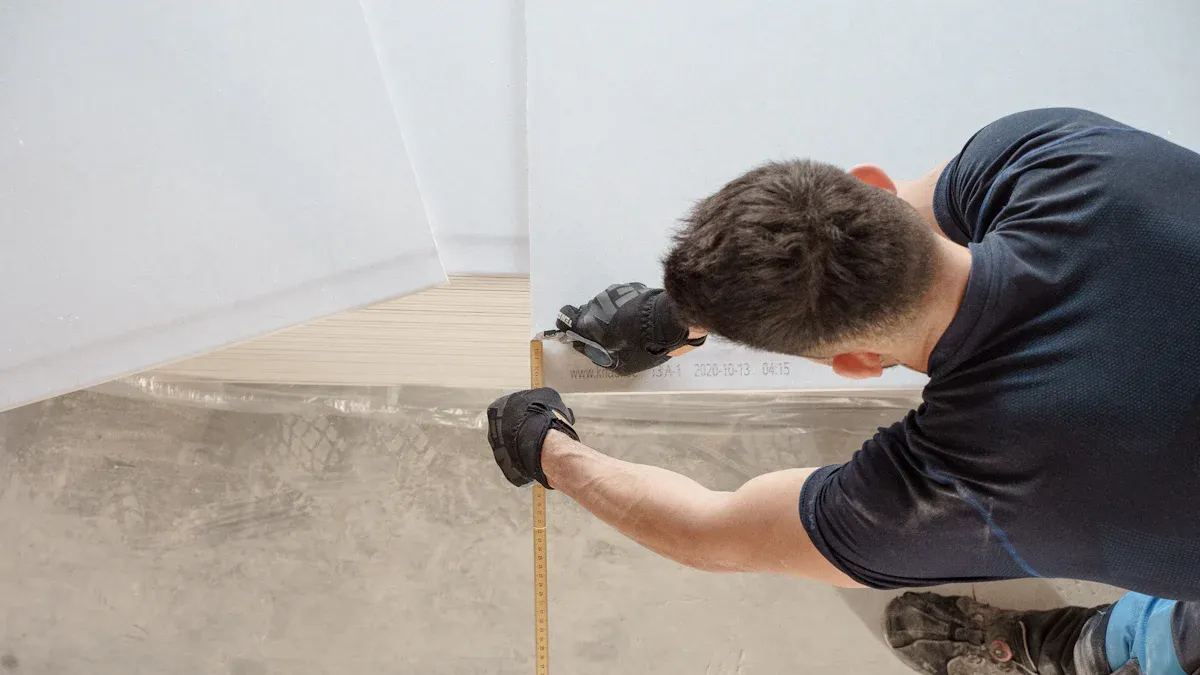
How do I know if my subfloor is level enough?
You can use a long level or a straight board to check. Place it on the floor and look for gaps or high spots. If you see more than 1/8 inch difference over six feet, you should fix it before installing your new floor.