

24 Aug Installation Guidelines For Magnesium Wall Board In Fire-Resistant Systems
Table of Contents
- 1 Key Takeaways
- 2 Tools and Materials
- 3 Preparation
- 4 Cutting and Sizing
- 5 Installation Guidelines
- 6 Finishing
- 7 Safety and Best Practices
- 8 Maintenance
- 9 FAQ
- 9.1 What is the best way to store magnesium wall boards before installation?
- 9.2 Can magnesium wall boards be painted or tiled?
- 9.3 How often should maintenance teams inspect magnesium wall boards?
- 9.4 Are magnesium wall boards safe for wet areas like bathrooms?
- 9.5 What fasteners work best for magnesium wall boards?
Magnesium oxide boards help keep buildings safe from fire. It is important to follow proper installation guidelines when installing them. This ensures the safety of people and compliance with building codes. It also guarantees that the boards provide long-lasting fire resistance. If you do not follow the correct installation guidelines, serious problems can occur. These problems include:
The board can crack and joints can open, reducing its fire protection.
The board can absorb water, leading to rust, mold, stains, and warping.
Water damage can harm the building and result in costly repairs.
Adhering to the proper installation guidelines keeps both the building and its occupants safe.
Key Takeaways
Make sure the workspace is dry. Keep it warm and clean. This helps the wall last longer and stay safe from fire.
Pick the right tools for the job. Use fasteners and adhesives that do not rust. This keeps the wall strong and safe from fire.
Measure the magnesium wall boards with care. Cut them slowly and leave small gaps. This stops cracks and water damage.
Put the boards up with the right space between them. Fasten them tight but do not push screws in too far. Seal the joints with mesh tape and fire-rated compounds.
Check and clean the boards often. This helps you find damage early. It also keeps the wall strong and fire-resistant for a long time.
Tools and Materials
Tools
Installers must use the right tools for a safe job. The correct tools help make straight cuts and measure well. They also help attach the boards tightly. Here are some tools that are often needed:
A circular saw with a sharp or diamond blade makes straight cuts.
A utility knife or carbide-tipped scoring knife is used to score and snap boards.
A T-square and measuring tape help mark and measure.
A cordless drill or screw gun puts in screws quickly.
A rotary tool with carbide bits cuts around outlets or pipes.
An adjustable torque screwdriver stops screws from going in too far.
Saw horses hold the board steady while you cut or get ready.
A putty knife spreads joint compounds.
Tip: Use fiber cement shears or dust-reducing saws to keep dust low when cutting.
Fasteners and Adhesives
Picking the right fasteners and adhesives is very important. This helps the wall system stay strong and fire-resistant. The table below shows the best choices for different uses:
Application/Material | Fastener Type/Specification | Adhesive Type/Specification | Additional Notes |
|---|---|---|---|
General MgO Board | 316-stainless steel screws or ceramic coated fasteners | ASTM D3498 compliant adhesives or select construction adhesives | Corrosion resistance is critical to maintain fire resistance and board integrity |
MagPanel MGO Boards | 4.8 x 42mm Bi-Metal Drywall Screws | Moisture-cured urethane adhesives (e.g., ChemLink M1) | Ensures strong bonding compatible with MgO panels |
Wood Studs | #8 flat head screws with high/low threads and sharp drill points | N/A | Fasteners must be countersunk and spaced properly to avoid stress |
Metal Studs (≥18 gauge) | #8 flat head screws with nibs and self-drilling points | N/A | Pneumatic fastening recommended for lighter gauge metals; hardened pneumatic nails may be used |
Joint Finishing | Sandable elastomeric joint compounds or lightweight concrete patching compounds with wide fiberglass tape | N/A | Compatibility with MgO boards is essential for fire resistance and joint integrity |
Safety Gear
Safety is always important when working with magnesium wall board. Workers should wear personal protective equipment to stay safe:
Safety glasses keep dust and debris out of your eyes.
Dust masks or respirators stop you from breathing in small particles.
Gloves protect your hands from sharp edges and tools.
Ear protection, like earplugs or earmuffs, lowers loud noise.
Use wet suppression or a HEPA vacuum to control dust instead of dry sweeping.
Clean up dust after cutting to keep the area safe.
Note: Always use tools safely and follow local building codes to make sure everyone stays safe.
Preparation
Workspace
A good workspace helps make installation go well. Keep the room at least 59°F while you work. Finish all wet jobs, like painting or plastering, before you start. Also, finish electrical and plumbing work first. The area must stay dry and have fresh air moving through it. Store boards flat and off the ground. Do not put them near damp places. If you keep boards outside, cover them to stop rain from getting in.
Check the wall for cracks or holes before you begin. Fix any damage you find. Clean the wall to get rid of dust and dirt. Make sure the wall is flat and dry. You might need to sand or use leveling compound to make it smooth. In damp rooms, use a dehumidifier to help dry things faster. Plan where each board will go and mark the layout. This helps you leave space for boards to expand.
Tip: Use heaters in winter to keep the room warm enough.
Acclimation
Letting magnesium wall boards get used to the room is important. Take off the packaging and let the boards sit in the room. They should stay there for at least two days. It is best if they are in the same room where you will install them. For better results, let them sit for three to five days. Run the HVAC system for at least three days before you start. This helps stop small cracks and makes sure the boards work well.
Substrate
Get the substrate ready before you put up the boards. Make sure the framing is straight and level. It should also be square. This gives a flat base for the boards. Leave a small gap between boards for expansion. Use a 1/16″ gap on steel and a 1/8″ gap on wood. Only use fasteners that do not rust, like 316-stainless steel screws. You can also use ceramic-coated screws. If you use galvanized steel framing, put a barrier between the board and the steel. Always follow local building codes and best practices for fire-resistant systems.
Cutting and Sizing
 Measuring
 Measuring
Measuring the boards correctly helps them fit well and stay fire-resistant. Installers use a tape measure and T-square to mark each board. They check both the length and width before cutting. Boards need to match the wall plan and leave small gaps for expansion. The table below shows how close the cuts should be. These numbers help stop gaps and weak spots that could lower fire protection.
Dimension | Tolerance |
|---|---|
Length & Width | -2 mm / +3 mm |
Thickness | ±0.2 mm or +3% |
Edge Straightness | Less than 1-2 mm/m² |
Squareness | Less than 5 mm |
Tip: Check your measurements twice before you cut. This helps you avoid expensive mistakes.
Cutting
Installers pick cutting tools that make less dust and keep the board strong. A circular saw with a thin carbide blade makes clean cuts and stops chipping. Set the blade just past the board’s thickness for a smooth edge. Workers wear safety goggles, gloves, and a dust mask while cutting. They put the board on a steady surface and mark a straight, clear line. Start the saw at full speed and push gently along the line to avoid damage. For thin boards, use a score-and-snap method with a carbide-tipped scoring knife. This may need extra finishing. Jigsaws, handsaws, and angle grinders make rough cuts and more dust, so they are not as good. Plunge saws with diamond blades work very well but cost more.
Handling
Handling boards the right way stops damage and keeps them ready to use. Workers store boards in a cool, dry place inside. Carrying boards on their side protects the edges and corners. Stacking boards flat on dunnage or matting stops warping and keeps out moisture. Do not put other things on top of magnesium boards to avoid crushing. Boards should get used to the room’s temperature and humidity for at least 48 hours before installing. Installers must not bend or bow boards when moving them. Rainwater can hurt how the boards work. Wearing safety gear like dust masks and safety glasses keeps workers safe during cutting and sanding.
Note: Always check that the framing is straight and level before you install boards. This gives you a smooth surface with less stress.
Installation Guidelines
Placement
Installers need to put magnesium wall boards in the right spot. This helps the wall stop fire better. The smooth side of each board should face out. This makes it easier to finish and keeps the board strong against fire. Boards can go up and down or side to side. The way you place them depends on the wall and what the maker says. Each board should fit tight, but leave a small gap. Use a 1/16 inch gap for steel frames and a 1/8 inch gap for wood frames. These gaps let the boards move when it gets hot or wet. This stops cracks from forming.
Boards should not touch the floor. Leave a 1/4 inch gap at the bottom. This keeps water from soaking up into the board. Plan where each board will go before you start. This helps you avoid tiny pieces at the corners. It also keeps joints away from doors and windows. Careful placement helps the wall work well in a fire.
Tip: Mark where the studs are on the floor and ceiling. This helps you put the boards in the right place and make fewer mistakes.
Fastening
Fastening the boards the right way is very important. It keeps the wall strong and fire-resistant. Use fasteners that do not rust, like 316-stainless steel screws or ceramic-coated fasteners. Fasteners must go at least 1 inch into the frame. Follow these rules for spacing:
Put fasteners 6 inches apart in the middle.
Keep fasteners at least 3/8 inch from the edge.
Do not put fasteners within 2 inches of any corner.
Panels should be supported every 24 inches.
Drive fasteners so they are even with the board. Do not push them in too far or break the board. Keep fasteners at least 4 inches from the corners to stop cracks. These steps help the wall stay strong and meet building codes like ASTM E119 and ANSI UL/263.
Note: Use an adjustable torque screwdriver. This helps you put fasteners in at the right depth and keeps the board safe.
Joints
Joints need to be done right for fire safety and strength. Stagger the vertical joints between boards. This stops weak spots from forming. Leave a small gap at each joint for the boards to move. Put wide fiberglass mesh tape over the joints. Cover the tape with a joint compound that works with the board. This seals the gaps and keeps smoke or fire from getting through.
Spread the joint compound at least 6 inches on both sides of the joint. Sand between coats to make the wall smooth. Good joint work helps the wall keep its fire rating and last longer.
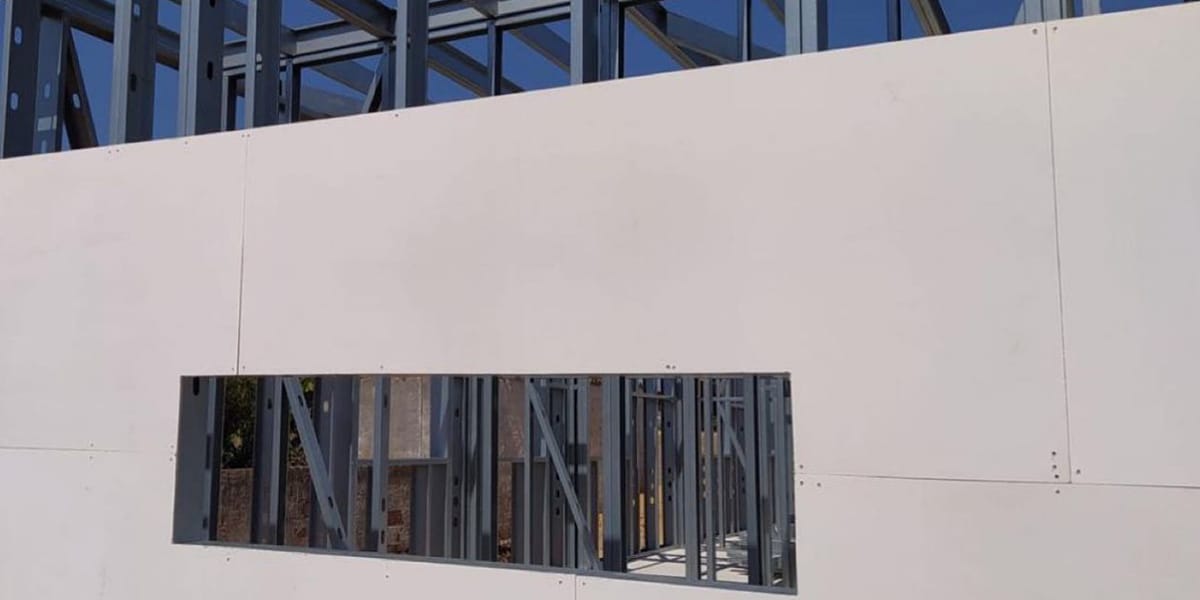
Openings
Openings for doors, windows, outlets, and pipes need extra care. Reinforce these spots to keep the wall fire-resistant. Do not end a board right at the edge of an opening. Instead, run the board past the opening and cut out the shape you need. This keeps the corners strong.
Put extra fasteners around each opening. Use the same spacing as the rest of the wall. Add more mesh tape and joint compound around openings. This stops cracks and keeps the fire barrier strong.
Magnesium wall boards have passed tough fire tests like ASTM E119 and NFPA 285. These tests show the boards can stand up to fire for up to four hours. NFPA 285 checks how fire spreads and how hot the wall gets. Meeting these standards means magnesium wall boards are safe for fire-resistant walls.
Callout: Always check your local building codes and the maker’s instructions. Make sure your work meets all fire safety rules.
Finishing
Joint Treatment
 Joint Treatment
Good joint treatment helps the wall stay strong and fire-resistant. Installers pick fasteners that do not rust, like phosphoric-coated drywall screws. These screws stop rust and keep the wall safe. They use joint compounds that can be sanded or light concrete patching compounds. Wide fiberglass tape, at least 6 inches, is pressed into special cement fillers like RapidSet One Pass. This makes the joints tough so they do not crack or let fire through. Light pre-mixed muds do not work well with magnesium oxide boards. These boards dry out the mud too fast and make weak joints. Installers do not use these products to avoid problems. Moisture-cured urethane adhesives, like ChemLink M1, stick well to many surfaces. MagPanel magnesium oxide boards have a Class A fire rating. This means they are good for fire-rated walls and ceilings.
Surface Prep
Getting the surface ready is very important for a good finish. Installers do these steps to get ready: First, clean the board with a broom or vacuum to get rid of dust. Next, check that the base is flat, dry, and strong. Fix any cracks or damage before you go on. Measure how wet the wood or concrete is. Wood should have 2-4% moisture. Concrete should have less than 75% moisture. Sand any rough spots to make the board smooth. Clean up the dust after sanding. Put on a primer made for masonry or concrete. This primer helps paints or coatings stick better. Keep the room at the same temperature and humidity while you work. Seal the joints with flexible fillers and fiberglass tape. This makes the surface smooth and strong.
Coating
Coating the boards protects them and helps stop fire. Installers use a primer made for concrete or masonry because magnesium oxide boards are alkaline. This primer makes a good base for paint or other finishes. Before painting the whole wall, they test a small spot and let it dry. They use a tape test to check if the paint sticks well. Installers follow the instructions for paint, stucco, or tile glue to make sure it works right. Good coating keeps the wall strong and fire-resistant for a long time.
Safety and Best Practices
Code Compliance
Installers must follow local building codes and manufacturer instructions. These rules help keep everyone safe. They also make sure the wall system works right. Inspectors look at fastener spacing, materials, and joint treatment. Builders should check fire rating standards like ASTM E119 and NFPA 285 before starting. They need to keep records of materials and installation steps. This paperwork shows the project meets code rules.
Tip: Always look for new updates to codes and standards before you begin a project.
Mistakes to Avoid
Installers sometimes make mistakes that hurt fire resistance and strength. Try not to make these errors:
Using wrong fasteners or adhesives can make boards loose or break.
Skipping acclimation causes cracks or boards to bend.
Putting boards too close or too far apart weakens the fire barrier.
Not leaving a gap at the bottom lets water damage the board.
Not reinforcing around doors and windows makes weak spots.
Ignoring installation guidelines can lead to failed inspections.
🚫 Never use regular drywall screws or joint compounds that are not approved for magnesium wall board.
Performance Tips
Experts suggest steps to help magnesium wall board systems last longer and stay fire-resistant:
Pick magnesium oxide boards for better fire resistance and strength.
Build a strong frame to hold the boards and stop movement.
Use the right primer and topcoat, especially outside, to protect from weather.
Add a house wrap or weather barrier to keep moisture out.
Prepare surfaces well, choose the right adhesives, and fasten boards properly.
Wear safety gear and use the correct tools for each job.
Doing these best practices and following installation guidelines helps the wall system stay strong and fire-resistant for many years.
Maintenance
Inspection
Regular inspection keeps magnesium wall boards in top condition. Building owners or maintenance teams should check the boards at least twice a year. They look for cracks, chips, or signs of water damage. They also check joints and fasteners for movement or rust. Inspections after storms or leaks help catch problems early. If they find any damage, they mark the area for repair.
Tip: Use a flashlight to spot small cracks or hidden moisture stains.
Cleaning
Clean magnesium wall boards with care. Dust and dirt can build up over time. Use a soft brush or a vacuum with a brush attachment to remove loose dust. For stains, use a damp cloth with mild soap. Avoid harsh chemicals or abrasive pads. These can scratch the surface or weaken the fire-resistant coating. Always dry the boards after cleaning to prevent moisture from soaking in.
Recommended Cleaning Steps:
Remove dust with a soft brush or vacuum.
Wipe stains with a damp cloth and mild soap.
Dry the surface with a clean towel.
🚫 Never use bleach or strong solvents on magnesium wall boards.
Repairs
Quick repairs help keep fire resistance strong. If a board cracks or chips, maintenance teams should patch small areas with a compatible joint compound. For larger damage, they may need to replace the board. They must cut out the damaged section and fit a new piece. All joints and seams need mesh tape and fire-rated compound. Teams should check fasteners and replace any that rust or loosen.
Problem | Solution |
|---|---|
Small crack | Fill with joint compound |
Large hole | Replace board section |
Loose fastener | Tighten or replace with new screw |
Note: Always follow manufacturer guidelines for repairs to keep the fire rating intact.
Getting magnesium wall board ready for fire-resistant systems takes a few steps. You need to set up your workspace, measure boards carefully, fasten them the right way, and seal joints well. If you follow these steps, the wall will resist fire, keep out water, and last a long time. The table below shows how these features help over time:
Feature | Long-term Benefit |
|---|---|
Fire Resistance | Keeps people safe and follows rules |
Moisture Proof | Stops boards from bending or getting mold |
Means fewer fixes and saves money |
Check your local building codes and read the maker’s instructions, like those from Sulfycor. Make sure to check the boards often to keep fire protection working.
FAQ
What is the best way to store magnesium wall boards before installation?
Installers should keep boards flat and off the ground. The area must be dry and have fresh air. Cover the boards so moisture cannot get in. Storing boards inside helps stop warping and damage.
Can magnesium wall boards be painted or tiled?
Painters use masonry primer before painting the boards. Tilers pick adhesives that work with magnesium oxide. Test a small spot first to see if it sticks well. Always follow the maker’s instructions for the best results.
How often should maintenance teams inspect magnesium wall boards?
Teams need to check boards two times every year. They look for cracks, water damage, and loose fasteners. After leaks or storms, inspections help find problems early.
Are magnesium wall boards safe for wet areas like bathrooms?
Magnesium wall boards resist moisture better than drywall. Installers seal joints and use approved coatings. Good installation stops mold and keeps boards strong in wet rooms.
What fasteners work best for magnesium wall boards?
Installers use 316-stainless steel screws or ceramic-coated fasteners. These do not rust and keep fire resistance strong. Fasteners must meet the maker’s and code rules for best results.