

15 Aug Replacing a Subfloor Board Made Easy for Homeowners
Table of Contents
You might feel nervous about tackling a subfloor board project, but you can do it! Many homeowners replace their subfloor when they spot issues like squeaky floors or warping. Water damage, mold, and rot are common problems that lead people to replace a subfloor. Sometimes, improper installation or too much moisture causes trouble.
Here’s the good news: with the right diy steps and a clear step-by-step guide, you’ll learn how to replace subfloor boards safely. You just need a step-by-step process, some patience, and the right tools. Stay safe, follow the diy steps, and you’ll replace that subfloor board with confidence.
Key Takeaways
Look for floors that feel soft, bouncy, or bent. Notice any musty smells. These are signs your subfloor needs fixing. – Use simple tools like a pry bar, hammer, and measuring tape. Always wear safety gear like goggles and gloves. – Follow easy steps: get the area ready, take out broken boards slowly, check and fix joists, then put in new subfloor boards. Make sure to leave space and use the right fasteners. – Check for moisture before and after you put in new boards. This helps stop future problems. Use a vapor barrier if the area is damp. – Call a professional if you see big damage, squeaks that do not stop, mold, or if you are not sure how to fix it.
Signs You Need to Replace a Subfloor
Warning Signs
You may not know if your subfloor is damaged. There are some easy signs to watch for at home. If you see these, your subfloor might have problems:
The floor feels soft or sags when you walk on it.
The floor feels bouncy or spongy under your feet.
Mold or mildew keeps coming back, especially near water.
The plywood starts to break apart or crumble.
The floor looks warped or has bumps.
The floor flakes or crumbles in spots.
There are gaps where the floor pulls away from the subfloor.
You smell something musty or odd, which can mean water damage.
Leaks from pipes, toilets, or washing machines can cause water damage. Sometimes, water gets in from windows or the roof. Bathrooms and basements with high humidity can also hurt your subfloor. If you notice any of these signs, check your subfloor soon.
Tip: Finding subfloor damage early can save you money. You might only need to fix a small spot, not the whole subfloor.
When to Inspect
Check your subfloor if your flooring changes. If you see or smell mold, feel soft spots, or hear squeaks, look closer. Water damage is a big reason to check, especially after leaks or floods.
Here are some common causes of subfloor moisture problems:
Cause | Explanation |
|---|---|
Lack of Moisture Control | The subfloor stays wet if you do not control moisture. |
Building Not Enclosed | Rain or humidity gets in during building, so the subfloor stays wet. |
Lack of Vapor Barrier | No plastic sheet under the subfloor lets ground moisture come up. |
Untested Subfloor Material | If you do not check moisture levels before installing, you can have problems later. |
Check your subfloor before you put in new flooring. If you live where it is humid or had water damage before, check often to stop bigger problems. A damaged subfloor can cost a lot to fix if you ignore it.
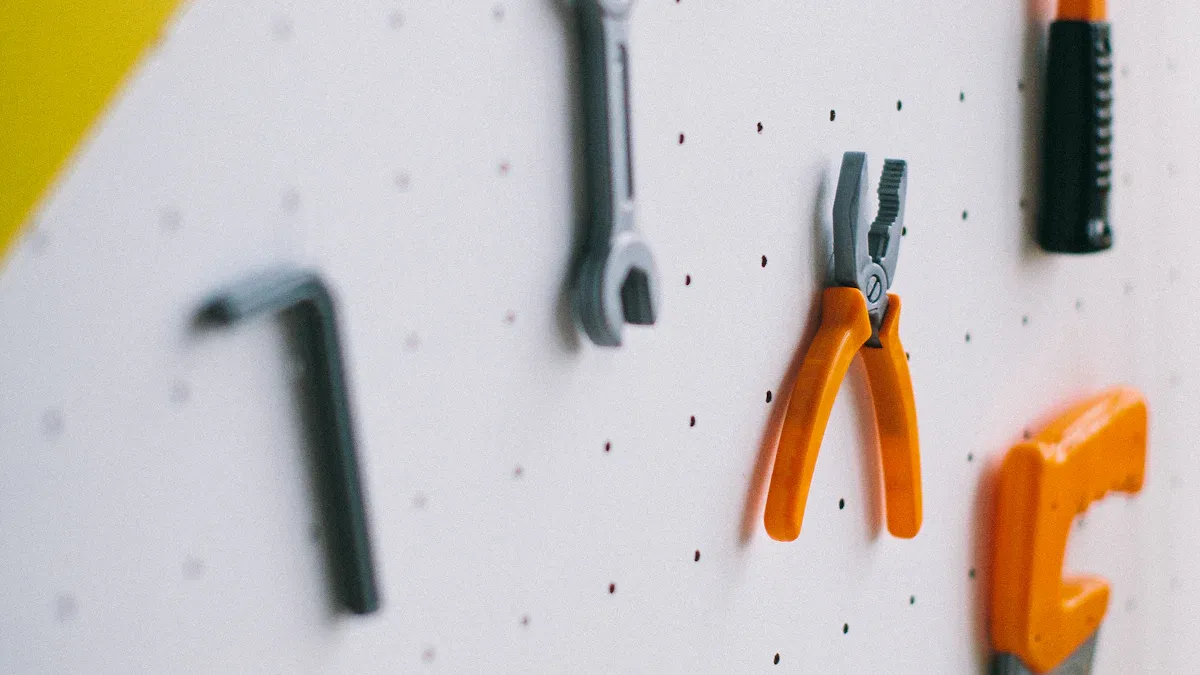
Tools and Materials for Subfloor Board
 Essential Tools
 Essential Tools
You do not need special tools to do this job. Most of these tools are in your home already. Here is what you need:
A utility knife helps cut away old flooring or underlayment.
Use a chisel to pry up tough pieces.
A pry bar lifts the old subfloor board.
Use a hammer to pull out nails or tap boards in place.
You need a nail gun or screws and a drill to attach the new subfloor.
Sandpaper or a sanding machine smooths rough edges.
A vacuum cleaner picks up dust and debris.
Wear safety glasses and gloves to protect yourself.
Tip: Check your tools before you begin. This way, you will not need to stop and go to the store.
Materials List
Picking the right subfloor material is very important. The table below shows the most common choices and where they work best:
Subfloor Material | Best Suited For | Key Considerations |
|---|---|---|
Plywood | Hardwood, Laminate, Carpet, Vinyl | Strong base; needs moisture barriers for vinyl |
Oriented Strand Board (OSB) | Engineered Wood, Laminate, Carpet, Vinyl Plank | Good for most homes; stable |
Concrete | Ceramic/Porcelain Tile, Vinyl Tiles, Stone | Very hard and stable; not good for hardwood |
Cement Board | Ceramic/Porcelain Tile, Stone Tile | Resists moisture; best for bathrooms or laundry rooms |
Particle Board | Carpet, Laminate | Only use in dry places; not for heavy use |
MGO Panels | Modular and prefab homes | Strong, fire-safe, and eco-friendly |
Plywood is the top choice for most subfloors. It is strong and can last up to 60 years if it stays dry. OSB is also used a lot and costs less, but it does not last as long if it gets wet. Both plywood and OSB are good for most homes if you install them the right way.
Safety Gear
Safety is always important when working on a subfloor. You will use sharp tools, make dust, and move heavy boards. Always wear:
Safety goggles to keep your eyes safe from flying bits.
Gloves to protect your hands from splinters and sharp things.
A dust mask so you do not breathe in dust or mold.
Never forget your safety gear. Even a small subfloor job can hurt you if you are not careful.
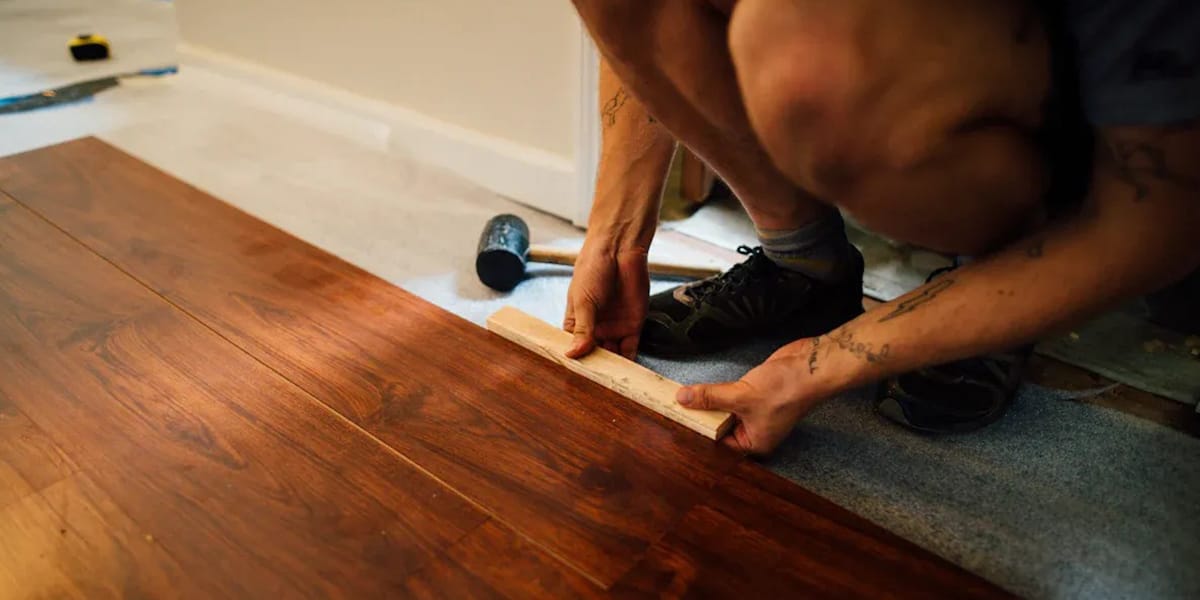
Steps to Replace a Subfloor
 Replacing a subfloor board might sound tough, but you can do it if you follow the right steps. Let’s break down how to replace subfloor boards with clear diy steps, so you can handle subfloor repair and subfloor replacement like a pro.
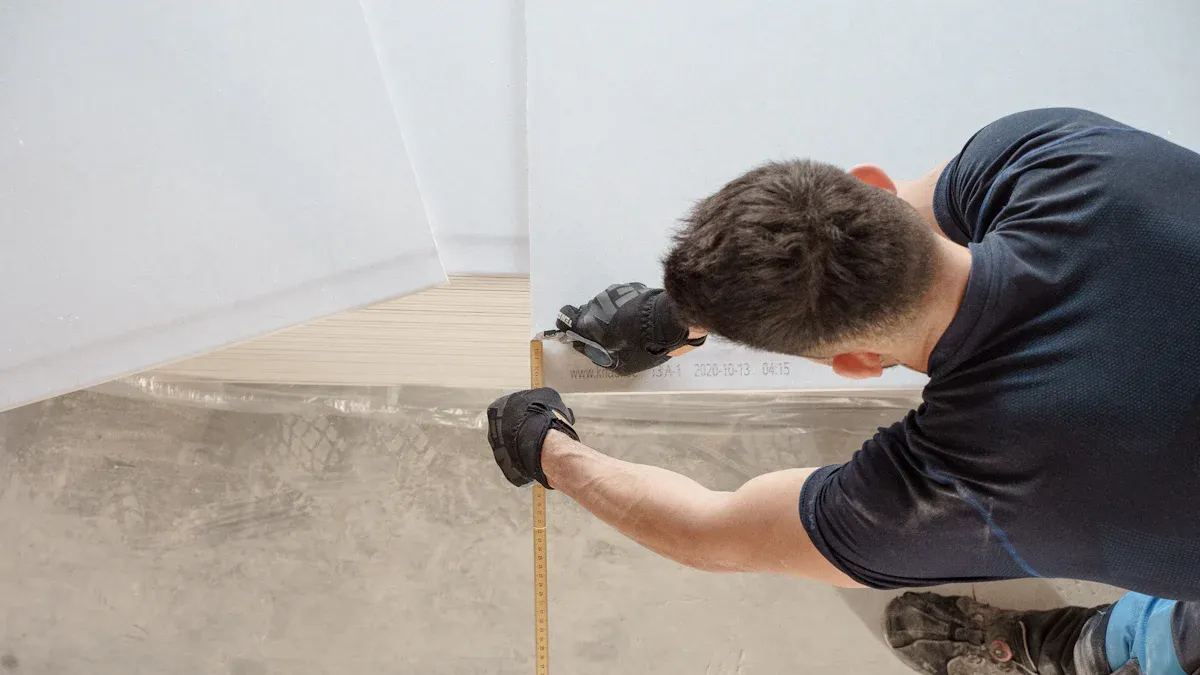
Preparation
Before you start, get your workspace ready. Move furniture and clear the area. Always turn off water and power if you’ll work near pipes or wires. Put on your safety gear—goggles, gloves, and a dust mask.
Here are some common mistakes to avoid during preparation:
Skipping moisture checks. Always use a moisture meter to test the subfloor.
Not cleaning the area. Dirt and debris can mess up your subfloor installation.
Forgetting to level the subfloor. Use a straight edge or level to check for bumps or dips.
Rushing through measurements. Measure twice before you cut.
Ignoring safety. Never skip gloves, goggles, or a dust mask.
Tip: If you find blackened, soft, or spongy wood, you need to replace that section. Don’t install new boards over damaged spots.
Remove Flooring and Subfloor Board
Now you’re ready to remove damaged subfloor and start removing the subfloor board. This part takes patience. Here’s how you can do it safely without hurting the joists:
Use a pry bar or claw hammer to start at an exposed edge. If you can’t find one, make a small clearance hole.
Work along the joists. Pry up the subfloor board gently, moving from nail to nail.
Alternate prying points. This helps lift the board without bending or breaking it.
Pry right at each nail as you find it. This keeps the joists safe.
Once you lift the board, flip it over. Hammer out any nails, then pull them with a cat’s paw or claw hammer.
If nails won’t budge, drill out or grind off the heads.
Use scrap wood under your pry bar for extra leverage and to protect the joists.
Try a long pry bar or a claw hammer with a long claw for tough nails.
Note: Take your time with removing the subfloor. Rushing can damage the joists and make subfloor repair harder later.
Inspect and Repair Joists
After removing the subfloor, check the joists for damage. If you see cracks, rot, or sagging, you need to fix them before you install new boards. Here’s how to handle diy subfloor installation and repair:
Find the joists using a stud finder or by looking for nail lines.
Cut away any damaged subfloor board, but set your saw just deep enough to avoid hitting wires or pipes.
If a joist is damaged, “sister” a new 2×4 board alongside it. Line up the tops so the new subfloor board sits flat.
Use the old piece as a template to cut your new patch.
Nail the patch into the sistered joist every 6 inches. Leave a 1/8-inch gap between sheets for wood movement.
Add wood glue for extra strength.
Tip: Always check for moisture or mold on the joists. Fix any problems before you move on.
Install New Subfloor Board
Now you’re ready to install new subfloor. This is where you put your diy steps into action. Follow these steps for a strong, squeak-free floor:
Make sure joist spacing is 16 inches on center. This gives your subfloor board solid support.
Use blocking or bridging between joists if your panels don’t have tongue-and-groove edges.
Pick the right fasteners. Use ring-shank nails or screws with adhesive to keep the boards from moving.
Lay the first row of panels along a snapped chalk line to keep everything straight.
Fasten the whole first row before starting the next.
Stagger the joints. Offset the second row by half a panel so the seams don’t line up.
Leave a 1/8-inch gap around every panel for expansion. Tap panels together gently, but don’t force them tight.
Glue the whole row at once, not one sheet at a time, for a better bond.
Tips for replacing subflooring: Always follow the manufacturer’s instructions for adhesives and fasteners. This helps prevent squeaks and keeps your floor strong.
Finishing Up
Before you finish, make sure the area is dry. Moisture can ruin your new subfloor board. Here’s what you should do:
Clean the area. Remove all dust and debris.
Test the subfloor with a moisture meter. Compare the reading to the flooring manufacturer’s limits.
If the subfloor is too wet, let it dry or install a vapor barrier. This is extra important in basements or bathrooms.
Seal seams and edges if you use a moisture barrier. Let any coatings dry fully before you move on.
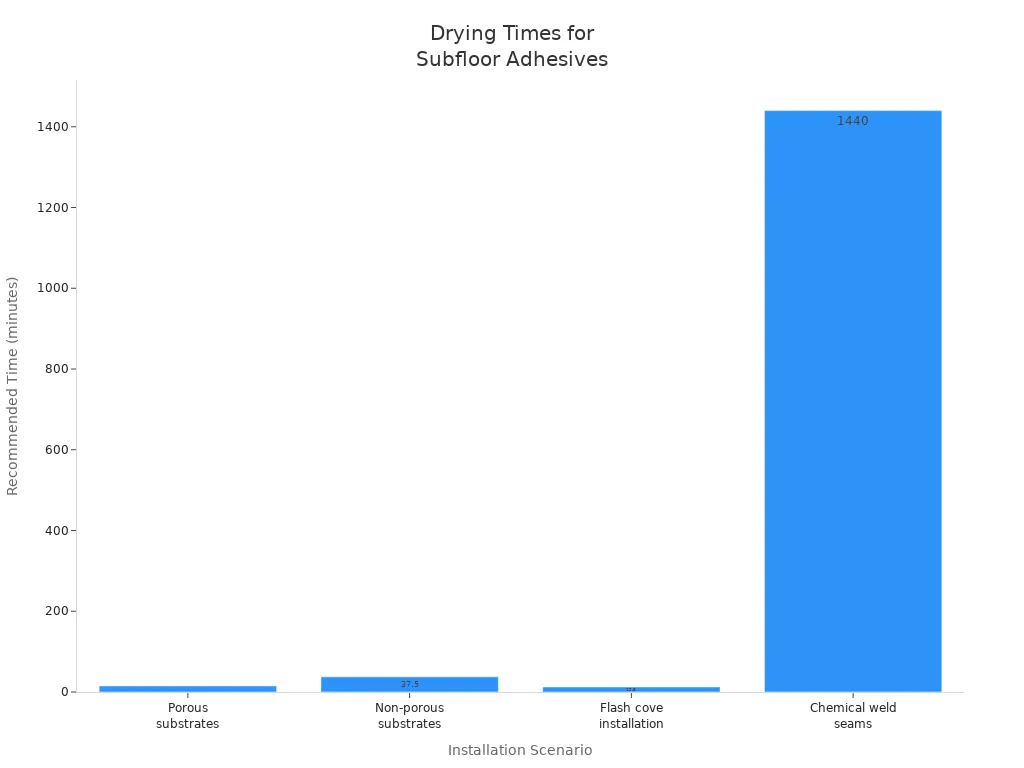
Follow the adhesive drying times. Most construction adhesives need 10-20 minutes of open time on porous surfaces. For non-porous surfaces, wait 30-45 minutes. Always check the label for exact times.
Substrate/Scenario | Recommended Drying/Open Time | Notes |
|---|---|---|
Porous substrates | 10-20 minutes | Install flooring when adhesive changes from opaque to clear; roll with 100 lb roller. |
Non-porous substrates | 30-45 minutes | Install when adhesive is 80% clear (dry to touch but tacky); roll with 100 lb roller. |
Flash cove installation | About 10-15 minutes | Allow open time before fitting material; use hand roller after placement. |
Chemical weld seams | Minimum 24 hours traffic-free | Allow seam to cure before traffic. |
Once everything is dry and secure, you can install your finished flooring. You’ve just learned how to replace subfloor boards with confidence! If you ever feel unsure, remember these steps and don’t rush. Subfloor repair and subfloor replacement take time, but you’ll get a solid, safe floor.
Remember: Good prep, careful removing the subfloor, and following each step will help you avoid problems. That’s how to handle diy subfloor installation the right way.
Troubleshooting and When to Call a Pro
Common Issues
You might run into a few problems when you replace a subfloor, especially if you work on subflooring in a mobile home. Here are some of the most common issues and what you can do:
Water damage is the biggest problem for subflooring in a mobile home. You often find it near bathrooms or kitchens. The best fix is to remove and replace the damaged section right away.
Squeaks and creaks can drive you crazy. These usually mean the subfloor is loose. Try screwing down the area to stop the noise.
Uneven spots or high and low areas show up a lot in mobile home subfloor projects. Sand down high spots and fill low ones with a leveling compound.
If you see swelling or warping, it means the subflooring in a mobile home got wet. Replace the warped boards and make sure you leave a 1/8-inch gap between new sheets.
Sometimes, you need to replace subfloor behind walls. Remove baseboards and drywall carefully. If you feel unsure, call a pro.
Always let new wood sit in the room for a few days before you install it. This helps prevent warping later.
Tip: Always check for mold or musty smells. These signs mean you need to replace the subfloor and fix any leaks.
Professional Help
Sometimes, subfloor repair is too big for a DIY job. You should call a pro if you notice:
Sagging, bouncy, or uneven floors in your mobile home subfloor.
Persistent squeaks, loud creaks, or soft spots that do not go away after you replace the boards.
Visible water damage, mold, or musty smells under the floor.
Cracked tiles, bubbling laminate, or shifting floorboards.
Signs of pests like termites or carpenter ants.
If you see any of these, your subflooring in a mobile home might have serious subfloor damage. A professional can check for hidden problems, like weak joists or deep water damage. They use special tools to test for moisture and make sure your mobile home subfloor is safe.
Note: If you ever feel unsure about the safety of your floor, or if the damage covers a large area, do not wait. Call a certified pro who knows how to replace subflooring in a mobile home. Look for someone with the right training and good reviews. Your safety comes first!
You just learned how to replace a subfloor board step by step. You can do this project if you stay safe and take your time. Always use the right tools, check for hidden wires or pipes, and fix any weak joists.
Safety matters most—wear your gear, use construction adhesive, and install a moisture barrier if needed.
To keep your new subfloor strong:
Stagger plywood joints for better support.
Center sheet ends on joists.
Waterproof areas that get wet.
Inspect for leaks and fix them fast.
Ready for your next home project? Try sealing gaps, checking for drafts, or adding new flooring!
FAQ
How long does it take to replace a subfloor board?
You can usually finish in one day if you have all your tools and materials ready. If you find damage or need to let things dry, it might take longer. Plan for extra time just in case.
Can I walk on the new subfloor right away?
Wait until the adhesive dries. Most adhesives need at least 24 hours. Check the label for exact times. Walking too soon can cause problems with your new floor.
What thickness should I use for a subfloor board?
Most homes use 3/4-inch plywood or OSB. This thickness gives strong support. Always match the thickness of your old subfloor so your floor stays even.
Do I need to remove all the old subfloor?
No, you only need to remove the damaged section. If the rest of your subfloor feels solid and dry, you can leave it in place. Just make sure you cut out all the bad spots.
What if I find mold under my subfloor?
Stop and wear a mask. Clean small spots with a mold cleaner. If you see a lot of mold or feel unsure, call a pro. Mold can be dangerous if you do not handle it right.