

29 Mar Everything You Need to Know About Decorative Wood Wall Panels
Table of Contents
Decorative wood panels for walls can instantly change how a room feels. You get warmth, texture, and a new sense of depth with just a simple update. It is no surprise that around 80% of homeowners bring these panels into their spaces. You will find so many options, such as:
3D Mosaic Wood Panels
Acoustic Wood Slat Panels
Acoustic Wood Slat Veneer
Peel and Stick Wood Planks
3D Plant Fiber Panels
3D MDF Wood Panels
Eco-Products
3D Metal Wall Art
You can paint, stain, or mix and match panels. Many people love the DIY side because you get a custom look that fits your style. These panels never go out of fashion, and your walls will always feel inviting. If you want a guide, you are in the right place.
Key Takeaways
Decorative wood panels make a room look warm and stylish. They help rooms feel cozy and special. These panels are useful too. They can help block noise and keep heat in. This makes your home quieter and saves energy. You can pick from many styles, colors, and finishes. This helps you match your taste and what the room is for. Installing panels can be a fun DIY project. But you need to plan and get ready first. This helps you do a good job. You should dust and clean your wood panels gently. This keeps them looking nice and helps them last longer.
Benefits of Decorative Wood Panels for Walls
Visual Impact and Style
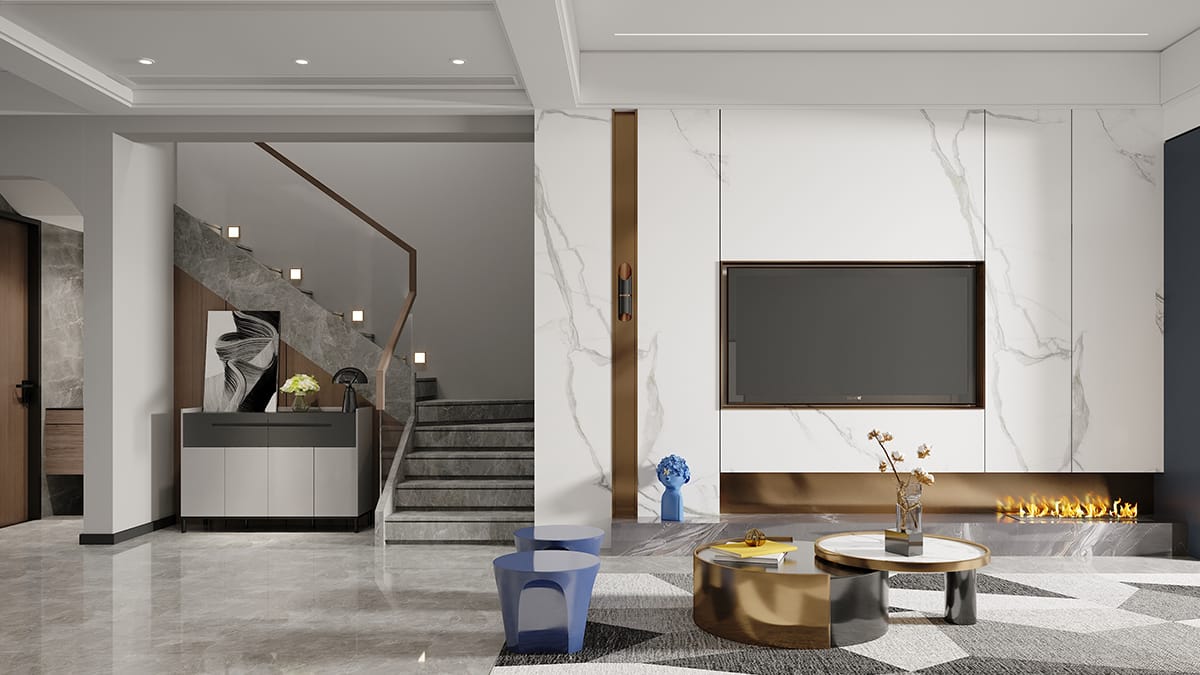
When you add decorative wood panels for walls, you instantly boost the look of your space. These panels can cover an entire wall or just a section as an accent. You get a sleek, uniform appearance that feels much more inviting than plain paint or cold materials.
Decorative wood panels for walls fit almost any style.
You can blend them with rustic, modern, or even industrial designs.
They make dull walls pop and give your home a fresh, finished look.
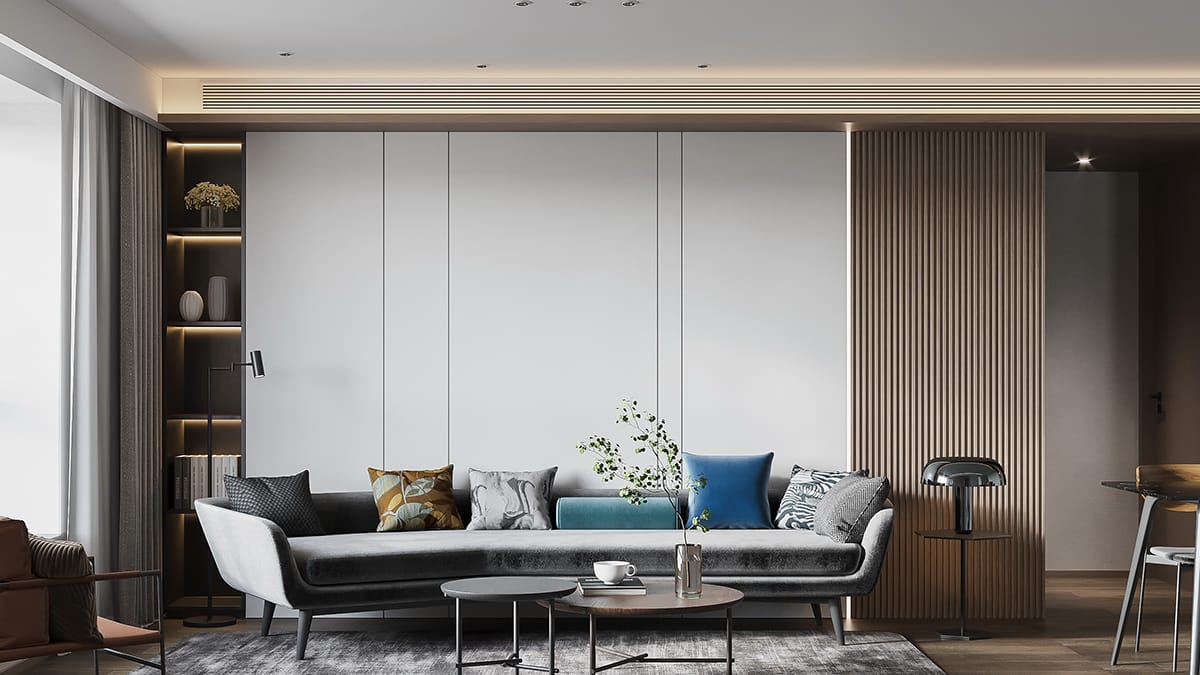
Warmth and Texture
Wood wall panels bring a natural warmth that you can see and feel. The unique grains and patterns in each panel make your walls one-of-a-kind. Check out what studies have found:
Study | Findings |
|---|---|
Sakuragawa et al. | Wood panels create a natural, calming vibe. Metal panels can make people feel uneasy. |
Zhang et al. | Wood makes rooms feel more comfortable and boosts your mood. |
Wan et al. | Warm colors in wood help you feel cozy and relaxed. |
Acoustic and Insulation Advantages
Decorative wood panels for walls do more than look good. They help absorb sound, so your rooms feel quieter and more peaceful. Unlike drywall, which bounces sound around, wood panels soak up noise and reduce echo. They also act as natural insulators. This means your home stays warmer in winter and cooler in summer, which can lower your energy bills.
Timeless Appeal in Modern Design
Modern wood wall panels never go out of style. You see them in all kinds of homes, from classic to trendy. Styles like wainscoting, beadboard, and shiplap keep coming back because they work in so many spaces. You can use panelling in living rooms, kitchens, or even bathrooms for a timeless touch.
Customization and Versatility
You have endless ways to make decorative wood panels for walls your own. Try geometric shapes, slatted designs, or even Victorian details. Pick from different wood species, finishes, and colors to match your taste. Panelling lets you create a look that fits your home perfectly. You can use it to make small rooms feel bigger and more inviting. Plus, many options are eco-friendly and built to last, so you get style and durability in one package.
Types and Styles of Decorative Wood Panels
 Wainscoting and Beadboard
 Wainscoting and Beadboard
Wainscoting gives your home a classic look. It is a type of paneling that covers the lower wall. Wainscoting usually has wood panels, chair rails, and molding. You often see it in dining rooms, hallways, or entryways. Beadboard has lines that run up and down between each plank. These lines make your room feel cozy and textured. You can paint or whitewash beadboard to make it look bright and new.
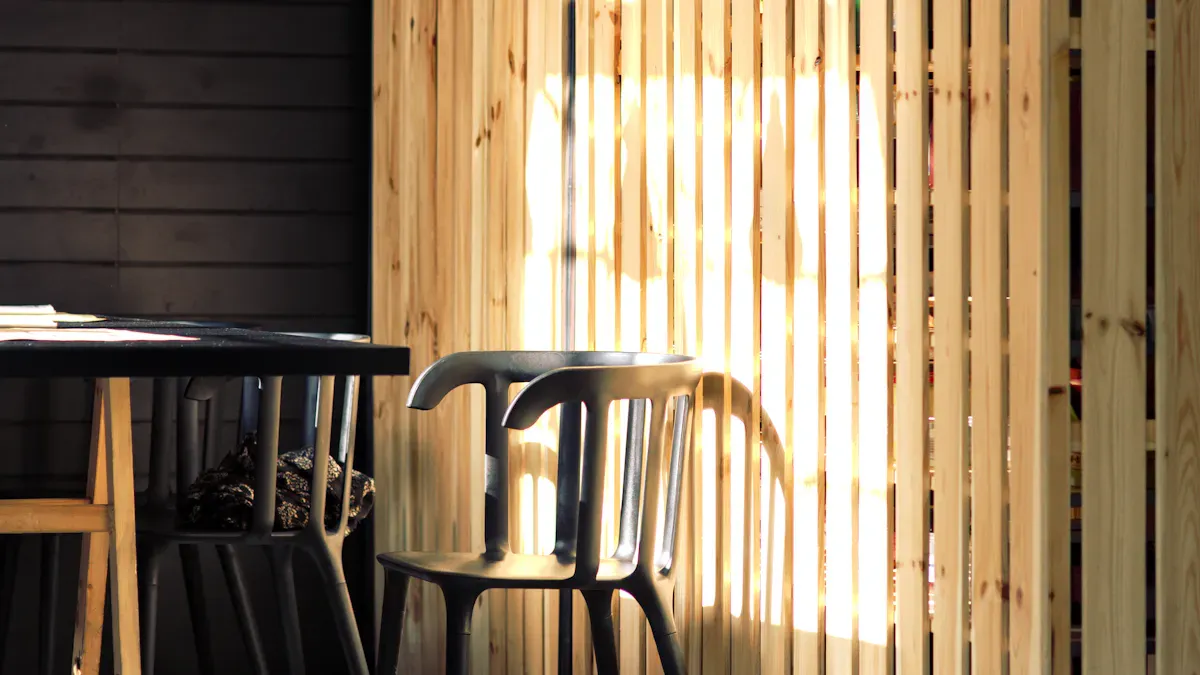
Shiplap and Tongue-and-Groove
Shiplap and tongue-and-groove are simple to put up. They are great for DIY projects at home. Shiplap has a special cut so the boards overlap. This gives your room a farmhouse style. Tongue-and-groove panels fit together like puzzle pieces. This makes the wall look smooth and neat. You can paint shiplap for a modern look or keep it natural for warmth.
Geometric and 3D Patterns
Geometric and 3D wood panels make your room stand out. You can choose shapes like hexagons, triangles, or chevrons. These panels create cool accent walls and add depth to your space. Many geometric panels use materials that are good for the planet. You can paint the shapes in different colors or add shiny touches for extra style.
Veneer and Solid Wood
Feature | Solid Wood | Veneered Wood |
|---|---|---|
Very durable | Less durable | |
Acoustic Properties | Great sound insulation | Needs backing for sound |
Aesthetic Appeal | Unique grain patterns | Many finishes, less depth |
Sustainability | Eco-friendly | May use adhesives |
Cost | Higher upfront | More cost-effective |
Solid wood panels are strong and look natural. Veneered panels cost less and give you more design choices. You can stain, paint, or add patterns to both types.
Reclaimed Wood
Reclaimed wood panels use old wood from barns or factories. This style is good for the earth and cuts down on waste. Each piece has its own marks and texture, so your wall looks special and warm. You can sand and seal reclaimed wood or leave it rough for a rustic style.
MDF and MgO Decorative Panel
MDF and MgO panels are new choices for walls. MDF is smooth and easy to paint, so you can make it your own. MgO panels do not burn easily and resist mold and bugs. This makes them good for kitchens and bathrooms. Both types come in lots of colors and textures, so you can match any style.
Tip: Try using more than one kind of paneling in a room. Mixing styles lets you play with colors and textures. This makes your space feel unique and personal.
Choosing Wood Wall Panels
Matching Style to Room Function
 Matching Style to Room Function
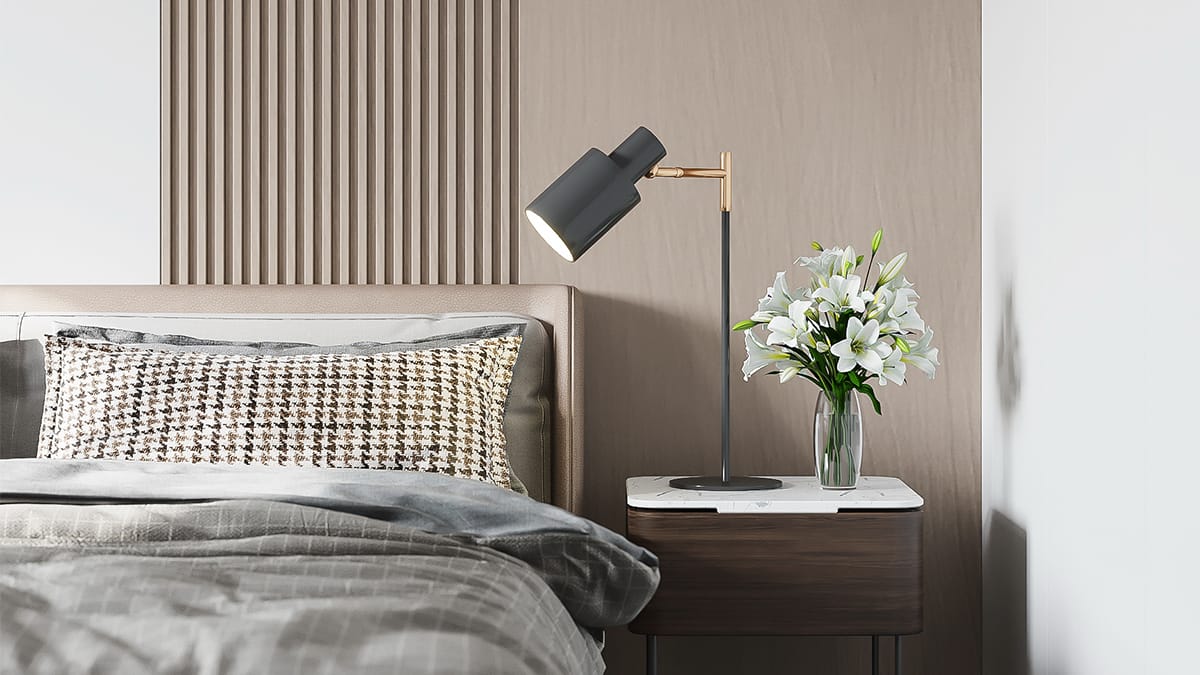
You should pick panelling that fits each room’s use. For busy places like kitchens or hallways, choose strong wood wall panels. Bedrooms need softer colors and textures for a cozy feel. Living rooms look nice with accent walls that show off cool wood designs. Think about how you want the room to feel. Decide what you want people to notice most.
Factor | Description |
|---|---|
Wood Type | Solid wood panels last longer than engineered ones, so they are more durable. |
Aesthetic Appeal | The finish you pick changes the mood, and warm tones make rooms feel cozy. |
Durability | Solid wood lasts for many years, but engineered panels may need replacing sooner. |
Maintenance | You need to clean and seal wood often to keep it looking good. |
Cost Considerations | Softer woods cost less than hardwoods, so you can save money. |
Environmental Impact | Using wood from good sources helps protect nature and the planet. |
Wood Types, Grains, and Colors
There are many choices for wood wall paneling. Oak, maple, cherry, and walnut all have different grain patterns and colors. Oak gives a classic look, and walnut feels bold and rich. Shaker panels look simple and neat. Shiplap brings a rustic style. The finish and texture you pick will change how your walls look and feel. A shiny finish looks modern. A rough finish feels warm and relaxed.
Each wood type changes the room’s mood.
Grain patterns make walls look interesting.
The finish can help your panelling stand out or blend in.
Budget and Practical Considerations
You can find panelling for almost any budget. Veneer panels start at $22 to $40 for basic ones. Fancy panels can cost $265 or more. Solid wood panels usually cost $15 to $30 for each square foot. Engineered wood panels are cheaper, costing $5 to $15 per square foot. If you want to save money, try veneer or MDF panels, which start at $5 to $8 per square foot.
Sizing and Layout Tips
Panelling can make a big difference in a room. Try putting it behind your TV or bed for an accent wall. Mix colors and textures for a special look. In dining rooms, panelling adds style. In entryways, it makes a strong first impression. Always measure your walls before you start. This helps you fit the panels right and avoid mistakes.
Design Inspiration and Trends
Need ideas? Here are some popular trends for 2024:
Design Inspiration | Description |
|---|---|
Single Wall Coverings | Put wood panels on one wall to make it stand out, especially in small rooms. |
Partial Coverings | Use wood panels on parts of walls, like around pillars or kitchen islands, to add interest. |
Flooring On Walls | Use wood flooring on walls to make the room look cool and match the floor. |
This guide helps you pick panelling that fits your style, needs, and budget. With the right choices, you can make any room look amazing.
Wall Panelling Installation Guide
Ready to transform your space with wood wall paneling? This wall panelling installation guide will walk you through every step. Whether you want a cost-effective way to update your home or just love a good DIY project, you’ll find this guide easy to follow. Let’s dive into the step by step wall panelling guide and see how you can make your walls stand out.
Preparation and Planning
Before you start installing wood wall panels, you need to get your space ready. Good prep makes the whole process smoother and helps you avoid mistakes later. Here’s how to fit the paneling the right way:
Prep the wall. Remove nails, trims, and baseboards. You want a clean, flat surface for your decorative wall panels.
Measure the wall. Use a tape measure to check the height and width. Write down the numbers so you know how many panels you need. Don’t forget to account for doors, windows, or outlets.
Acclimatize the wood. Let your wood wall panels sit in the room for at least 48 hours. This helps them adjust to the temperature and humidity, which prevents warping later.
Tip: Take your time with planning. Double-check your measurements and layout before you cut anything.
Tools and Materials
You don’t need fancy tools for diy wall panelling. Most of these items are easy to find at your local hardware store. Here’s what you’ll need:
Tape measure
Pencil
Level
Chalk line
Stud finder
Circular saw or fine-toothed handsaw
Drill and screwdriver
Caulking gun
High-grab construction adhesive
Finishing nails or black screws
Hammer or nail gun
Timber battens (if needed)
Sandpaper
Safety gear (gloves and safety glasses)
Wood filler
Trim pieces
Safety First: Always wear gloves and safety glasses when cutting or drilling. Keep your workspace clean to avoid accidents.
Step-by-Step Installation Process
Now you’re ready for the main event. This step-by-step installation process will help you install wood wall panels like a pro:
Use a level and chalk line to create a straight reference line on your wall. This keeps your first panel straight.
Measure and cut your panels with a fine-tooth blade. Sand the edges for a smooth finish.
Test fit the first panel against the wall. Make sure it lines up with your reference line.
Apply high-quality construction adhesive to the back of the panel.
Mount the first panel on the wall, pressing it firmly into place.
Add mechanical fasteners (nails or screws) if your panels need extra support.
Continue installing the rest of the panels in sequence. Check each one for alignment as you go.
Cut openings for electrical outlets or switches as needed.
Install trim pieces along the edges and corners for a finished look.
Note: If you want to customize your decorative wood panels for walls, now is the time. Paint, stain, or add patterns before you mount them.
Common Pitfalls to Avoid
Even if you follow a great installation guide, mistakes can happen. Here are some common pitfalls and how to avoid them:
Skipping wall prep. Always start with a clean, dry, and smooth wall.
Using the wrong measurements or adhesive. Measure twice and use the adhesive recommended by the manufacturer.
Forgetting to leave an expansion gap. Leave a 1/4 inch gap at the edges so the panels can expand and contract naturally.
Not aligning the panels correctly. Use your level and chalk line to keep everything straight.
Starting without acclimation. Let your panels adjust to the room before you install them.
Installing over uneven walls. Make sure your wall is flat before you begin.
Rushed measurements and cutting. Take your time to avoid costly mistakes.
Pro Tip: If you’re unsure about any step, practice on a scrap piece first. This helps you get comfortable with the tools and materials.
DIY vs. Professional Wood Wall Panel Installation
You might wonder if you should tackle this project yourself or hire a pro. Installing wood wall panels is easy to install for most DIYers, especially if you follow a clear installation process. DIY wall panelling saves money and lets you customize your space. It’s a cost-effective way to transform your home and try out new wood wall designs.
However, some situations call for a professional. If your walls are very uneven, or you want a complex pattern, a pro can ensure proper installation. They have the experience to handle tricky cuts and finishes. If you want a quick, easy to install solution, stick with simple panelling styles and follow this guide closely.
Remember: Whether you choose DIY or professional help, planning and patience are key. With the right approach, you can transform any room with beautiful panelling that matches your interior design.
Maintenance and Care Guide
Cleaning and Upkeep
 Cleaning and Upkeep
Keeping your panelling looking fresh doesn’t have to be hard. You can start by dusting your walls with a soft, dry microfiber cloth. For deeper cleaning, grab a vacuum with a soft brush attachment. If you need to wipe away smudges, use a damp cloth with mild soapy water. Always dry the panels right after cleaning. Avoid harsh chemicals and never soak the panels. Here’s a quick table to help you remember the best cleaning methods:
Cleaning Method | Description |
|---|---|
Soft Cloth and Mild Soapy Water | Dust first, then wipe gently in circles with a damp cloth and mild soap |
Avoid Harsh Chemicals | Skip abrasive cleaners to protect the finish |
Do Not Soak Panels | Clean spills fast and keep moisture low |
Dry Thoroughly | Use a dry cloth after cleaning to remove any leftover moisture |
Tip: Make gentle cleaning part of your routine. This keeps your panelling looking new and prevents dirt buildup.
Preventing Damage
You want your panelling to last for years. Try these simple steps:
Apply furniture wax to add shine and protect the surface.
Keep panels away from heat and direct sunlight. This stops warping and fading.
Don’t place heavy objects against your walls. This prevents compression and damage.
Add protection to high-risk areas and follow the manufacturer’s instructions.
Repairing Scratches and Dents
Scratches and dents happen, but you can fix them. Here’s a step-by-step guide:
Clean the damaged spot with a soft cloth and mild detergent.
Lightly sand the edges with fine-grit sandpaper.
Place a damp cloth over the area and use an iron for thirty seconds to raise the wood fibers.
Let the fibers dry, then apply matching paint or wood filler.
Sand again if needed and finish with a color-matching stain.
Long-Term Preservation
You can keep your panelling looking great for years. Dust regularly with a dry microfiber cloth. Apply high-quality polish every three to six months to restore shine and protect against dust and moisture. Use a humidifier or dehumidifier to keep indoor humidity stable. Protect your walls from sunlight with UV-filtering window film or curtains. Re-oil or wax the panels a couple of times a year to keep them supple. Avoid silicone-based products, which can harm the wood.
Note: Watch for moisture issues and address them quickly. This helps your panelling stay beautiful and strong.
Decorative wood panels for walls let you change your room in many ways. You can choose from different panelling options to fit your favorite style and make your space look better. Look at the table below to see the main benefits:
Benefit | Why It Matters |
|---|---|
Makes your walls feel cozy and welcoming | |
Durability | Stands up to busy rooms and daily life |
Easy to Install | Lets you try diy wall panelling with confidence |
Low Maintenance | Keeps your panelling looking great with little effort |
Try out new panelling ideas, use a good guide, and save money while making your walls look new. The right wall panelling helps your home feel special and new.
FAQ
How do I choose the right panelling for my room?
You want to match panelling with your room’s purpose and style. Think about how much traffic the space gets. Look at colors and textures that fit your design styles. This guide helps you pick the best option for your walls.
Is wall panelling a cost-effective way to update my home?
Yes! Wall panelling gives you a fresh look without breaking the bank. Many types are easy to install. You can try diy wall panelling for a budget-friendly decorative wall treatment. You get a big impact for less money.
Can I install wood wall panels myself?
You can! Many panels are easy to install. Follow a step by step wall panelling guide or a wall panelling installation guide for best results. If you want a custom look, diy projects let you transform your walls with your own wood wall designs.
What rooms work best for wood wall paneling?
You can use wood wall paneling in almost any room. Living rooms, bedrooms, and entryways all look great with panelling. Bathrooms and kitchens need moisture-resistant panels. Panelling adds style and warmth to your walls.
How do I keep my panelling looking new?
Dust your panelling often. Wipe with a damp cloth for spots. Avoid harsh cleaners. For long-lasting beauty, follow the installation guide and use proper installation methods. This keeps your decorative wall panels looking great for years.