


04 Jul Step-by-Step Guide for Installing Magnesium Wall Board in 2025
Table of Contents
You can install magnesium wall board with confidence when you understand the right steps. Magnesium oxide board, often called mgo board, gives you a strong and fire-resistant wall. Many homeowners and builders choose mgo board because it lasts longer than regular drywall. Mgo board also resists mold and moisture. If you want a smooth installation, always keep your mgo boards dry and handle them carefully. Magnesium wall board works well for any wall project, whether you build a new room or update an old space. Mgo installation helps you create a safe and sturdy wall.
Key Takeaways
- Get your work area ready and collect all tools and materials first. This helps the installation go smoothly.
- Measure and cut magnesium wall boards with care. Use the right tools and wear safety gear. This gives you clean and straight edges.
- Put the boards in place and fasten them with space between each one. Use corrosion-resistant screws to make the wall strong and last long.
- Be careful with corners and joints. Use adhesives and waterproofing to stop water damage and cracks.
- Finish by filling holes, sanding, priming, and checking the wall. This makes the surface smooth and ready for paint or wallpaper.
Tools and Materials for Installation
Get your tools and materials before you start your mgo wall board project. When you have everything ready, the job is easier. This helps you build a strong wall that will last a long time. Using each tool and material the right way is important. It can change how your wall turns out.
Essential Tools
You need some basic tools to put up mgo board.
- Use a good circular saw with a sharp or diamond blade. This helps you cut the boards clean and straight.
- A utility knife is good for scoring and snapping boards. It works well for small or careful cuts.
- Carbide-tipped scoring knives and power saws with carbide blades help you cut neatly.
- T-squares and measuring tapes help you make straight lines and measure boards.
- Cordless drills or screw guns help you put in screws fast. They also stop you from driving screws too deep.
- Rotary tools with carbide bits help you cut around outlets or pipes.
- Adjustable torque screwdrivers keep the board safe while you work.
Tip: Hold up the ends of the mgo board when you cut it. This stops the board from breaking.
Required Materials
You need certain materials to install mgo board the right way.
- Use screws that do not rust, like 316 stainless steel or ceramic coated fasteners.
- Pick adhesives that meet ASTM D3498 rules, like moisture-cured urethane adhesives. These help the boards stick well.
- For joints, use flexible fillers and fiberglass tape in a finishing compound.
- Pick joint compounds like Murco Wall M-100 or Westpac “Red Dot” for a smooth finish.
- Let your boards sit in a dry place for at least 48 hours before you use them.
- Keep your mgo boards on raised supports and protect the edges from getting hurt.
Safety Equipment
Safety is important every time you work with mgo board.
- Wear dust masks and safety glasses when you cut or sand mgo boards. This keeps your lungs and eyes safe.
- Wear gloves to keep your hands safe from sharp edges.
- Keep a vacuum or dust control system close to clean up dust.
- Make sure your work area has fresh air.
Note: Always follow local building codes and safety rules. This helps you stay safe and finish your project the right way.
Site Prep and Framing
Work Area Prep
Start your project by preparing the work area. You want a clean and safe space for the application of mgo boards. Remove all dirt, dust, oil, and leftover cement from the floor and walls. Make sure the area is dry and has no standing water. This step helps prevent moisture problems during application. Complete all major pipeline work before you begin. Wait until the exterior wall construction is finished. Keep the temperature between 41°F and 95°F (5°C to 35°C) for the best results.
Tip: Level any uneven surfaces before you start. This makes the mgo board application smoother and helps your wall last longer.
Framing and Keel Setup
Check all materials before you start framing. Make sure your mgo boards are dry, flat, and free from damage. Inspect steel keels for rust or bends. Mark the wall positions on the floor and ceiling. Include spots for doors and windows. Secure the top and bottom keels with fasteners no more than 24 inches apart. Cut vertical keels to fit with a small gap for easy application. Keep the framing spaced at 16-inch centers for strong support. Use a plumb line to check that vertical keels stand straight.
Reinforce the framing around doors and windows. Break horizontal keels at openings and add extra vertical and horizontal keels to form a strong frame. For wide openings or places where you plan to hang equipment, add more support. Adjust the keels as you install the mgo boards to keep everything lined up.
Marking Layout
Accurate marking is key for a smooth application. Use a tape measure to check the area and the mgo boards. Mark cutting lines and layout spots with a pencil or chalk. Use a straight edge or T-square for even lines. Always measure twice before you cut to avoid mistakes and wasted material. Mark boards on a steady surface, like saw horses, to keep them from moving. Leave a 1/8 inch gap between boards for expansion. Use a level to check that your wall is flat and even.
Note: Careful layout and marking help you avoid errors and make the application of mgo board easier.
Cutting and Fitting Magnesium Wall Board
 Measuring and Marking
 Measuring and Marking
You need to measure and mark carefully before cutting mgo boards. Use a tape measure and a T-square to get straight lines. Mark your cutting lines with a pencil or chalk so you can see them clearly. Always double-check your measurements to avoid mistakes. Place the mgo board on a stable surface, like saw horses, to keep it steady. Use a level to make sure your lines are straight. Leave a small gap, about 1/8 inch, between boards for expansion. Even though there are no strict codes for measuring and marking, following these steps helps you get a clean fit and a strong wall.
Tip: Double-check every measurement before you start cutting mgo boards. This saves time and materials.
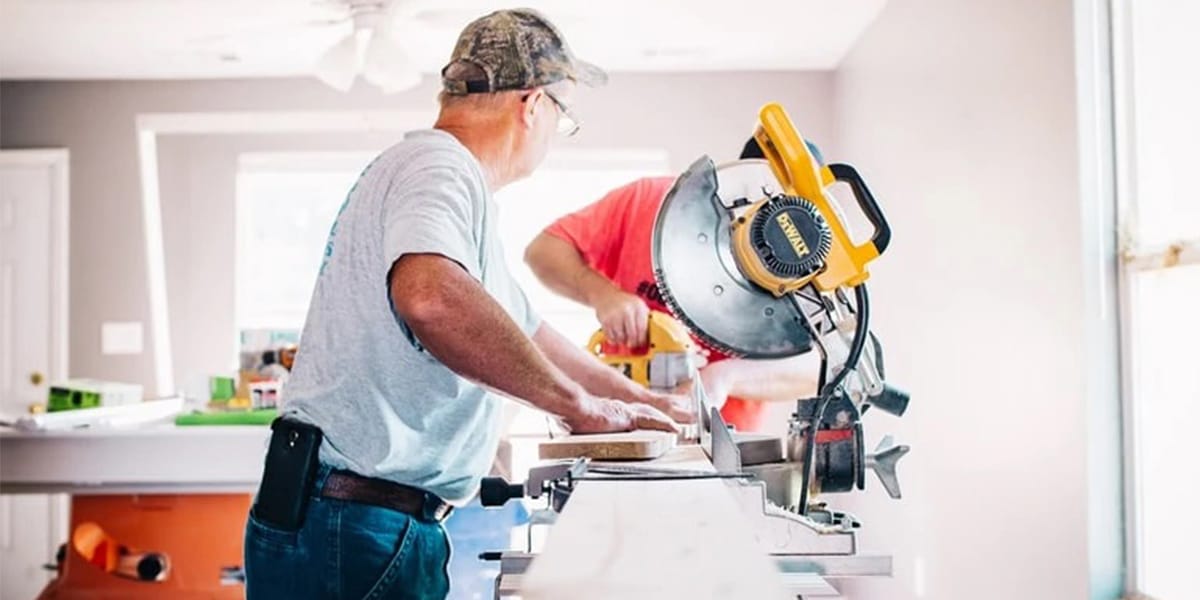
Cutting Techniques
You have several ways to cut mgo boards. For long, straight cuts, use a circular saw with a thin carbide blade made for cement board. This gives you a clean edge and helps your blade last longer. For smaller cuts or trimming, score the board deeply with a utility knife along your marked line, then snap the board. This method works fast but may leave rougher edges. Always secure the mgo board on a stable surface before you start cutting. Wear safety glasses, gloves, and a dust mask to protect yourself from dust and sharp edges.
- Fiber cement shears or circular saws make neat, straight cuts.
- Scoring knives or utility knives work well for small sections.
- Saw horses and squares help keep your setup steady.
- Lightly sand the cut edges if you want a smoother finish.
- Apply construction adhesive on corners after cutting to reduce micro-cracking.
Note: Cutting mgo boards while they are dry prevents damage and gives you the best results.
Fitting Around Openings
When you need to fit mgo boards around doors, windows, or outlets, measure the opening first. Mark the area on the board with a pencil. Use a rotary tool with a carbide bit for detailed cuts, like curves or small holes. Always carry mgo boards vertically to avoid breaking the edges. Make sure the boards stay dry before you install them. After cutting mgo boards for openings, check the fit before fastening them in place. Sand any rough edges for a smooth finish.
Remember: Careful fitting around openings makes your wall look professional and helps prevent cracks later.
Install MgO Board
Board Positioning
You need to start with careful board positioning when you install mgo board. Place each magnesium wall board so the ends rest on joists or framing. This gives your wall strength and keeps the boards stable. Always check that your framing is straight, square, and level. This step helps you avoid stress on the boards and makes the application smooth.
- Leave a 1/8 inch expansion gap between each magnesium wall board and at adjoining walls. This gap lets the boards expand and contract with changes in temperature and humidity.
- If you use cold-formed steel framing, stagger the panels and leave a 1/16 inch gap. For wood framing, keep the 1/8 inch gap.
- Acclimate the boards to the room for at least 48 hours before you start laying the mgo boards. This helps prevent problems with expansion later.
- Support all board ends with framing. Never let a board end hang in the air.
- Start laying the mgo boards from one side of the wall and work across. This method helps you avoid stress and keeps the application even.
Tip: Always position the boards so the edges line up with the center of the vertical keels. This gives you a strong and stable wall.
Fastening and Spacing
Fastening the boards the right way is key for a safe and long-lasting installation. Use self-drilling screws or self-tapping screws for magnesium oxide board. Start fastening from the center of each board and move outward. This method spreads the stress and keeps the board flat.
- Place perimeter fasteners every 6 inches and center fasteners every 12 inches. This pattern gives your wall the best support.
- Keep screws at least 4 inches from corners and 9/16 inch from the board edge. Never drive screws at an angle.
- Pre-drill holes near the edges to stop the board from cracking.
- Do not force the boards into place. Let the expansion gaps stay open.
- For mgo board installation for internal wall, align the boards with the adjacent ones and keep the design-specified expansion gaps.
- Lift the bottom edge of each panel at least 10mm above the floor. This keeps the board dry and safe from moisture.
- Secure the upper edge tightly to the ceiling unless you need a gap for sound or fire requirements.
- Stagger the vertical joints along the longer side of the boards on both sides of the wall. This step adds strength to your application.
Here is a table showing the recommended fastening and spacing for mgo board installation for internal wall:
Location | Fastener Spacing | Distance from Edge | Notes |
|---|---|---|---|
Perimeter | 6 inches | 9/16 inch | No closer than 4 inches from corners |
Center | 12 inches | 9/16 inch |
|
Screw to Edge | — | 10-15 mm (15-20 mm for cut edge) | Use single pass with screw gun |
Note: These fastening patterns help your wall resist wind and static loads. They also let the wall move a little without cracking.
Handling Corners and Joints
 When you install mgo board, you must pay special attention to corners and joints. Good handling here keeps your wall strong and stops moisture from getting in.
- Use a strong adhesive, like Bostik, for board-to-board connections. This step makes the joints tight and secure.
- Apply a waterproofing membrane with seam reinforcement at all corners and critical joints. This protects your wall from water damage.
- At the wall-shower-pan seam, use an elastomeric membrane and reinforcement scrim. This method works well in bathrooms and wet areas.
- Choose large 4×8 foot magnesium wall boards when possible. Fewer seams mean less movement and a more stable wall.
- Fasten the boards with stainless or coated screws. Make sure the screws sit flush with the surface.
- Treat all joints with care. Fill them with a flexible filler and cover with fiberglass tape in a finishing compound. This step stops moisture from reaching the framing.
- The strength of magnesium oxide board lets you attach fixtures directly to the wall without extra backing.
- You can finish the wall with paint, plaster, or wallpaper. The surface supports many types of finishes.
Remember: Careful handling of corners and joints during mgo board installation for internal wall helps your wall last longer and look better.
Finishing Magnesium Wall Board Installation
Filling and Sanding
You need to fill all screw holes, seams, and joints before you finish your mgo wall board. Start by using a flexible filler like Manus-Bond 75-AM for any gaps. For dry indoor spaces, choose gypsum-based fillers with polymer additives such as KNAUF FUGENFULLER or SEMIN SE-78. In humid rooms, polymer-cement fillers like Snezhka’s ACRYL-PUTZ FD12 work best. If your space has big changes in temperature or humidity, use elastic putties like Fibrelastic.
After filling, embed 6-inch fiberglass tape into a compound like RapidSet “Wunderfixx” to reinforce the seams. Feather the compound out 12-18 inches on each side. Lightly sand the seams while the compound is still damp for a smooth finish. Apply a final coat of a high-quality finishing compound, such as Murco Wall M-100, and feather it out even wider. Always keep the room at a steady temperature and humidity during this step. This helps prevent micro-cracking in your mgo board finish.
Tip: Let your mgo boards acclimate for 3-5 days with HVAC running before installation. This step helps avoid cracks later.
Priming and Painting
After sanding, you need to prime your mgo wall board. Use a primer made for masonry or concrete. This helps the paint stick and protects the board. For outdoor walls, pick an exterior acrylic primer and a 100% acrylic latex or elastomeric paint. These coatings protect your mgo wall from moisture and weather.
Studies show that the right primer and paint system can stop environmental damage and make your wall last longer. Advanced tests prove that magnesium-rich primers resist corrosion and keep your wall strong, even in tough conditions.
Note: Always test your primer and paint on a small area first to check for good adhesion.
Final Inspection
Before you finish your mgo wall board installation, check your work. Look for smooth seams, filled screw holes, and even surfaces. Run your hand over the wall to feel for bumps or rough spots. Make sure all joints are flush and the wall is level. If you see any flaws, sand and touch up those areas.
You can now choose your final finish. Paint, plaster, or wallpaper all work well on mgo board. Pick the finish that fits your room best.
Step | What to Check For |
|---|---|
Seams & Joints | Smooth, feathered, no cracks |
Screw Holes | Fully filled, sanded flat |
Surface | Even, no bumps or rough patches |
Alignment | Level and plumb |
Remember: Careful inspection ensures your mgo wall board installation looks professional and lasts for years.
You can install magnesium wall board with great results when you follow each step.
- Gather your tools and materials.
- Prepare your site and framing.
- Measure, cut, and fit each board.
- Fasten and finish the wall with care.
Always check the manufacturer’s instructions for your specific mgo board. If you have questions or want to share your experience, leave a comment below!
FAQ
How do you store magnesium wall board before installation?
Keep your boards dry and flat. Place them on raised supports. Cover the boards with a tarp or plastic sheet if the area is damp. Avoid stacking heavy items on top. This prevents warping and damage.
Can you use regular drywall screws for MgO board?
No, you should not use regular drywall screws. Use corrosion-resistant screws, such as stainless steel or ceramic-coated fasteners. These last longer and prevent rust.
What is the best way to cut magnesium wall board?
Use a circular saw with a carbide blade for straight cuts. For small cuts, score with a utility knife and snap the board. Always wear safety gear to protect yourself from dust and sharp edges.
Do you need to prime MgO board before painting?
Yes, you need to apply a masonry or concrete primer. This helps the paint stick and protects the board. Test the primer on a small area first to check for good results.