

21 Jun Step-by-Step Guide to Installing Magnesium Oxide Boards in 2025
Table of Contents
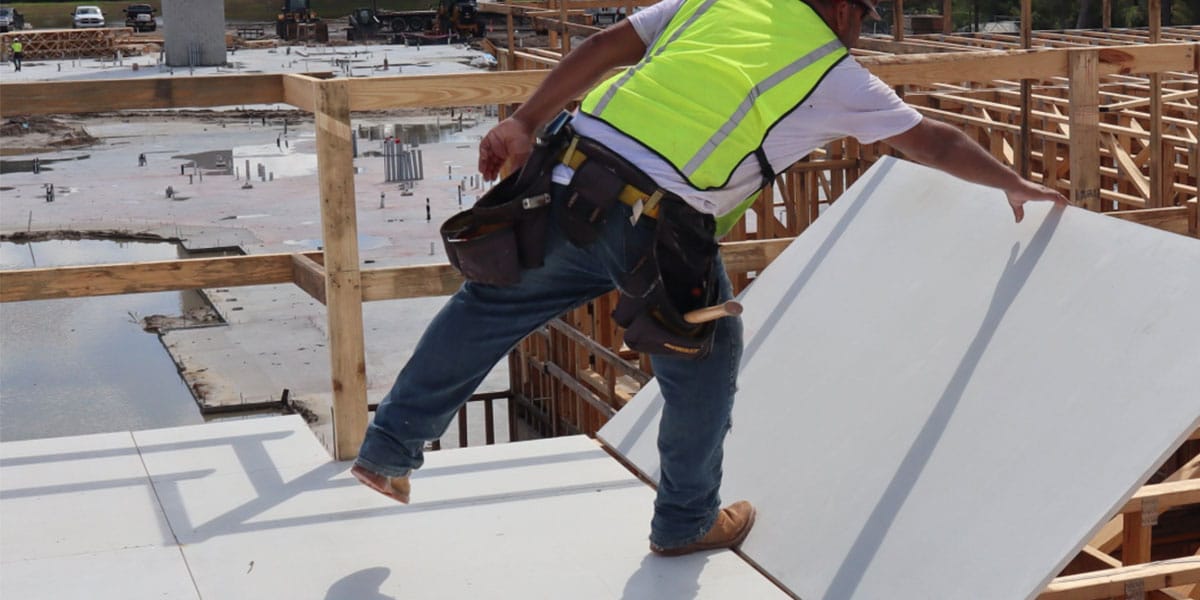
If you need a strong building material, magnesium oxide boards are great. They are tough, fireproof, and very useful for many projects. These boards have a UL 055 rating and an A+ from ATSM, showing they resist fire really well. They also stop fungus, so no mold or rot—just lasting strength.
Magnesium boards are light, about 20–30% lighter than other cement boards. This makes them simple to carry and install on walls, ceilings, or floors. With a flexural strength of up to 15 MPa, they are stronger than regular drywall. That’s why they are popular for new buildings in 2025.
Key Takeaways
Magnesium oxide boards are light, fireproof, and resist mold. They are great for many building projects.
Collect all tools and supplies before you begin. This saves time and helps the work go smoothly.
Clean and level the surface first. This stops problems later and helps the boards last longer.
Cut MgO boards carefully with the right tools. Always wear safety gear to stay safe from dust and bits.
Leave small spaces between boards so they can expand. Seal seams well to make them strong and look nice.
Tools and Materials Needed
Before installing magnesium oxide (MgO) boards, gather all tools and materials. Being prepared saves time and makes the job easier.
Tools You’ll Need for MgO Boards
You’ll need some special tools to work with MgO boards. Here’s what to have:
Carbide Tipped Scoring Knife: Cuts and snaps boards neatly.
Dust Reducing Circular Saw: Cuts cleanly while keeping dust low.
Fiber Cement Shears: Makes precise, detailed cuts.
Saw Horses: Holds boards steady for cutting and measuring.
Square: Ensures straight and even lines.
Putty Knife: Spreads adhesives and fills seams easily.
These tools are made for the strength of MgO boards, which crack less than cement boards.
Materials You’ll Need
Using good materials is important. Here’s what you’ll need:
MgO Boards: Pick boards that meet fire safety standards.
Corrosion-Resistant Screws: Keep boards secure and rust-free.
Adhesive: Bonds boards firmly to surfaces.
Polyurea or Modified Epoxy Seam Filler: Fills gaps for a smooth look.
Underlayment: Gives floors a stable base and reduces movement.
MgO boards resist moisture, so they’re great for damp areas. Using the right materials ensures they last longer.
Safety Gear to Use
Always stay safe while working. Wear this gear:
Safety Glasses: Protect your eyes from dust and debris.
Dust Mask: Stops you from breathing in fine particles.
Gloves: Protect your hands from sharp edges and tools.
Even though MgO boards make less dust, safety gear is still important. Stay safe while working on your project.
Pro Tip: Keep all tools and materials in one spot before starting. This helps you stay organized and avoid delays.
Preparation for Installing Magnesium Oxide Board
Getting ready is key for installing magnesium oxide (MgO) boards. Preparing the surface well makes the job easier and ensures the boards last longer. Follow these simple steps to get started.
Cleaning the Surface
First, clean the surface completely. Dirt, grease, or dust can weaken the adhesive and make the boards unstable. Sweep or vacuum to remove loose debris. For sticky dirt, use a damp cloth with mild soap. Let the surface dry fully before moving forward.
Pro Tip: If the area often gets wet, like a basement floor, use a moisture meter to check dryness. This helps avoid problems like mold or warped boards later.
Leveling and Measuring the Substrate
After cleaning, make sure the surface is flat and dry. Uneven spots can cause cracks or shifting over time. Use a level to check for bumps or dips. For big projects, advanced leveling tools can give accurate results and work with modern building methods like BIM.
Fix uneven areas like this:
Fill low spots with cement mix or foam.
Sand down high areas to make them even.
For concrete floors, drill holes and inject a mix of water, sand, and cement to lift uneven parts.
Seal and smooth the surface to prepare it for MgO boards. This step is very important for a strong installation.
Planning the Layout and Board Placement
Before attaching boards, measure and plan carefully. This avoids mistakes and gives a neat finish.
Measure the area where boards will go.
Draw a layout to see how boards will fit. Plan seams to reduce waste.
Mark where each board will go using chalk or pencil.
Callout: Leave a small gap (about 1/8 inch) between boards. This lets them expand and prevents damage over time.
Planning ahead saves time and makes installation easier. It also helps the project feel more organized and less stressful.
Cutting Magnesium Oxide Boards

Cutting magnesium oxide boards might seem tricky at first, but with the right approach, you’ll get clean, precise results every time. Let’s break it down step by step.
Measuring and Marking for Precision
Before you start cutting, take a moment to measure and mark your boards carefully. Precision here saves you from costly mistakes later. Use a tape measure to determine the exact dimensions you need. Then, grab a pencil or chalk to mark your cutting lines. A square tool can help you keep those lines straight and accurate.
Pro Tip: Double-check your measurements before cutting. It’s always better to measure twice and cut once!
If you’re working on a large project, consider marking all your boards in one go. This keeps the process smooth and organized.
Tools for Cutting MgO Boards
Using the right tools makes cutting magnesium oxide boards much easier. Here’s what works best:
Circular Saw with a Thin Carbide Blade: Perfect for clean, straight cuts.
Utility Knife: Great for scoring and snapping smaller sections.
Fiber Cement Shears: Ideal for detailed cuts.
Oscillating Multitool: Handy for tricky angles or tight spaces.
MgO boards are easier on tools than fiber cement, so you won’t wear out your blades as quickly. For edges, you can use carbide tooling to rout them smoothly. If you’re cutting MagPanel® boards, scoring with a razor blade and snapping from the smooth side works well too.
Tips for Clean and Safe Cuts
When cutting MgO boards, safety and precision go hand in hand. Follow these tips to get the best results:
Secure the Board: Place it on a stable surface, like sawhorses, to prevent movement.
Power Cutting: Use a circular saw with a thin carbide blade for clean cuts. This also extends the blade’s life.
Dust Control: Cutting MgO boards produces fine dust. Wear a respirator and work in a well-ventilated area. A dust collection system can help too.
Scoring and Snapping: For smaller cuts, score deeply with a utility knife and snap the board. Sand the edges lightly for a smoother finish.
Protect Yourself: Always wear safety glasses to shield your eyes from debris.
Method | Description |
|---|---|
Power Cutting | Use a circular saw with a thin carbide blade for clean cuts and blade longevity. |
Dust Control | Wear a respirator and ensure good ventilation or use a dust collection system during cutting. |
Scoring and Snapping | Score deeply with a utility knife and snap for smaller cuts, though edges may be rough. |
Secure the Board | Firmly support the board on a stable surface while cutting. |
Eye Protection | Always wear safety glasses to protect your eyes. |
Edge Finishing | Lightly sand cut edges for a smoother finish if necessary. |
Glue Corners | Apply construction adhesive to corners post-cut to reduce micro-cracking. |
By following these tips, you’ll make cutting MgO boards a breeze while keeping yourself safe.
Reminder: Always clean up the dust after cutting. This keeps your workspace tidy and reduces health risks.
Installation Instructions for MgO Boards
Positioning and Aligning the Boards
Getting the placement right is the first step to a successful installation. Start by laying the MgO boards on the prepared surface according to your layout plan. Make sure to follow the markings you made earlier to avoid misalignment. Positioning the boards correctly ensures a smooth and professional finish.
Here’s how you can do it:
Place the first board at one corner of the surface. Align it with the edges of the wall or floor.
Use a level to check that the board is perfectly straight. Adjust it if needed.
Continue laying the MgO boards row by row. Keep the seams tight but leave a small gap between each board for expansion.
Pro Tip: If you’re installing MgO boards on walls, start from the bottom and work your way up. This makes alignment easier and prevents shifting.
MgO boards are good for kitchens and bathrooms because they resist moisture and mold. Proper alignment is especially important in these areas to maintain a clean and seamless look.
Fastening Techniques for Durability
Fastening the boards securely is crucial for a long-lasting installation. Use the right screws and techniques to keep the boards in place, even in high-moisture areas like kitchens and bathrooms.
Follow these steps for screw fixing:
Use rust-resistant screws, such as 316-stainless steel. These prevent corrosion and extend the life of your installation.
Drill pilot holes into the boards before fastening. This reduces the risk of cracking.
Place screws about 12 inches apart along the edges and 16 inches apart in the center of the board.
Drive the screws in until they’re flush with the surface. Avoid over-tightening, as this can damage the board.
For added durability:
Let the boards acclimate to the environment for 48 hours before installing. This prevents warping.
Use MagO strips or metal clips to separate joints from the structure. This reduces stress on the boards.
Always follow local building codes to ensure your installation meets safety standards.
Reminder: If you’re working with wood frames, maintain a 1/8-inch gap between the boards. For steel frames, a 1/16-inch gap works best. These small adjustments make a big difference in durability.
Allowing for Expansion Gaps
MgO boards expand and contract slightly with temperature changes. Allowing for expansion gaps prevents buckling and ensures the boards stay in place over time.
Here’s what you need to know:
Leave a small gap (about 1/8 inch) between each board. This gives the boards room to expand without pushing against each other.
Fill the gaps with a fire-rated sealant. This maintains the fire resistance of the boards while keeping the surface smooth.
Check the edges of the installation. Leave a similar gap between the boards and the walls or other fixed structures.
Callout: Expansion gaps are especially important in areas with high humidity or temperature fluctuations, like bathrooms or kitchens.
By following these steps, you’ll create a sturdy and long-lasting installation. Proper spacing and sealing also enhance the appearance of the finished surface.
Installing MgO Boards on Walls, Ceilings, and Floors
Putting up magnesium oxide (MgO) boards depends on where you’re working. Walls, ceilings, and floors each need a slightly different method. With the right steps, you’ll get a great result every time.
Walls
Installing MgO boards on walls is simple. Attach the boards to the surface with rust-proof screws. Start in one corner and move across, keeping each board straight. Use thicker boards for fire or impact protection. For mobile homes or lighter structures, thinner boards work better.
Here’s a quick guide for wall thickness:
12mm (1/2″) and 15mm (19/32″) for regular walls.
20mm (3/4″) for fireproof or strong walls.
6mm (1/4″) and 9mm (11/32″) for lightweight walls.
Tip: Mark screw spots with a chalk line. This keeps screws neat and evenly spaced.
Ceilings
Ceilings need extra care to stop boards from sagging. Use thicker boards for direct attachment to joists. For drop ceilings, lighter boards are best. MgO boards are great for ceilings because they resist fire and last long.
Thickness options for ceilings:
12mm (1/2″) for direct attachment.
3mm (1/8″) and 6mm (1/4″) for drop ceilings.
Start at one ceiling corner and work outward. Have someone hold the board while you screw it in. Leave small gaps between boards for movement.
Pro Tip: In humid rooms like bathrooms, seal edges with waterproof sealant. This stops water damage and helps boards last longer.
Floors
MgO boards are strong and resist moisture, making them perfect for floors. They create a solid base for tiles, vinyl, or other coverings. Use thicker boards for strong support.
Recommended floor thickness:
20mm (3/4″) or more for subflooring.
Lay the boards following your plan. Secure them with screws or adhesive. Fit them tightly but leave small gaps for expansion. Use underlayment on uneven surfaces for a smooth base.
Reminder: Always follow the manufacturer’s instructions. This ensures your project is safe and durable.
Quick Comparison Table
Here’s a simple table comparing MgO board installation for walls, ceilings, and floors:
Application | Thickness Options | Notes |
|---|---|---|
Walls | 12mm (1/2″), 15mm (19/32″), 20mm (3/4″), 6mm (1/4″), 9mm (11/32″) | Thicker for fire/impact resistance; lighter for mobile homes. |
Ceilings | 12mm (1/2″), 3mm (1/8″), 6mm (1/4″) | Use thicker boards for joists; lighter ones for drop ceilings. |
Floors | 20mm (3/4″) or thicker | Provides strong support for subflooring. |
By following these steps, you’ll install MgO boards smoothly and securely. Whether it’s walls, ceilings, or floors, good preparation and materials are key.
Finishing Magnesium Oxide Boards
After installing your magnesium boards, it’s time to finish them. Finishing makes them look better and last longer. Follow these steps to handle seams, prime and paint, and seal the boards for extra protection if needed.
Treating Seams and Joints
Seams and joints need attention first. If ignored, they can weaken or let in moisture. Keep the workspace at a steady temperature and humidity. Leave a small gap (1/6″ to 1/8″) between boards for expansion.
Here’s how to treat seams:
Step | Details |
|---|---|
Preparation | Make sure gaps are even and clean. |
Materials | Use Manus-Bond 75-AM for gaps and fiberglass tape for strength. |
Filling Process | Apply Manus-Bond, press tape into RapidSet “Wunderfixx,” and sand lightly for smoothness. |
Final Coat | Finish with Murco Wall M-100 joint compound for a neat look. |
Tip: Sand gently after the final coat to blend the seams smoothly.
Priming and Painting the Boards
Priming and painting protect your MgO boards and make them look polished. Use a primer made for masonry or concrete. For outdoor use, pick an exterior acrylic primer to block moisture.
When painting, choose a topcoat that fits your needs. For weather protection, 100% acrylic latex paint works well. In tough climates, elastomeric paint adds flexibility and strength.
Technique | Description |
|---|---|
Zinc Chromate Pigmented Primer | Best for bare magnesium boards; helps paint stick better. |
Clean the surface to improve how the paint holds up. |
Pro Tip: Apply two coats of paint for the best finish. Let the primer dry fully before painting.
Optional Sealing for Added Protection
Sealing is optional but helpful in wet or high-use areas. A sealant adds extra protection and makes boards last longer.
Here are some sealing choices:
Coating Type | Description |
|---|---|
Primer | Stops chemical reactions on alkaline surfaces like MagPanel®. |
Tough finish that can be applied directly. | |
Polymer Modified Cement Base | Boosts moisture resistance and durability. |
Paint | Some paints create a UV-resistant layer on MgO boards. |
Reminder: Always follow the sealant instructions to avoid problems with compatibility.
By treating seams, priming, painting, and sealing (if needed), your magnesium boards will look great and stay strong for years. These steps ensure a durable and professional finish.
Safety Tips for Installing MgO Board
Safety is very important when working with magnesium oxide boards. Follow these tips to stay safe and make your installation smooth.
Using Tools Safely
Always check your tools before using them. Make sure they work well and are right for the job. For cutting MgO boards, use a circular saw with a sharp carbide blade. It should also reduce dust to keep the area clean.
Secure the board on a steady surface like sawhorses before cutting or drilling. This stops it from moving and keeps you safe. When using power tools, keep your hands far from the blade. Always cut away from your body.
Tip: Take short breaks during long tasks. Tired hands can cause mistakes or accidents.
Wearing Safety Gear
Protective gear keeps you safe while working. Even though MgO boards are light and safe, cutting them makes fine dust. Wear a dust mask or respirator to avoid breathing it in. Use safety glasses to protect your eyes from flying debris.
Gloves are also important. They shield your hands from sharp edges and tools. Pick gloves that fit well but still let you hold tools easily. If it’s noisy, wear earplugs or earmuffs to protect your hearing.
Reminder: Always wear safety gear, even for small jobs. It’s better to be careful.
Avoiding Common Problems
Installing MgO boards is easy, but problems can happen if you’re not careful. Don’t carry boards flat; hold them upright to stop bending or breaking. They are strong, but rough handling can still damage them.
Another issue is skipping surface prep. A dirty or uneven surface can make boards unstable. Clean and level the area before starting.
Lastly, think about fire safety. MgO boards don’t burn and have an A1 fire rating, but you should still follow building codes. Use fire-rated sealants for seams to meet safety rules.
Callout: Keep your workspace neat. A clean area helps prevent trips or tool accidents.
By following these tips, you’ll stay safe and create a strong, professional installation.
Putting up magnesium oxide boards is simple if you follow steps. First, gather tools and materials. Next, clean the surface and plan where boards go. Cut them carefully and attach using proper screws or adhesive. Leave small gaps for expansion and finish for a neat look.
Being prepared and accurate makes the job easier. Clean, measure, and align everything well. Always wear safety gear and use tools carefully to stay safe.
This guide helps you create a strong and lasting installation. Get ready and start your project today!
FAQ
What makes magnesium oxide boards better than drywall?
MgO boards are stronger, fire-resistant, and mold-proof. They last longer in damp areas like bathrooms. Drywall is cheaper but less durable. If you want a sturdy, moisture-resistant option, MgO boards are the way to go.
Can I install MgO boards without professional help?
Yes, you can! MgO boards are lightweight and easy to cut. Follow this guide, and you’ll handle the installation like a pro. Just take your time and use the right tools.
Do MgO boards need special screws?
Absolutely. Use corrosion-resistant screws, like stainless steel ones. Regular screws can rust and weaken over time. These screws keep your boards secure and extend their lifespan.
Are MgO boards safe for kitchens and bathrooms?
Definitely! MgO boards resist moisture and mold, making them perfect for wet areas. They also handle heat well, so they’re great for kitchens. Just seal the edges for extra protection.
How do I clean MgO boards after installation?
Use a damp cloth and mild soap to wipe them down. Avoid harsh chemicals—they can damage the surface. For stubborn stains, try a soft brush. Keep it simple, and your boards will stay looking great.