


02 Aug What Is Floor Sheathing and Why Is It Important
Table of Contents
Floor sheathing is a solid layer above floor joists. This base gives you a strong, flat area for flooring. Floor sheathing makes your floor system stronger and stiffer. It helps hold up furniture and people. Studies show good sheathing means less heavy material is needed. This makes the foundation lighter and helps buildings last longer. Some new systems use sensors to find damage early. This protects your building and helps the environment.
Key Takeaways
Floor sheathing is a strong, flat layer. It sits on floor joists. It helps hold up the floor. It spreads weight out evenly.
Picking the right material and thickness is important. It makes the floor stable and quiet. It helps the floor last a long time. It also meets building codes.
Plywood, OSB, and MgO boards are common choices. Each one has its own good and bad points. They handle water, fire, and wear in different ways.
To install it right, lay panels across the joists. Leave small gaps so the panels can expand. Use tongue-and-groove edges, glue, and strong fasteners. This stops squeaks.
Good floor sheathing keeps your home safe. It saves money on repairs. It makes your home safer and more comfortable.
Floor Sheathing Basics
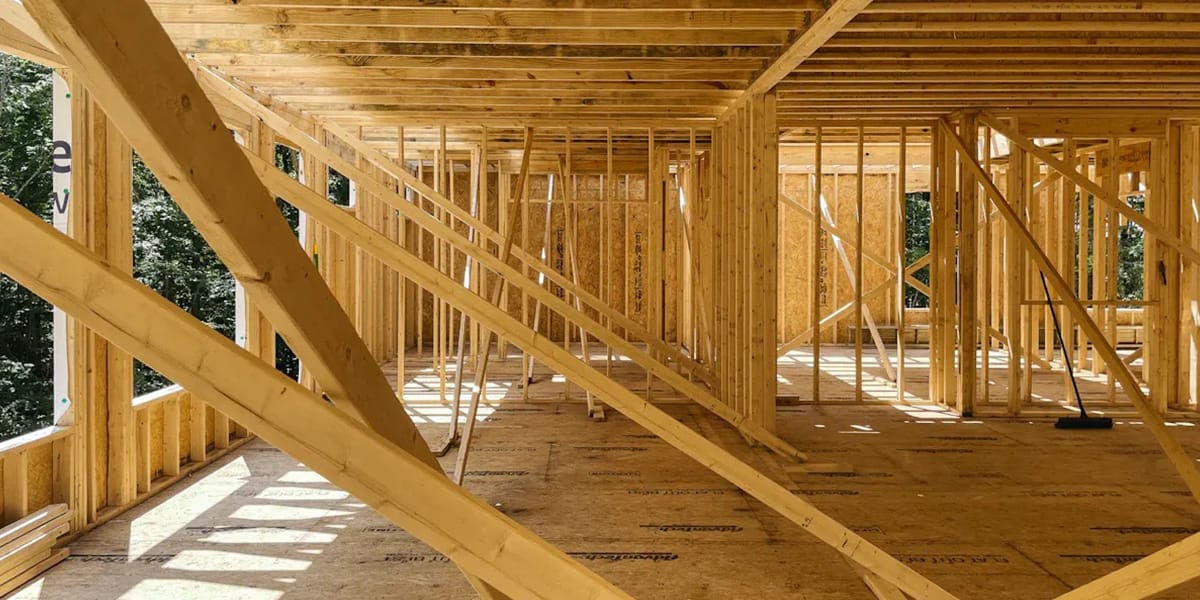
Definition
You can think of floor sheathing as the strong, flat layer that sits right on top of your floor joists. This layer forms the base for any flooring you install, like hardwood, carpet, or tile. Building codes and construction handbooks give clear rules for what counts as proper floor sheathing. Here is a quick look at some standard requirements:
Aspect | Description |
|---|---|
Minimum Thickness | 3/4 inch for a 24-inch span (surfaced dry lumber) |
Allowable Spans | 24 to 60 inches, depending on panel thickness and grade |
Grading Rules | Utility, Standard, No. 3, and Merchantable grades, following set standards |
Load Capacities | 40 psf total load, 30 psf live load for certain panel grades |
Panel Edge Support | Tongue-and-groove joints or blocking required for panel edges |
Moisture Content | Maximum 19% for surfaced dry lumber |
Note: The International Residential Code (IRC) says you need at least 7/16″ plywood for floor sheathing unless you use 3/8″ plywood with panel clips and supports spaced 24″ on center. The right thickness depends on your floor’s span and the loads it must carry.
Purpose
You need floor sheathing for several important reasons. First, it gives you a safe and stable platform to walk and work on during construction. This layer supports the weight of people, furniture, and anything else you place on your floor. It also helps spread out the weight, so your floor joists do not bend or break.
Construction experts point out that floor sheathing is the first layer you install because it forms the foundation for the rest of your building. It keeps your floor system from moving or shifting. This stability makes your whole building stronger and safer.
You get a solid base for your finished flooring.
The sheathing helps transfer loads from the floor down to the ground.
It prevents squeaks and uneven spots in your floor.
If you choose the right material and thickness, your floor sheathing will last longer and perform better. Always check local building codes to make sure your project meets all safety and strength requirements.
Functions
Structural Support
Floor sheathing helps make your floor strong. When you attach panels to joists, they work together. This teamwork is called composite action. It makes the floor stiffer and reduces shaking. Tests show sheathing adds a lot of bending strength. The floor can be about 23 times stiffer with sheathing. This happens when you put something heavy in one spot. Building codes set rules for how much a floor can bend. You meet these rules by picking the right thickness. You also need to fasten the sheathing well. If you want to hold heavy things, use thicker panels.
Stability and Load Distribution
Floor sheathing spreads out weight from people and furniture. It helps share the load across many joists. This makes your floor feel solid and stops sagging. You will hear fewer squeaks and feel less movement. Builders use tongue-and-groove panels to lock edges together. This keeps the floor flat and stable. Placing panels across the joists makes the floor even stronger.
Tip: Always check the panel thickness for your floor span. Thicker panels give better support and stop bouncy floors.
Protection
Floor sheathing acts like a shield for your home. It helps block moisture, pests, and fire. The level of protection depends on the material you pick. Here is a quick comparison:
Sheathing Material | Moisture Protection | Pest Protection | Fire Protection | Limitations |
|---|---|---|---|---|
Wood Structural Panels | Moderate; can degrade | Poor; attracts termites | Limited; not fire resistant | Sensitive to moisture, environmental impact |
Fiber Cement Sheathing | Excellent | Excellent | Excellent | Heavy, costly |
Foam Board Sheathing | Good | Limited | Poor; flammable | Needs extra fire barrier, less support |
Good | Limited | Excellent | Brittle, less structural support | |
Oriented Strand Board (OSB) | Moderate; can swell | Poor | Limited | Heavier than plywood, moisture sensitive |
You get the best results with good materials and proper installation. Rainscreens and termite shields add more protection. In flood areas, use sheathing that can handle water. No single material does everything, so match your choice to your local risks.
Floor Sheathing Materials
 Plywood
 Plywood
Plywood is a common pick for floor sheathing. It is made from thin wood layers glued together. The wood grain goes in different directions. This cross pattern makes plywood strong and helps it stay flat. Many plywood panels have tongue-and-groove edges. These edges fit tightly and make the floor stable. They also help stop squeaks.
Plywood is good at handling moisture. If your floor gets wet, plywood dries fast. It does not swell much at the edges. This makes it great for kitchens or bathrooms. Plywood holds nails and screws well. Your floor stays solid for a long time.
Building codes say you need at least 15/32-inch-thick plywood. You must put the panels across the joists. This keeps your floor strong and stops sagging. Plywood works under all types of finished flooring.
Tip: Plywood costs more than OSB. But it works better in wet places and busy rooms.
OSB
Oriented Strand Board (OSB) is also used for floor sheathing. OSB is made from wood strands and glue. These are pressed into big panels. OSB panels are heavier than plywood. They usually cost less. OSB comes in tongue-and-groove styles too. This helps the panels lock together and keeps the floor flat.
OSB and plywood are both strong. They meet building code rules for support. OSB soaks up water slowly but holds it longer. When OSB gets wet, the edges can swell. Sometimes, they do not go back to normal. This can cause problems under thin floors.
Here is a quick comparison:
Feature | OSB | Plywood |
|---|---|---|
Shear Strength | Strong, especially at the edges | Good at handling impacts |
Fastener Grip | Not as strong | Holds nails and screws better |
Flexibility | More flexible, may squeak | Less flexible, makes a stiffer floor |
Moisture Resistance | Swells more, especially at edges | Handles moisture better |
Suitability for Flooring | Cheaper, not best for tile or hardwood | Best for tile, hardwood, busy areas |
Weight | Heavier | Lighter |
Cost | 15–30% cheaper | Costs more |
You need at least 7/16-inch-thick OSB for floor sheathing. Always put OSB panels across the joists. This gives the best support and stops sagging.
OSB is a good choice if you want to save money.
Do not use OSB under tile or stone. Swelling can crack the floor.
OSB works well for carpet or vinyl in dry rooms.
Note: OSB costs $1.00 to $2.40 per square foot. Plywood costs $4.50 to $10 per square foot. OSB saves money at first, but plywood may save on repairs later.
Mgo Board
Magnesium Oxide (MgO) board is a newer floor sheathing option. MgO boards use minerals, not wood. These panels resist water, fire, mold, and pests. MgO boards do not swell, bend, or rot when wet. They do not burn or make toxic smoke in a fire.
Here is a table to help you compare MgO board with plywood and OSB:
Criteria | MgO Board Advantages | MgO Board Disadvantages | Plywood Advantages | Plywood Disadvantages | OSB Advantages | OSB Disadvantages |
|---|---|---|---|---|---|---|
Moisture Resistance | Very good; does not swell or bend | Not fully waterproof; long wet times can harm it | Dries fast, resists swelling | Can swell and bend when wet | Cheaper | Soaks up water, swells, weakens over time |
Fire Resistance | Great; does not burn | N/A | N/A | Not very fire resistant; burns easily | Lower cost | Needs treatment; makes smoke |
Durability | Very strong; resists fire, water, pests | Heavier; needs special tools and care | Strong | Not as good against water and pests | Easy to cut and install | Needs sealing for water resistance |
Cost | Costs more at first, saves money later | Higher price per square foot | Cheaper at first | May need to be replaced more often | Cheaper | May cost more to fix later |
Environmental Impact | N/A | Depends on trees; may have chemicals | N/A | N/A | Chemicals can hurt the environment |
MgO boards are easy to install with normal tools. Wear safety gear because cutting makes dust. MgO boards cost more than wood panels. But they last longer and need less fixing. MgO boards also help indoor air stay clean. They do not give off bad chemicals.
Note: MgO boards are smart if you want a floor that fights water, fire, and pests, and if you care about the planet.
Advanced and Innovative Options
Some floor sheathing products are better than regular plywood and OSB. Some panels use special glues and fibers to be stronger and handle water better. High-performance panels have tongue-and-groove edges made with care. These features make them easy to install. They keep joints tight for many years.

These advanced panels often have long warranties. Some cover your floor for many years. You pay more at first, but your floor stays flat, quiet, and strong for a long time.
Tip: Always check the warranty and ratings before you pick a floor sheathing product. Good panels can save you time and money on repairs.
Installation
Panel Orientation
You should always lay floor sheathing panels with their long side, or strength axis, perpendicular to the floor joists. This method gives your floor the most strength and helps spread weight evenly. When you run panels across the joists, you reduce bending and keep the floor from sagging. Make sure each panel spans at least two supports. This setup keeps the floor stable and helps prevent squeaks. If you follow this rule, your floor will feel solid underfoot.
Tip: Leave a 1/8-inch gap between panels. This space lets the wood expand and contract without buckling.
Tongue and Groove
Tongue-and-groove panels fit together like puzzle pieces. You push the tongue of one panel into the groove of the next. This design locks the panels together and stops them from moving. When you use tongue-and-groove floor sheathing, you get a floor that stays flat and quiet. The interlocking edges prevent uneven spots and keep the panels from rubbing or wearing down. You also avoid gaps and a spongy feel. For best results, apply glue to the joists and the tongue-and-groove joints before fastening. This step creates a strong, stable surface and reduces squeaks.
Common Mistakes
Many people make simple mistakes during installation. These errors can lead to noisy, uneven, or weak floors. Here are some common problems and how to avoid them:
Forgetting to leave a 1/8-inch gap between panels can cause buckling when the wood expands.
Placing panels upside-down may create an uneven surface.
Using the wrong fasteners or spacing them incorrectly can lead to loose panels and squeaks.
Waiting too long after applying glue can weaken the bond.
Skipping glue at tongue-and-groove joints allows movement and noise.
Not fastening panels right after gluing can cause incomplete adhesion.
Using smooth nails instead of ring-shank nails or screws increases the risk of nails pulling out.
Proper fastening is key. Use ring-shank nails or code-approved screws. Place fasteners every 6 inches along panel edges and every 12 inches in the field. Always check local building codes for exact requirements.
A well-installed floor sheathing system keeps your floor strong, level, and quiet. Careful installation prevents squeaks and structural problems, giving you a floor that lasts.
You help make your building strong and safe. Picking good materials and putting them in the right way saves money later. Plywood and MGO panels last a long time and need less fixing. OSB is cheaper at first but can swell or rot, so you might have to fix it more.
Good materials help your home stay warm and comfy.
Doing each step right helps your floor last longer.
Using the right subfloor for your floor type stops early damage.
Always follow building codes. Ask an expert if your project seems hard.
FAQ
What is the best thickness for floor sheathing?
You should use at least 3/4-inch panels for most homes. Thicker panels give you a stronger and quieter floor. Always check your local building code for the exact thickness needed.
Can you install floor sheathing by yourself?
You can install floor sheathing if you have basic tools and follow safety steps. Use a helper for heavy panels. Always measure, cut, and fasten panels carefully. If you feel unsure, ask a professional for help.
Does floor sheathing need to be waterproof?
You do not need fully waterproof panels for every room. Kitchens and bathrooms need moisture-resistant sheathing. Use plywood or MgO board in wet areas. OSB works best in dry rooms.
How do you stop floor squeaks?
Use glue on joists and tongue-and-groove joints. Fasten panels with ring-shank nails or screws. Leave a 1/8-inch gap between panels. These steps help you prevent squeaks and keep your floor quiet.