


07 Sep How To Paint Or Finish Magnesium Oxide Board
Table of Contents
You can paint or finish magnesium oxide board to make it look nice and smooth. Many people pick sanded magnesium oxide board for finishing, even though it costs more than regular types. Sanding makes the board look flatter, which is good if you want a pretty finish. Always read the manufacturer’s instructions before you begin. The finishing steps are easy if you have good instructions and tools, so you can do it yourself.
Key Takeaways
Get magnesium oxide boards ready by cleaning them well. Sand any rough edges. Fix any cracks you see. This helps the finish last longer and look smooth.
Use primers made for concrete or masonry. These help the paint stick better. They also stop the board from peeling or cracking.
Be careful with the joints. Tape the seams first. Then put on flexible joint compound. Sand it until it feels smooth. This stops cracks and makes the surface look perfect.
Pick acrylic or latex paints that stick to the board. Put on two even coats. This makes the finish strong and protects it from the sun.
Seal the painted surface with the right sealants. This keeps out water, stains, and damage. Check your work closely to make sure it looks great.
Surface Preparation
Getting mgo boards ready for painting is super important. If you skip steps, paint might peel or look uneven. You want your magnesium oxide board to look smooth and last a long time. Let’s walk through the main steps for preparing the surface.
Cleaning the Surface
Start by making sure the surface is clean and dry. Grab a broom or vacuum to remove dust and loose dirt from mgo boards. If you see grease or sticky spots, use a damp cloth with mild soap. Wipe the magnesium oxide boards gently. Let the surface dry completely before moving on. This helps paint stick better and keeps the finish looking fresh.
Tip: Always check for hidden dust in corners and along the edges. A clean surface means better results!
Sanding Edges and Board
Next, focus on sanding. Use fine-grit sandpaper to smooth out rough spots on mgo boards. Pay extra attention to the edges. Sometimes, magnesium oxide boards have sharp or uneven sides. Sand these areas until they feel flat and smooth. This step helps you get a nice, even finish when painting. Don’t forget to wipe away any dust after sanding.
Step | Description |
|---|---|
Sanding | Smooth out high spots and rough edges on mgo boards for a flat surface. |
Repairing Imperfections
Look for cracks, dents, or holes in the surface. Fill low spots with a non-shrinking compound. For seams between mgo boards, leave a small gap and fill it with joint compound. You can use fiberglass tape for extra strength. Smooth out the compound so the surface looks even. Let everything dry before you start priming.
Here’s a quick checklist for preparing the surface of magnesium oxide board:
Sand rough spots and edges until smooth.
Repair cracks, holes, and seams for a flat finish.
If you follow these steps, you’ll have mgo boards that are ready for primer and paint. Preparing the surface makes a big difference in how your magnesium oxide boards look and last.
Priming Magnesium Oxide Board
Choosing the Right Primer
Picking the right primer for mgo boards makes a huge difference. You want your paint to stick well and last a long time. Magnesium oxide boards have a special surface. They are made from magnesium oxide powder, magnesium chloride, perlite, and fiberglass mesh. These materials make the boards strong, but they also create an alkaline surface. Regular primers might not bond well with mgo boards. You need a primer that works with concrete or masonry.
Look for acrylic-based or high-adhesion masonry primers. These primers form a strong bond with the cement in mgo boards. They also help neutralize the alkaline surface. This means your paint will not peel or crack. If you use the wrong primer, the paint might not stick, and you could see problems like poor adhesion or micro-cracking.
Here’s a quick table to help you choose:
Primer Type | Works With MGO Boards? | Benefits |
|---|---|---|
Acrylic-based | ✅ Yes | Strong bond, neutralizes surface |
Masonry/Concrete Primer | ✅ Yes | UV-resistant, prevents cracking |
Regular Drywall Primer | ❌ No | Weak bond, poor durability |
Tip: Always test your primer on a small area of mgo boards before painting the whole surface. This helps you check if the primer bonds well.
Applying Primer Evenly
You want your primer coat to look smooth and even. Start by making sure the surface of your mgo boards is clean and dry. Use a roller or brush to spread the primer. Work in small sections so you don’t miss any spots. Try not to leave streaks or thick patches. A thin, even layer works best.
Here’s how priming helps your paint finish last longer:
1. The primer forms a molecular bond with the cement in mgo boards. This makes the paint stick better. 2. You get a UV-resistant coating, so the paint does not fade quickly. 3. Testing the primer on a small area helps you avoid problems later. 4. Applying primer after caulking joints stops moisture from getting in and causing cracks. 5. If you keep the climate steady and let mgo boards acclimate before installation, you prevent micro-cracking and help the paint last.
Magnesium oxide boards go through chemical changes like hydration and carbonation. These changes make the boards stronger, but they also affect how paint and primer stick. The alkaline surface and chloride ions can cause problems if you use the wrong primer. That’s why you need a primer made for concrete or masonry. It helps create a tough, UV-resistant layer and stops moisture from causing damage.
Note: Let the primer dry completely before you start painting. This step is important for a smooth and durable finish.
If you follow these steps, your mgo boards will be ready for paint. You’ll get a finish that looks great and lasts for years.
Joint Treatment
When you work with magnesium oxide board, treating joints is a big part of getting a smooth finish. If you skip this step, you might see cracks or uneven spots after painting. Let’s break down the best way to handle joints so your project looks professional.
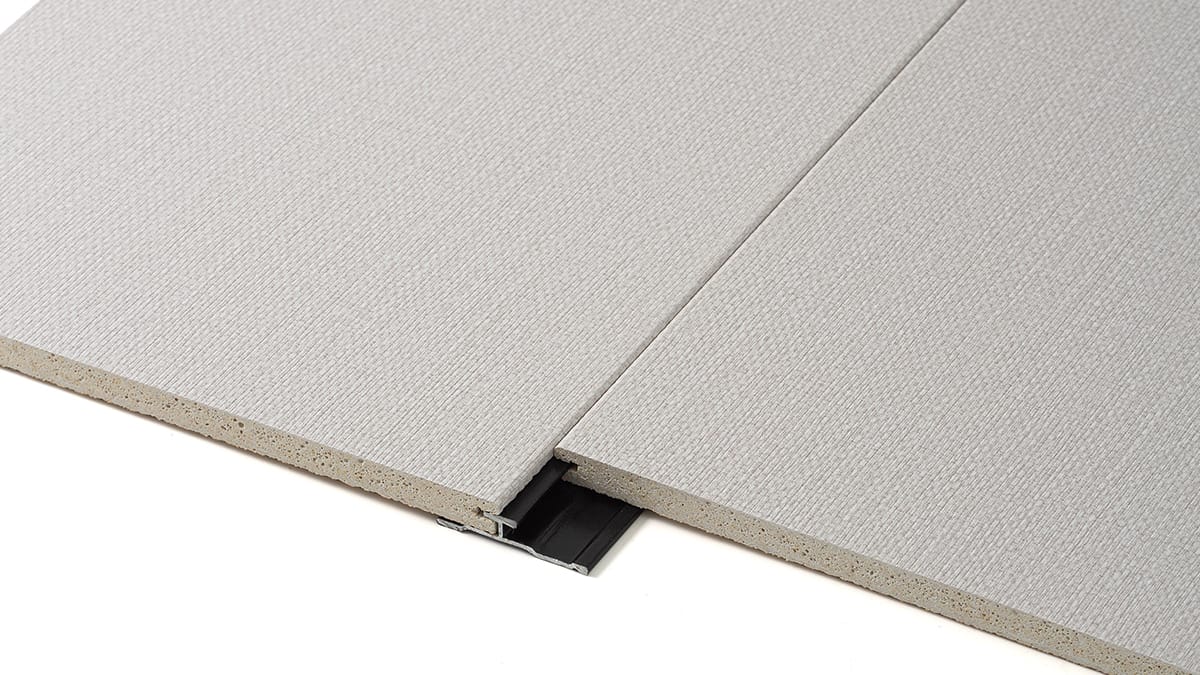
Taping Seams
You need to leave a small gap between boards—about 3 to 5 mm. This space lets the boards expand and contract without causing problems. For interior walls, grab some fiberglass tape. Place it over the seams where two boards meet. If you’re working in high-moisture areas, use waterproof tape and an elastomeric filler. Taping seams helps reinforce the joints and stops cracks from forming later.
Here’s a quick table with best practices for treating joints:
Aspect | Best Practice Details |
|---|---|
Joint Spacing | Leave a 3–5 mm gap between MgO boards to accommodate expansion. |
Joint Treatment | – Interior: Tape and skim joints with MgO-compatible joint compound. |
| – Exterior/high moisture: Use waterproof joint tape and elastomeric filler. |
Gap Filling | Fill gaps with fire-rated sealant or joint compound depending on application (interior/exterior). |
Fasteners | Use corrosion-resistant screws. Place screws at least 12 mm from edges and 50 mm from corners. |
Board Handling | Pre-condition boards in installation environment for 24–48 hours. Do not install wet boards. |
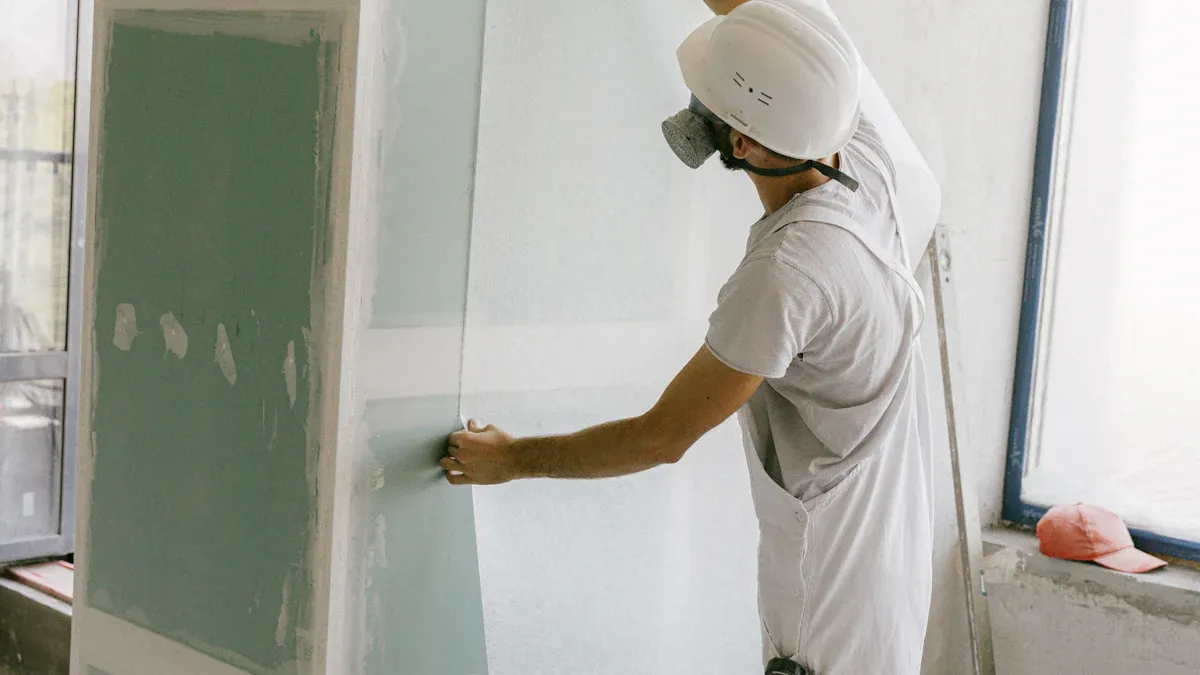
Applying Joint Compound
 After taping, you start plastering over the joints. Use a joint compound that works with magnesium oxide board. Spread the compound over the tape and fill the gaps. For best results, use a flexible filler that can handle movement. This step is important for treating joints because it prevents micro-cracking and keeps the surface strong. If you want extra durability, try embedding the tape fully into a setting compound and feathering it out.
Here’s how proper joint treatment boosts durability:
Fill seams with flexible filler to stop micro-cracking.
Embed fiberglass tape into the compound for a reinforced joint.
Sand lightly while the compound is damp for a smooth finish.
Feather out a finishing compound for a seamless look.
Keep temperature and humidity steady to avoid cracks.
Smoothing Joints
Once the compound dries, you need to sand the joints. Use fine-grit sandpaper and work gently. Your goal is to make the surface flat and even. Smoothing joints is a key part of plastering because it helps the paint look flawless. If you see any bumps or rough spots, sand them down before moving on. Always check your work by running your hand over the area. A smooth finish means you did a great job treating joints.
Tip: If you want a super durable finish, use a primer made for alkaline surfaces before painting. Specialty paints that bond with magnesium oxide board can give you a tough, UV-resistant surface.
Treating joints the right way makes your magnesium oxide board look great and last longer. You’ll get a finish that stands up to wear and tear, even in busy spaces.
Painting MGO Boards
Paint Selection
When you start painting mgo boards, you want to pick the right paint for the job. Not all paints work well on these surfaces. Leading paint brands suggest using primers made for concrete or masonry. These primers help the paint stick to the alkaline surface of magnesium oxide boards. You should also look for paints that bond with the cement in the board. This creates a UV-resistant coating that lasts for years, even if you use the boards outside.
Acrylic or latex paints work best for most projects. You can also use acrylic stucco topcoats or polymer-modified cement base coats if you want a textured finish. Always test your paint on a small spot before you cover the whole board. This way, you can check if the paint bonds well and does not peel off later.
Tip: If you want to choose correct finish, check the label for compatibility with masonry or cement surfaces. This helps you avoid problems like peeling or cracking.
Painting Techniques
You want your mgo boards to look smooth and even. Start by making sure the primer is dry. Use a high-quality roller or brush for the first coat. Work in small sections and use long, even strokes. This helps you avoid streaks and thick spots. Let the first coat dry fully before you add a second coat. Two coats give you better coverage and make the finish last longer.
Here are some tips for a great result:
Keep your workspace clean and dust-free.
Paint in a well-ventilated area.
Watch the temperature and humidity. Too much moisture or heat can cause the paint to dry unevenly.
Always let each coat dry before adding the next one.
Paint failure on mgo boards often happens because of high salt content or poor quality boards. Sometimes, salts move to the surface and cause stains or peeling. You can avoid this by using mineral silicate paints and making sure your boards come from a trusted source. If you see white stains or “weeping,” stop and check for moisture or salt problems before you keep painting.
Note: Always leave small gaps between boards and use elastic caulking. This helps the boards move without cracking the paint.
Painting MGO Floors
Painting mgo floors takes a little more care than painting walls. Floors get more wear and tear, so you need to follow a few extra steps. Here’s a simple guide to painting mgo board flooring:
1. Clean the floor well. Remove all grease, dirt, and dust. 2. Sand the floor with fine-grit sandpaper. This smooths out rough spots and helps the paint stick. 3. Apply an acrylic primer evenly. Make sure you cover the whole surface. 4. Treat the joints. Use mesh tape and sand them smooth. 5. Paint the floor with two or more coats of high-quality paint. Let each coat dry before adding the next. 6. Finish with a sealant. This protects the floor from moisture and makes it last longer.
Magnesium oxide boards resist moisture, so they work well in high humidity areas. Still, they are not waterproof. You must finish and seal mgo board flooring completely to keep out water and prevent damage. This step is even more important for floors than for walls.
Safety Reminder: Wear goggles, gloves, and a dust mask when sanding or painting. Keep your workspace tidy to avoid accidents.
If you follow these steps, your mgo floors will look great and stand up to daily use. Remember, a good finish starts with careful prep and the right materials.
Sealing and Finishing
Applying Sealant
You’ve reached the final steps of the finishing process for your mgo boards. Sealing the surface is a must if you want your project to last. When you seal, you protect the surface from moisture, stains, and everyday wear. This step is key for both walls and floors, especially when sealing the mgo board floor surface.
Here are some sealants that work well for painted magnesium oxide board:
Urethane adhesives and urethanes bond tightly to the surface.
Elastomeric caulking keeps joints flexible and stops micro-cracking.
Acrylic stucco topcoats and polymer modified cement base coats add extra protection and texture finishing.
Before applying the finish, make sure the surface is clean and dry. Use a brush or roller to spread the sealant evenly. Pay close attention to all joints, seams, and edges. Sealing the surface at these spots blocks water from sneaking in. This step boosts the board’s resistance to moisture and mold. You’ll also notice that sealing helps keep the structure strong and prevents damage over time.
Tip: Always test your sealant on a small area first. This helps you see how it bonds and looks before you finish the whole surface.
Final Inspection
After applying the finish, take time for a careful inspection. This is one of the best tips for professional finishing. You want your mgo boards to look smooth and flawless. Here’s a checklist to help you:
Check each board for warping or bending. The surface should stay flat.
Measure the finished area to make sure it matches your plan.
Look at all joints and seams. There should be no cracks or gaps.
Make sure screw heads sit flush with the surface.
Use good lighting to spot small dents, scratches, or pinholes.
Compare your work to a sample board if you have one.
Take notes or photos of any defects you find.
Sealing and finishing methods like these help you catch problems early. You can fix small issues before they turn into big repairs. If you want a unique look, try texture finishing with a stucco topcoat. This adds style and extra protection. Remember, sealing the surface and careful inspection are the last steps in the finishing process. They make your project look professional and help it last for years.
Note: Regular inspections after installation help you spot moisture or mold early. This keeps your mgo boards in top shape.
You can get a strong, long-lasting finish on magnesium oxide board if you follow the right steps. Start by gathering your tools and making sure the surface is clean and dry. Cut the boards with clean edges and leave a small gap from the wall. Fasten them evenly, treat the joints, and sand everything smooth.
Prime or seal the surface to protect against moisture.
Use paint and sealants made for cement or masonry.
Always check your work, especially in high-moisture areas.
Taking time with each step helps your finish last and keeps your project looking great.
FAQ
Can you paint magnesium oxide board without priming?
No, you should not skip primer. Primer helps paint stick to the board. If you skip this step, the paint may peel or look patchy. Always follow the instructions for best results.
What kind of paint works best on magnesium oxide board?
You get the best results with acrylic or latex paint. These paints bond well and last a long time. Always check the manufacturer’s instructions before you start painting.
How do you fix cracks or dents before painting?
You can fill cracks or dents with joint compound. Use a putty knife to smooth it out. Let it dry, then sand the area flat. This makes your finish look smooth.
Do you need to seal magnesium oxide board after painting?
Yes, sealing helps protect your board from water and stains. Use a good sealant and cover all edges and joints. This step keeps your project looking great for years.