


06 Dec Step-by-Step Guide to Installing Modular Wall Panels
Table of Contents
You can put up modular wall panels without much trouble, even if you have never done it before. These panels help you because they are easy to use and save time. Here are some good things many homeowners talk about:
Benefit | Description |
|---|---|
Efficiency | Fast to put up, so you save time and work. |
Cost-effectiveness | Lowers material and work costs, saving up to 20%. |
Environmental advantages | Often made from recycled stuff, so there is less waste. |
Flexibility in design | Works with many styles, so your walls look nice. |
If you have the right tools and plan a little, you can make your walls look like a pro did it.
Key Takeaways
Modular wall panels work well and save money. They help you finish faster and spend less.
Planning is very important. Measure your walls first. Make a layout before you start. This helps you not make mistakes.
Pick the right panel for your room. Think about what your room needs. Some panels block sound. Some panels are strong.
Use the tools that are suggested. Wear safety gear to stay safe. This makes installing easier and safer.
Check your work when you finish. Make sure everything lines up. Make sure the panels are steady. This makes your walls look nice.
Planning Modular Wall Installation
You need a good plan before you start. Planning helps you not make mistakes. It also makes the job easier. Each brand or system has its own steps. Always read the manufacturer’s instructions before you begin.
Measuring and Marking Walls
First, you must measure the walls. This helps your panels look straight. Here is an easy way to do it:
Move your furniture and cover the floor.
Use a stud finder to find the studs. Mark them so your panels stay strong.
Use a level to check your lines as you go up. This keeps your panels straight.
Check your marks again, especially at corners and seams.
Tip: Try a laser level or chalk line for long, straight lines. This helps you keep panels even and avoid gaps.
Choosing Modular Wall Panels
There are many types of modular wall panels. Each type works best in different places. Look at this table to compare your choices:
Features and Benefits | Best Use | |
|---|---|---|
Gypsum Wall Panels | Fireproof, soundproof, energy-saving | Homes, offices |
Steel Wall Panels | Strong, rust-resistant, many finishes | Factories, offices |
Composite Panels | Lightweight, sturdy, great insulation | Homes, offices, factories |
Magnesium Wall Board | Fire and water resistant, good soundproofing | Modular homes, offices |
Think about what your room needs. If you want less noise, gypsum or composite panels are good. If you need something strong, pick steel panels.
Creating a Layout Plan
A layout plan saves you time and stops problems. Start by checking your room’s size and shape. Some rooms have sloped ceilings or odd corners. Measure carefully. Here are some things to add to your plan:
Do a site survey and draw your layout.
Look for uneven spots or tricky corners.
Plan for doors, windows, and built-in things.
Make sure your plan works with electrical or plumbing jobs.
Description | |
|---|---|
Wall Panels | Strong, pre-cut, and come in clear or solid styles. |
Structural Posts | Hold up the panels and hide wires or pipes. |
Ceiling System | Holds lights, vents, and wires. |
Doors & Windows | Pre-made for easy use and different looks. |
Additional Features | Can have plumbing, electricity, or HVAC for more options. |
If you follow these steps and check your work, your installation will go well. Remember, every modular wall system is different. Always read the manufacturer’s instructions before you start.
Tools and Materials for Installation
 Getting the right tools and materials makes your modular wall panel project much easier. You do not need fancy equipment, but you do need to pick the right items for the job. Let’s break down what you need and how to stay safe.
Essential Tools Checklist
You want to gather your tools before you start. This saves you time and keeps your project moving. Here’s a handy table of tools professionals often use for modular wall panel installation:
Tool/System | Description |
|---|---|
Works on many surfaces, comes in different sizes and colors. | |
Fastmount Installation Tools | Special clips and tools for lining up and supporting FRP panels. |
You might also want these items:
Fastmount Standard Range clips (PC-F1A, PC-M1B)
Fastmount installation tools (CT-07, CT-09, CT-10, CP-01ST)
5mm tile packers or spacers
Fastmount Layout Guide
FRP panels (6mm thick)
Level, tape measure, pencil, and stud finder
Tip: Double-check your measurements. Incorrect measurements can lead to gaps or crooked panels.
Selecting Connectors and Fasteners
Picking the right connectors and fasteners is just as important as choosing your panels. Always use the fasteners recommended by your panel manufacturer. If you use the wrong type, your panels might not stay in place. Some panels need special clips, while others use screws or adhesives. Make sure your fasteners match your wall type and panel thickness.
Common mistakes include:
Skipping a layout plan.
Choosing style over function.
If you avoid these, your panels will look better and last longer.
Preparing Safety Gear
Safety should always come first. Before you start, grab your safety gear. You need gloves, safety glasses, and a dust mask. Some panels have coatings or adhesives that release fumes, so good ventilation helps. Many panels meet standards like CARB Phase 2 for low emissions and CALGreen for safe materials. If you work in a hospital or school, check for extra rules like ICRA or fire safety codes.
Note: Wearing the right gear keeps you safe from dust, sharp edges, and fumes. Never skip this step!
Preparing for Installation
Cleaning and Smoothing Surfaces
You want your modular wall panels to stick well and look smooth. Start by clearing away dust, dirt, and old paint from your walls. Use a damp cloth or a mild cleaner for stubborn spots. If you see bumps or holes, grab some spackle or filler and patch them up. Sand rough areas until the surface feels even. A clean, flat wall helps your panels stay in place and look sharp.
Tip: Run your hand over the wall after cleaning. If you feel any rough spots, sand them down before you move on.
Marking Guidelines
Good guidelines make your job easier. Take your tape measure and mark where each panel will go. Use a pencil for light marks that you can erase later. A level helps you keep lines straight. If you have a laser level, use it for long walls. Mark spots for outlets, switches, and corners. Double-check your marks before you start installing panels.
Tool | Use |
|---|---|
Tape Measure | Measure panel spots |
Pencil | Mark guidelines |
Level | Keep lines straight |
Laser Level | Mark long walls |
Block Quote: “Measure twice, mark once. This saves you from mistakes and keeps your panels looking neat.”
Protecting Surroundings
You want to keep your floors and furniture safe during installation. Scratches and dents can happen fast if you don’t prepare. Here’s a simple plan:
Place protectors under furniture to stop scratches.
Use plywood or Masonite sheets to shield your floors from heavy tools or dropped panels.
Slide furniture with moving blankets or sliders instead of dragging it.
Clean and cover your shoes so you don’t track dirt onto the floor.
Sweep up debris often to avoid scratches.
Make a floor plan so you move furniture only when needed.
Pick the right protection for your type of flooring.
Use proper equipment to avoid putting too much pressure on the floor.
Note: Taking time to protect your space now saves you from costly repairs later. Your room will look great when you finish!
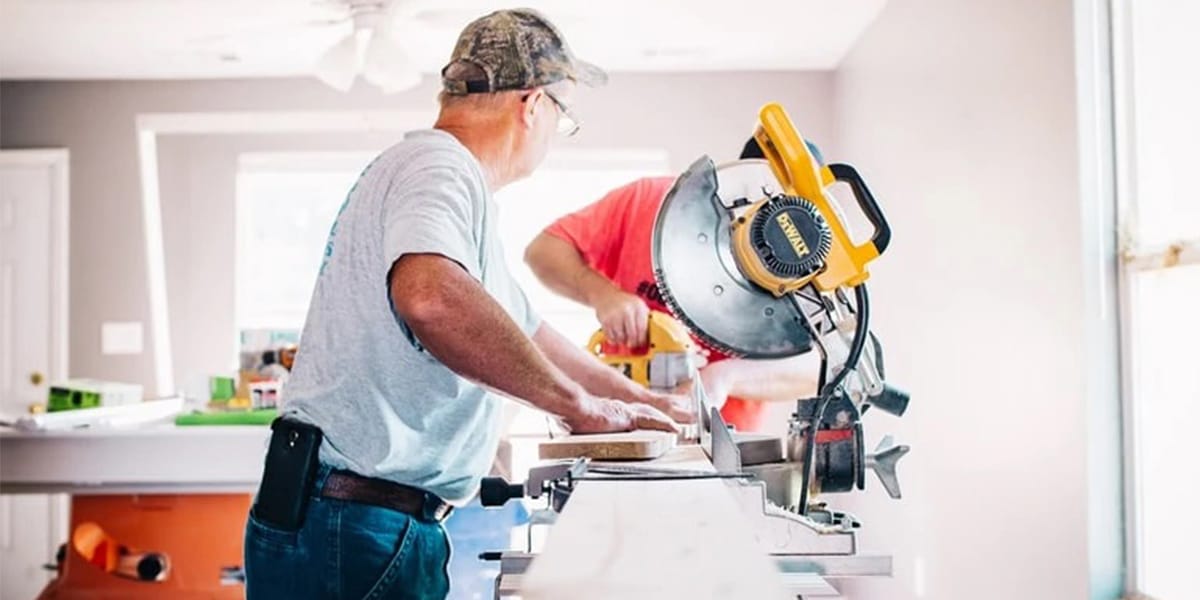
Steps to Install Modular Walls
 You have your tools ready, your walls prepped, and your layout planned. Now it’s time to dive into the installation process for modular walls. These steps will help you get a smooth, sturdy finish that looks great and lasts.
Assembling the Base Layer
The base layer is the foundation for your modular wall panels. If your system uses a wall starter, begin by installing it at the bottom of your wall. This piece helps keep everything straight from the start.
Here’s a simple way to assemble the base layer:
Unpack your panels with care. Avoid scratching or damaging any parts.
Read the manufacturer’s instructions before you start. Every system has its own tips and tricks.
Connect the first row of panels using the locking mechanism or fasteners. Make sure each panel fits snugly and lines up with your guidelines.
Add any trims or moldings if your design calls for them.
Tip: Always start with the bottom row. This gives you a solid base and helps the rest of the panels line up perfectly.
To keep the base layer level, space your fasteners every 12 to 16 inches along the studs. Check both vertical and horizontal alignment as you go, especially in corners or tricky spots. A level base layer means your whole wall will look straight and professional.
Attaching Panels with Connectors
Now you’re ready to attach the rest of your modular wall panels. The connectors you choose matter a lot. Some systems use adhesives, while others use bolts or special clips. Each type affects how strong and durable your wall will be.
Adhesive connectors can make the job quick, but they might crack or peel if the wall moves or gets bumped. Bolted connectors hold tight, but you need to watch for stress around the bolts. Always match your connector type to your wall and panel system for the best results.
Note: Double-check that your connectors and fasteners match your panel thickness and wall type. This keeps your installation safe and sturdy.
Building Upward and Securing Panels
With your base layer set, you can start building upward. Take your time with each row. Here are some tips to keep your installation process for modular walls smooth:
Make sure your walls are clean and dry before you add more panels. Dirt or moisture can weaken the bond.
Keep the room at a steady temperature between 59°F and 77°F. Humidity should stay between 30% and 50%. This helps adhesives work their best.
Spread adhesive evenly if your system uses it. Let it get tacky before pressing the panel in place.
Line up each panel carefully. Tight seams and straight edges keep out moisture and make your wall look sharp.
Block Quote: “A strong start leads to a strong finish. Take your time with each panel, and your wall will thank you.”
Cutting Panels for Outlets and Corners
Walls often have outlets, switches, or odd corners. You’ll need to cut your modular wall panels to fit these spots. Here’s how you can do it:
Lay the panel face down. Mark the spot for the outlet or corner using paint or chalk.
Press the panel against the wall to transfer the mark exactly where you need it.
Gather your tools: a sharp saw, craft knife, measuring tape, and safety gear.
Map out where all obstacles are on your wall.
Use a jigsaw or fine-tooth handsaw to cut the panel. Go slow for clean edges.
Dry-fit the panel to make sure it fits around the outlet or corner.
Apply adhesive and secure the panel with drywall screws.
Once the panel is in place, reattach the outlet cover or trim for a finished look.
Use painter’s tape to outline your cut area. This helps you cut straight and avoid splinters.
If your panels are thicker than your old wall, consider using outlet extenders for a safe fit.
Tip: Always wear safety glasses and gloves when cutting panels. Double-check your measurements before you cut.
By following these steps to install modular walls, you’ll get a clean, professional look. Each step builds on the last, so take your time and check your work as you go. Modular wall installation can feel like a big job, but with patience and the right approach, you’ll get results you can be proud of.
Finishing the Installation Process
Inspecting Alignment and Stability
You want your walls to look straight and feel solid. After you finish installing the panels, step back and check each row. Use a level to make sure everything lines up. Press gently on different spots to test for movement. If you find a loose panel, tighten the fasteners or add more support. Look at the seams between panels. They should be tight with no gaps. If you see uneven edges, adjust the panels before moving on.
Tip: Walk along the wall and look from different angles. Sometimes, you spot problems you missed before.
Sealing Edges and Touching Up
Sealing the edges keeps your walls safe from moisture and dust. Neutral silicone sealant works well because it sticks to many surfaces and creates an airtight seal. If you need extra fire protection or insulation, polyurethane edge-sealed panels are a smart choice. These panels help prevent delamination and boost soundproofing.
You can also use materials like high-pressure laminate, UPVC, painted steel, painted aluminum, or stainless steel for edge sealing. Pick the one that matches your panel type and room needs.
When you touch up your panels, follow these steps:
Apply caulk to joints and screw holes. Use painter’s tape for straight lines.
Brush on a base coat if your kit includes one. Let it dry.
Add tints with a paint brush and blend with a clean cloth.
Mix wash concentrate with water as directed.
Brush on the wash and blend with a soft cloth.
Block Quote: “A careful touch-up makes your walls look flawless and helps them last longer.”
Cleaning and Final Presentation
Cleaning is the last step in your installation. Use a mild detergent solution for most panels. If you have glass panels, a glass cleaner gives a streak-free shine. All-purpose cleaners work well for tough spots. Specialty panel cleaners protect the finish on certain materials. Always use microfiber cloths or soft brushes to avoid scratches.
Here’s a quick cleaning checklist:
Mix mild detergent with water for general cleaning.
Use glass cleaner for glass panels.
Try all-purpose cleaner for grease or grime.
Pick specialty cleaners for unique panel finishes.
Wipe with microfiber cloths or soft brushes.
Step back and admire your work. Your walls should look clean, smooth, and professional. You finished the installation with care, and now your space feels fresh and new.
You finished putting up modular wall panels and your walls look nice. Go slow, measure everything, and check your work a lot. If you need more help, use these resources:
EverPanel Installation Guide Video
Don’t forget, a checklist helps you not make mistakes and keeps your panels straight. Print out a guide before you begin.
FAQ
How long does it take to install modular wall panels?
Most rooms take one to two days. If you work slowly and check your measurements, you get a better finish. Small rooms go faster. Large spaces or tricky corners need more time.
Can I install modular wall panels by myself?
You can do it alone if you have basic tools and follow the instructions. Heavy panels or tall walls may need a helper. Always put safety first.
What surfaces work best for modular wall panels?
Smooth, clean drywall or plaster works best. You can use modular panels on concrete or brick if you prep the surface. Remove dust and fill holes before you start.
Do I need special tools for cutting panels?
You need a sharp saw, measuring tape, and safety gear. A jigsaw or fine-tooth handsaw works well. Always wear gloves and safety glasses when you cut panels.
How do I keep my panels looking new?
Wipe panels with a damp cloth. Use mild detergent for tough spots. Avoid harsh chemicals. Check seams and edges every few months for gaps or damage.