


19 Aug How to Install Magnesium Wall Board on Uneven Walls
Table of Contents
You can put magnesium wall board on uneven walls if you follow the right steps. You need to handle the board carefully. This board costs more at first than gypsum or calcium silicate. But you save money later because it lasts longer and needs fewer repairs.
Initial Cost | Long-term Cost Implication | |
|---|---|---|
Magnesium Oxide (MgO) | Higher upfront cost | Saves money over time due to durability |
Calcium Silicate Board | Lower upfront cost | May cost more later for repairs and upkeep |
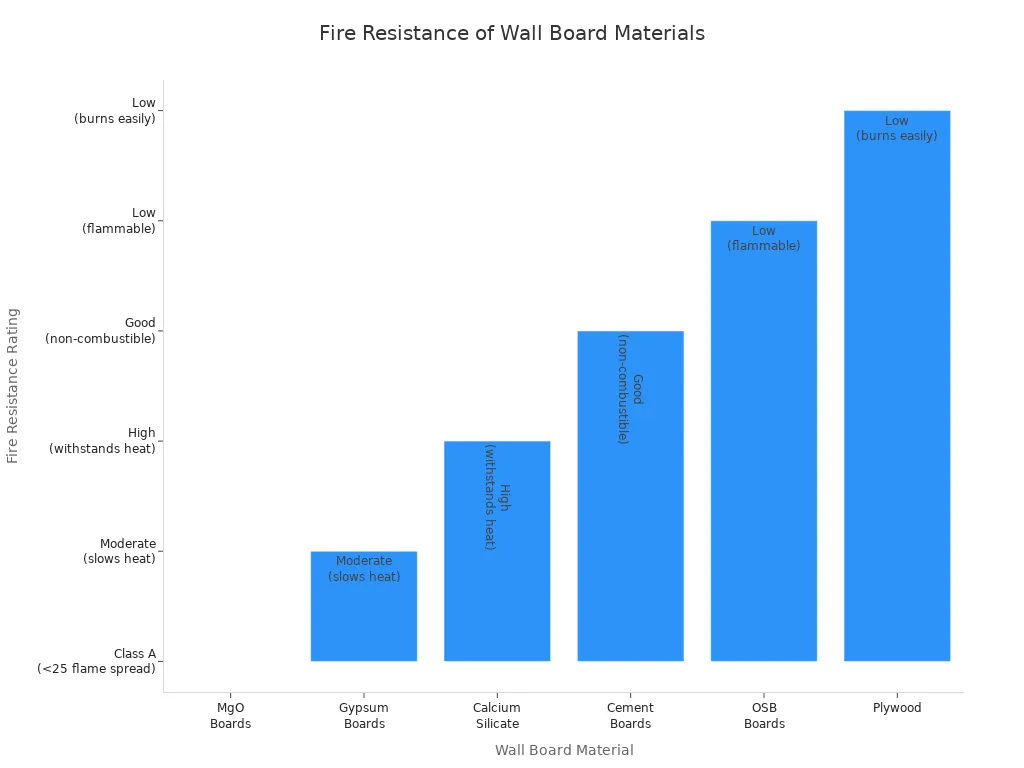
Magnesium wall board is very good at stopping fires. It can handle high heat better than other wall boards.
MgO boards come from natural and earth-friendly sources.
Making these boards uses less energy and makes less pollution.
These boards do not get moldy, wet, or damaged by bugs. They work well for homes and businesses.
Make sure to level the wall or use an underlayment before you start. Handle the board gently so it does not crack. If you follow the best steps, you will get a smooth and strong wall.
Key Takeaways
Clean, dry, and level the wall before you start. This helps make a smooth and strong base for the magnesium wall board. Use the right framing, shims, and fasteners. Make sure you space them correctly. This keeps the boards in place and stops cracks or shifting later. Leave small gaps between the boards. Fill these gaps with the right sealant. This lets the boards move a little and stops damage from heat or moisture. Be careful with wall openings. Add extra support around doors and windows. This keeps the wall strong and helps stop cracks. Finish the wall with primer and paint made for magnesium boards. Check and clean the wall often to keep it strong and looking nice.
Prepare the Wall
Clean and Dry Surface
You need to start with a clean wall. Scrape away old cement, paint, or wallpaper. Remove dust, dirt, and grease. Wipe off any oil spots. If you see cracks or holes, fill them with a leveling compound. Sand the surface until it feels smooth. If the wall feels damp, install a moisture barrier. This step protects the magnesium wall board from water damage. Always make sure the wall is dry before you move on.
Tip: Acclimate your boards in the room for at least 48 hours before installation. This helps prevent warping or expansion.
Steps for cleaning and drying the wall:
Wipe off any oil or sticky spots.
Fill cracks or holes with leveling compound.
Sand the surface smooth.
Check for moisture and add a barrier if needed.
Let the wall dry completely.
Level or Add Underlayment
Uneven walls can cause problems later. You must create a flat base for your boards. Use a straightedge to check for bumps or dips. Fill low spots with compound. Sand down high spots. If the wall is very uneven, install an underlayment. This gives you a stable surface for the magnesium wall board.
Note: Skipping this step can lead to cracks or shifting boards. Always fix uneven spots before you start.
Gather Tools and Safety Gear
You need the right tools and safety gear. Prepare these items before you begin:
Safety glasses protect your eyes when you cut or sand.
Dust masks keep you from breathing in dust.
Gloves protect your hands from sharp edges.
Use wet suppression or a HEPA vacuum to clean up dust.
Set up your workspace with all tools nearby. Make sure the room’s temperature and humidity are stable. Turn on the HVAC system at least 72 hours before you start. This helps prevent micro cracking in the boards.
Tool/Safety Gear | Purpose |
|---|---|
Safety glasses | Protect eyes |
Dust mask | Prevent dust inhalation |
Gloves | Protect hands |
HEPA vacuum/wet mop | Control dust |
Inspect and Measure
Check Magnesium Wall Board
You want to make sure your boards are ready for installation. Start by looking closely at each magnesium wall board. Check for cracks, chips, or uneven edges. Manufacturers trim the edges, sand the surfaces, and add coatings to protect against moisture and mold. These steps help the boards meet industry standards for strength and safety. You can trust that most boards pass strict quality checks, but you should still inspect them yourself.
Follow these steps for a thorough check:
Look for surface defects or irregularities.
Measure the board with a tape measure or caliper to confirm the size.
Test the board’s strength by gently pressing on the surface.
Make sure the board feels dry and solid.
Tip: If you find a damaged board, set it aside and use another one. Damaged boards can cause problems later.
Inspect Framing Materials
You need strong framing to support the weight of magnesium wall board. Both metal and wood framing work well if they are sturdy and straight. Check each stud or batten for warping, cracks, or loose fasteners. The framing must follow fire protection codes and meet national installation standards. Proper framing keeps your wall safe and helps the boards last longer.
Framing Material | Acceptable? | What to Check For |
|---|---|---|
Wood Studs | Yes | Warping, cracks, strength |
Metal Studs | Yes | Rust, bends, alignment |
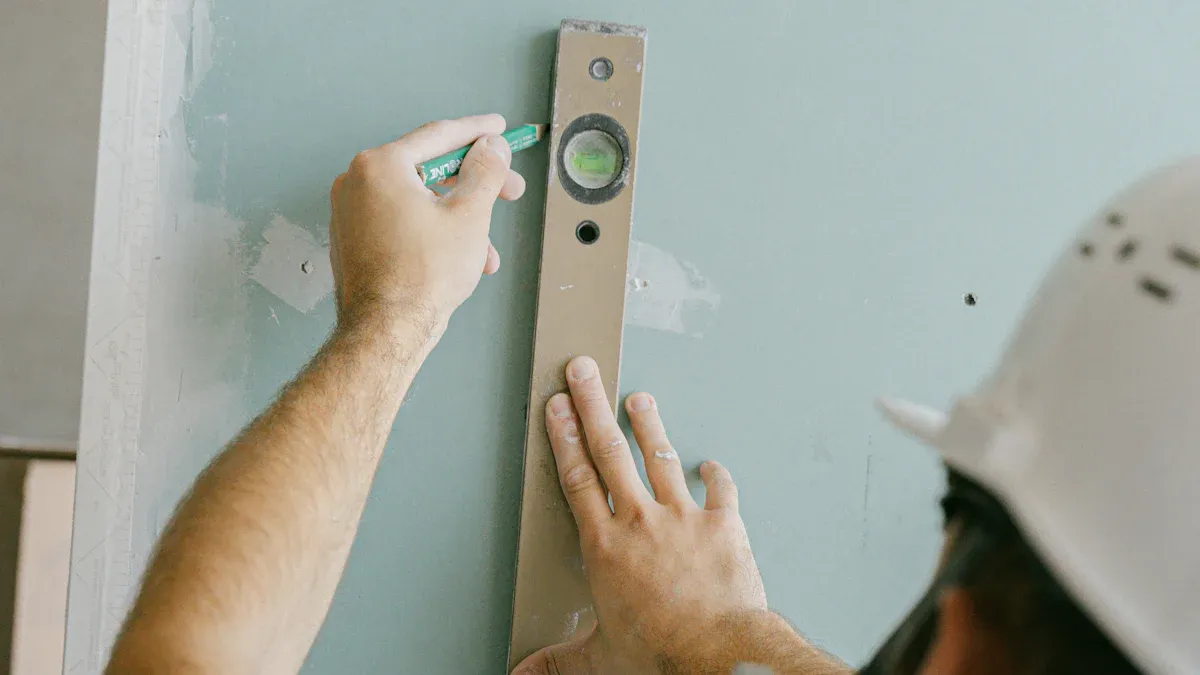
Mark Wall Layout
Accurate marking makes installation easier. Use a tape measure and a T-square to draw straight lines. Mark cutting lines with a pencil or chalk so you can see them clearly. Always double-check your measurements before you cut. Place the boards on a stable surface like saw horses to keep them steady. Use a level to make sure your lines are straight and the wall is even. Leave a small gap, about 1/8 inch, between boards for expansion.
Double-checking your layout now saves time and prevents mistakes later.
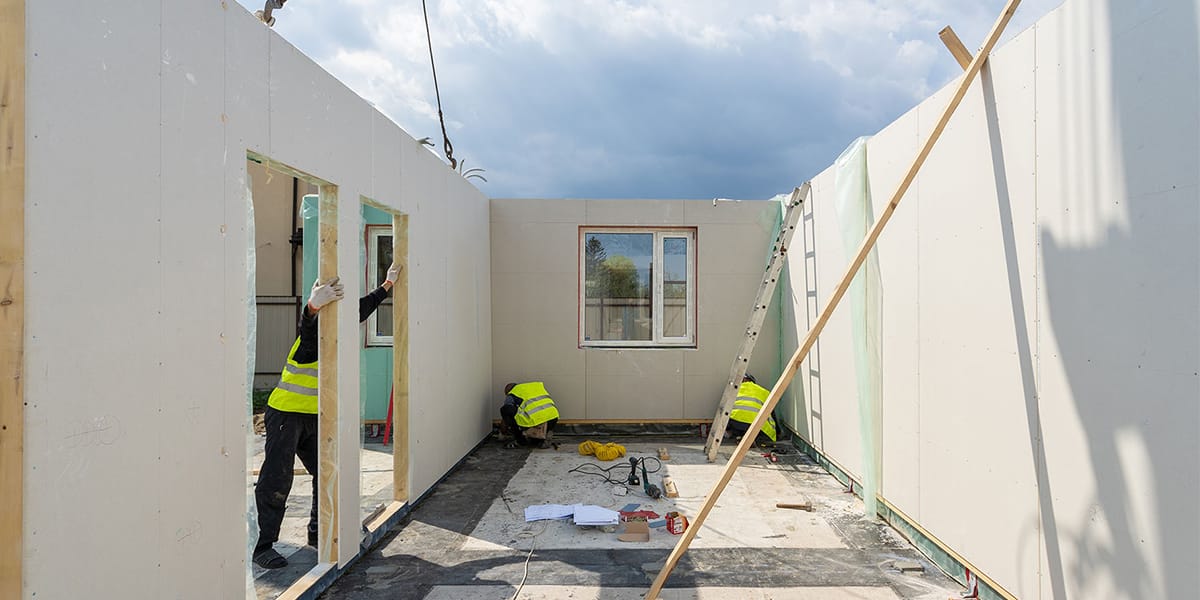
Install Framing
 Attach Studs or Battens
 Attach Studs or Battens
You need a strong and flat base for your wall. Start by attaching straight studs or battens to the wall. Use wood or metal, but make sure each piece is free from warping or damage. Place the studs vertically, spaced about 16 inches apart. Secure them tightly so they do not move. If you use battens, line them up horizontally. This step gives you a solid surface for the magnesium wall board.
Tip: Always check that your studs or battens are square before you fasten them. Crooked framing can cause problems later.
Use Shims for Leveling
Walls are not always perfectly flat. You can fix uneven spots with shims or spacers. Slide thin pieces of wood or plastic behind the studs or battens where the wall dips or bulges. This helps you create a level surface. Tap the shims gently until the framing sits flush against the wall. Use a level to check your work as you go. Shims make sure your magnesium wall board will not crack or shift after installation.
Shim Material | Use Case |
|---|---|
Wood | Small gaps |
Plastic | Moist areas |
Metal | Heavy-duty support |
Note: Do not skip shimming. Even small bumps can lead to uneven boards.
Check Alignment
You want your wall to look straight and neat. Use these tools to check alignment before you install the boards:
Take measurements with a measuring tape. Measure the height and width of each section.
Mark straight lines with a level. This helps you keep everything even.
Check angles with a T-square or framing square. Make sure corners are square.
Go over each stud or batten and confirm that everything lines up. If you see a problem, fix it now. Proper alignment helps the magnesium wall board fit tightly and look professional.
Double-checking alignment saves you time and trouble later. A well-framed wall supports the boards and keeps them secure.
Install Magnesium Wall Board
Cut and Fit Boards
You need to measure each wall section before you cut your boards. Use a tape measure and mark the size with a pencil. Draw straight lines with a level so your cuts stay accurate. Always wear safety goggles and gloves when you cut magnesium wall board. Use a utility knife or a fine-tooth circular saw for clean edges.
Follow these steps for best results:
Mark the cutting lines with a pencil.
Use a level to make sure lines are straight.
Cut panels slightly smaller than the marked size. This gives space for expansion.
Check each board for damage or bulges before you fit it.
Acclimatize the boards in the room for 3-5 days before installation.
Tip: Do not force the boards into place. Boards should fit snugly but still have a small gap at the edges.
If you work with uneven walls, you may need to adjust the position of vertical and horizontal keels. Do not fix them right away. Adjust them as you install the boards so everything lines up. Fix the keels and boards together after you finish adjusting.
Secure with Fasteners
You must use the right fasteners to keep your boards secure. Screws or nails work well for magnesium wall board. Place screws every 6 inches along the edges and every 12 inches in the center of the board. Keep screws at least 4 inches away from corners and about 9/16 inch from the edge. This spacing helps prevent cracks and keeps the board strong.
Fastener Location | Recommended Spacing |
|---|---|
Edges | Every 6 inches |
Center | Every 12 inches |
From Corners | At least 4 inches |
From Edge | About 9/16 inch |
Stagger the panels as you install them. This means you do not line up the seams in a straight row. Staggering adds strength and helps the wall resist movement. If you use steel framing, you can fasten the boards cleanly without cracking. Steel framing also makes installation faster and reduces the need for extra layers or moisture barriers. Wood framing may need extra steps to protect against moisture and pests.
Note: Always check that your fasteners are tight but do not over-tighten. Over-tightening can damage the board.
Leave Expansion Gaps
You need to leave expansion gaps between boards. These gaps let the boards move when the temperature or humidity changes. For steel framing, leave a 1/16 inch gap between boards. For wood framing, leave a 1/8 inch gap. At the edges where the boards meet the wall or fixed parts, leave a 6 mm gap. Fill all gaps with non-shrinking, paintable caulking. Use polyethylene backer rods for deeper gaps to control the caulk depth.
Always fill expansion gaps to prevent cracking and buckling. After you fill the gaps, apply primer and then spackle or plaster to hide imperfections.
Stagger the joints for extra strength. Use edge trims made of aluminum or PVC for a neat finish. Acclimatize the boards before installation to stabilize moisture content. This step helps prevent micro-cracking caused by movement or changes in temperature.
Framing Type | Gap Between Boards | Edge Gap (Perimeter) |
|---|---|---|
Steel Framing | 1/16 inch | 6 mm |
Wood Framing | 1/8 inch | 6 mm |
Callout: Magnesium wall board works best when you follow these gap guidelines. Proper gaps keep your wall smooth and strong for years.
Finish and Reinforce
Handle Openings
 Handle Openings
You need to reinforce wall openings like doors and windows to keep your wall strong. Start by breaking the horizontal keel at the spot where the opening sits. Place extra vertical keels on both sides of the opening. Make sure the opening faces away from the frame. Add horizontal keels above and below the opening to frame it. Insert vertical keels between the horizontal ones so the spacing matches the rest of the wall. If your opening is wider than 1800mm, reinforce the structure with more support. Use the same framing steps for the lower part of window openings.
Steps for handling wall openings:
Break horizontal keel at opening.
Place vertical keels on both sides.
Add horizontal keels to frame the opening.
Insert vertical keels between horizontals for even spacing.
Reinforce wide openings.
Repeat for lower window frames.
Tip: Reinforcing openings helps prevent cracks and keeps your magnesium wall board secure.
Fill Gaps and Joints
You must fill gaps and joints to protect your wall and keep it looking smooth. Leave a 3–5mm gap between boards for expansion. Fill these gaps with fire-rated sealant or joint compound. For inside walls, tape the joints and use a compound made for magnesium wall board. In wet areas or outside, use waterproof tape and elastomeric filler. Seal all penetrations and joints with fire-resistant sealant to keep your wall safe and durable.
Leave expansion gaps between boards.
Use fire-rated sealant or joint compound.
Tape joints and apply MgO-compatible compound for interiors.
Use waterproof tape and elastomeric filler for wet areas.
Seal all joints and penetrations with fire-resistant sealant.
Note: Properly filled gaps and joints help your wall resist fire, moisture, and movement.
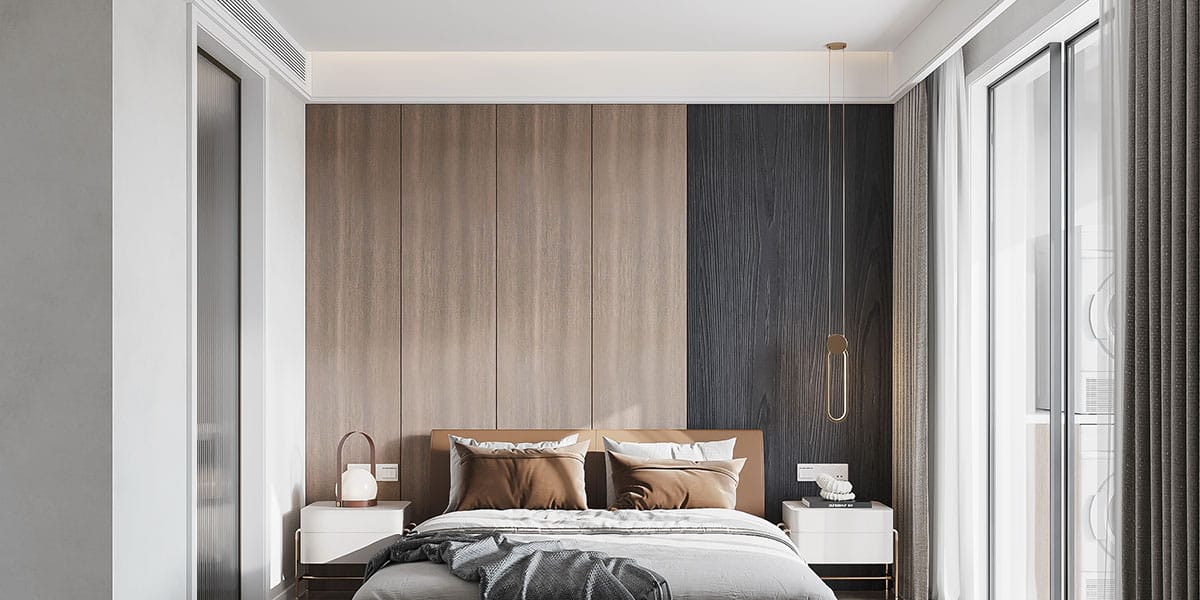
Surface Finishing
You want your wall to look good and last a long time. Start with a primer made for concrete or masonry. This helps the paint stick and protects the board. Use paints that bond with the cement in the board for a strong, UV-resistant finish. Acrylic stucco or polymer-modified cement coats work well for tough surfaces. If your wall is uneven, use spackle or plaster to hide bumps before painting. Finish joints with sandable elastomeric compounds and wide fiberglass tape to stop micro-cracks. Test your finish on a small area first to check bonding. Keep the room’s temperature and humidity steady during and after finishing to prevent cracks.
Surface Finish Option | Benefit |
|---|---|
Concrete/Masonry Primer | Better paint bonding |
UV-resistant Paint | Long-lasting color |
Acrylic Stucco Topcoat | Durable and flexible |
Polymer-modified Cement Coat | Strong and moisture-resistant |
Callout: A good finish protects your magnesium wall board and keeps your wall looking new for years.
You can build a strong and smooth wall if you follow each step. Make sure the base is flat. Use fasteners that do not rust. Leave small gaps so the magnesium wall board does not crack.
People often make mistakes like turning screws too tight, not leaving gaps, or forgetting about room temperature.
Check your wall often and keep it clean so it lasts longer.
Maintenance Tip | Benefit |
|---|---|
Find cracks early | |
Damp cloth cleaning | Protects finish |
Waterproof sealant | Prevents moisture damage |
Go slow and do each step with care. If you install it carefully, your wall will look good and last a long time.
FAQ
Can you install magnesium wall board over old plaster?
You can put magnesium wall board on old plaster if the wall is clean, dry, and flat. If the wall is bumpy, use an underlayment to make it even.
Tip: Check for loose plaster before you begin.
What tools do you need for cutting magnesium wall board?
You will need a utility knife, a saw with small teeth, safety glasses, and gloves.
Tool | Use |
|---|---|
Utility knife | Marking lines |
Saw | Cutting board |
Safety gear | Staying safe |
How do you prevent cracks in magnesium wall board?
To stop cracks, leave small gaps, use the right screws, and let the boards get used to the room first.
Leave space at the edges
Do not screw too tight
Let boards sit for 48 hours
Is magnesium wall board safe for wet areas?
Magnesium wall board works in wet places. It does not get moldy or soggy. Seal all joints with waterproof tape and special filler for best results.
Note: Always put a moisture barrier behind the board in bathrooms or kitchens.